Edraw.AI User Guides
Edraw.AI User Guides
-
Getting Started
-
Diagram from Scratch
-
Files Operation
-
Shapes Operation
-
Import Data to Make a Chart
-
Format and Style
-
Insert Object
-
View the Diagram
-
-
Mind Map from Scratch
-
Insert Objects
-
Topics Operation
-
Files Operations
-
View a Mind Map
-
Outline Mode
-
Theme and Style
-
-
Create with Templates
-
Create with AI
-
AI Image Tools
-
AI Diagram
-
AI File Analysis
- AI Chat
- AI OCR
- AI Flowchart
- AI Mind Map
- AI Drawing
-
-
Project Management
Align Shapes in a Diagram
Aligning shapes in a diagram improves its visual appeal and clarity. The diagram looks professional and is easier to understand when shapes are neatly arranged. This helps viewers focus on the information presented rather than being distracted by a messy layout. Follow this guide and learn how to align shapes in a diagram with Edraw.AI:
Step ❶
Select the shapes in the diagram on the editing canvas.
Step ❷
Align the selected shape(s) in various ways:
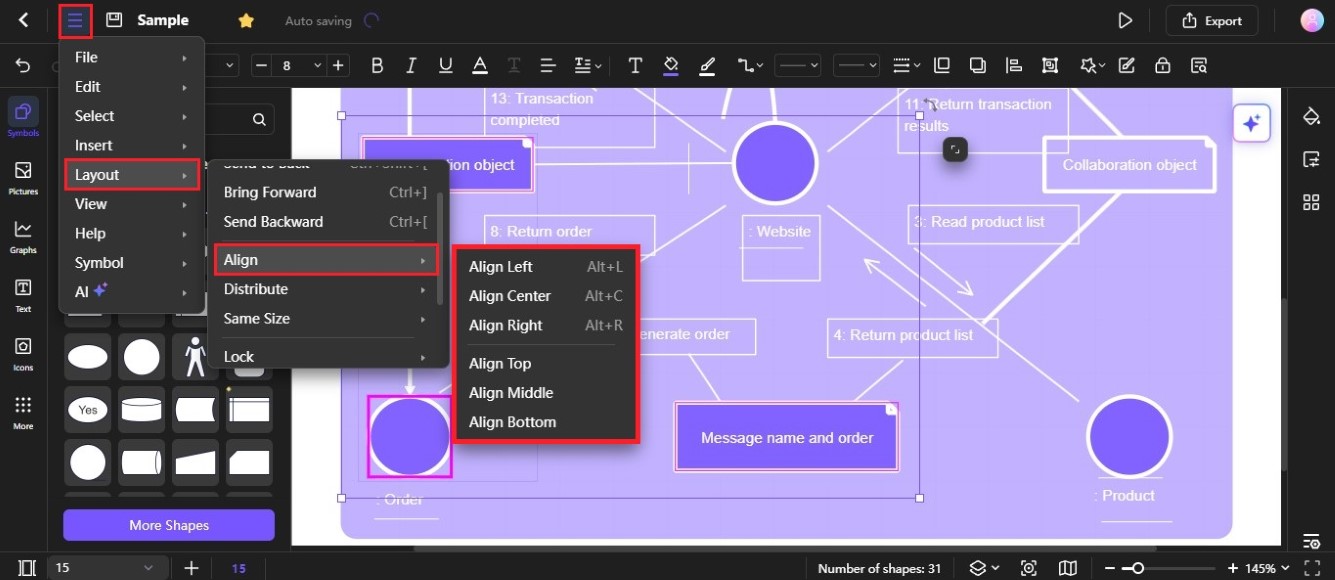
- Option ❶: (For multiple selected shapes) Click the Menu icon in the upper-right side navigation pane, then choose Align. From the cascading menu, choose a format such as Align Left and Align Center.

Align multiple shapes in a diagram
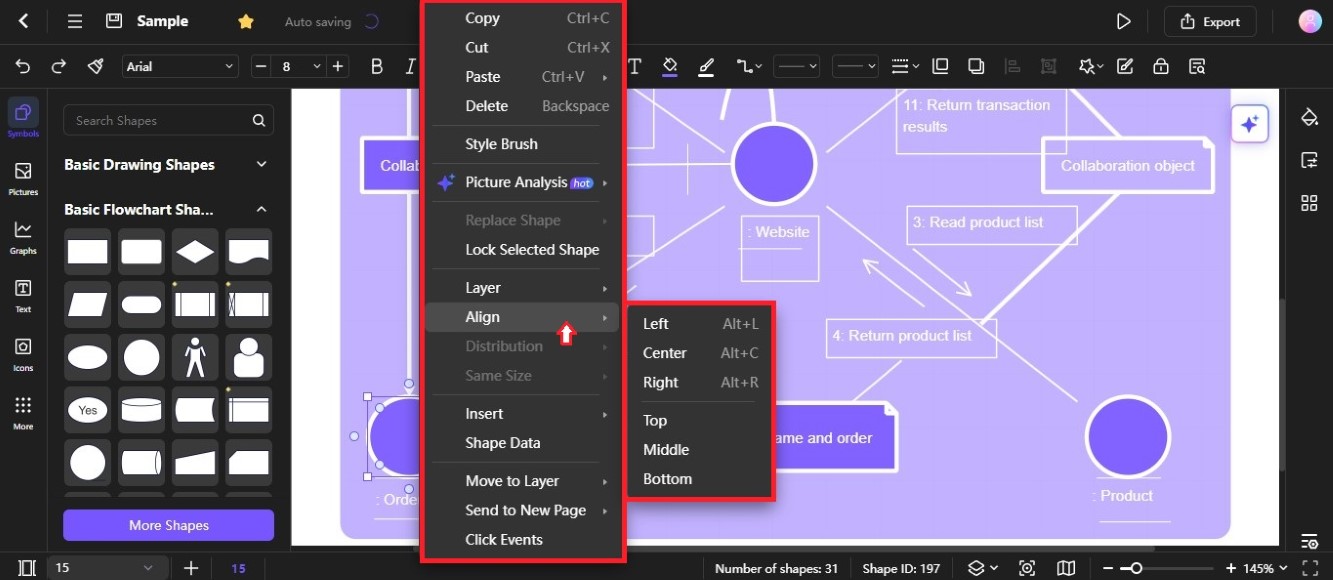
- Option ❷: (For an individual shape) Right-click on the selected shape, then choose Align from the cascading menu. Next, choose a format on how you want to align the shape, whether Left, Center, Right, Top, Middle, or Bottom.

Align individual shape in a diagram
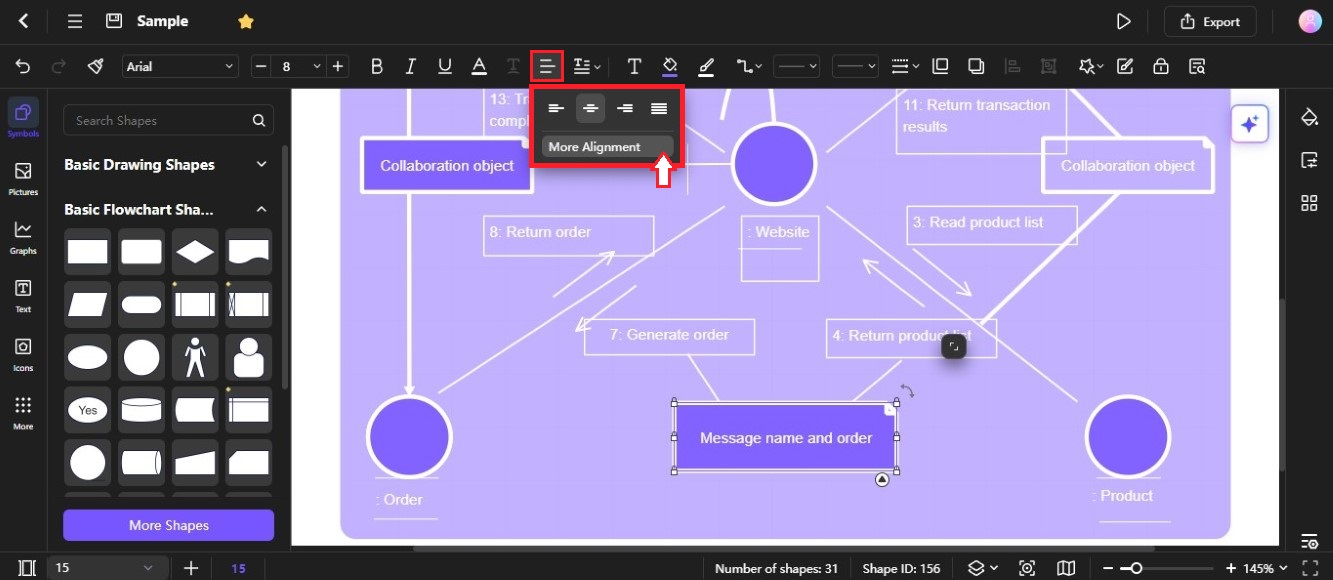
- Option ❸: Click the Align icon on the editing toolbar at the top, then choose the icon that represents the type of alignment you want to achieve. This could be aligning shapes to the left, right, top, bottom, or center. Click More Alignment for more format options.

Align shapes in diagram from toolbar