Edraw.AI User Guides
-
Getting Started
-
Diagram from Scratch
-
Files Operation
-
Shapes Operation
-
Import Data to Make a Chart
-
Format and Style
-
Insert Object
-
View the Diagram
-
-
Mind Map from Scratch
-
Insert Objects
-
Topics Operation
-
Files Operations
-
View a Mind Map
-
Outline Mode
-
Theme and Style
-
-
Create with Templates
-
Create with AI
-
AI Image Tools
-
AI Diagram
-
AI File Analysis
- AI Chat
- AI OCR
- AI Flowchart
- AI Mind Map
- AI Drawing
-
-
Project Management
Create a Smart Shape on a Diagram
Edraw.AI allows you to create several smart shapes in the same style and size as the selected shape in the diagram. If you use this feature, the process becomes even more efficient. Smart shapes automatically maintain consistency in style and layout, saving time and effort when creating complex diagrams. Here's how to create a smart shape on a diagram with Edraw.AI:
Step ❶
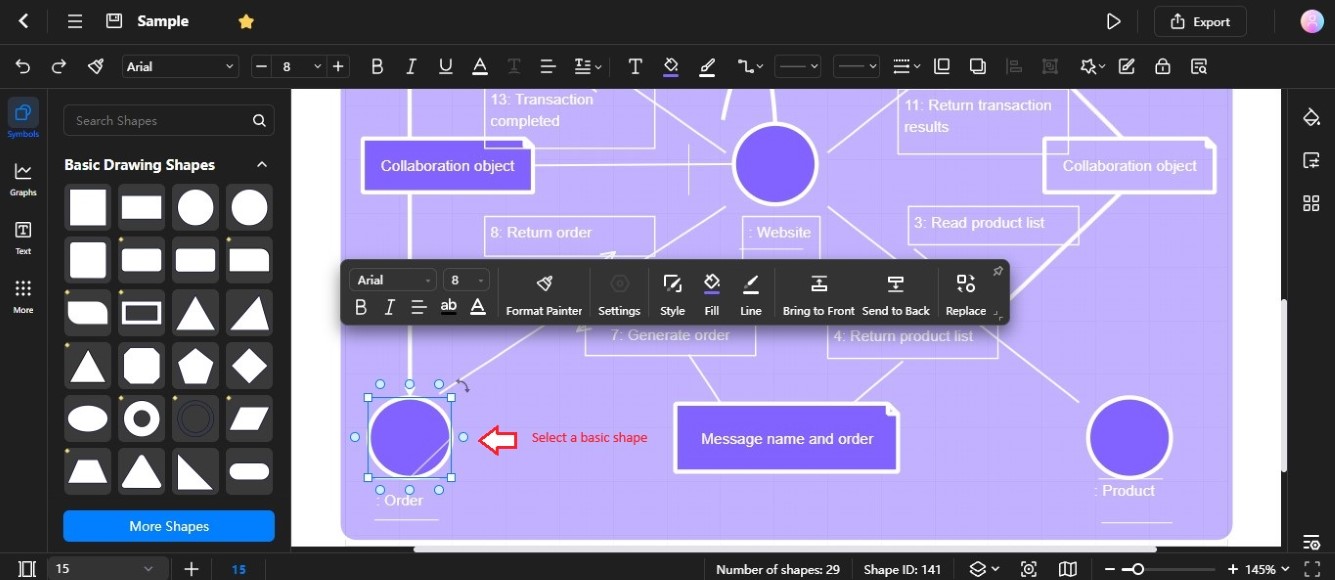
Select a basic shape on the diagram on the editing canvas.

Step ❷
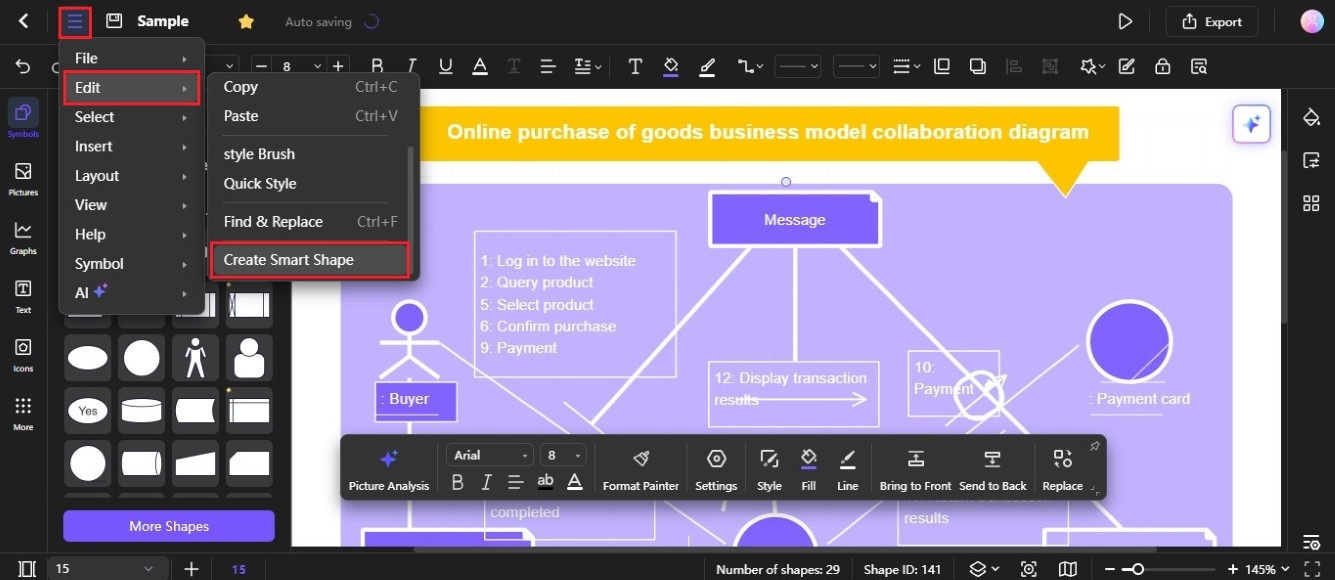
Click the Menu icon on the upper-left side navigation pane.
Step ❸
Choose Edit > Create Smart Shape from the cascading menu.

Step ❹
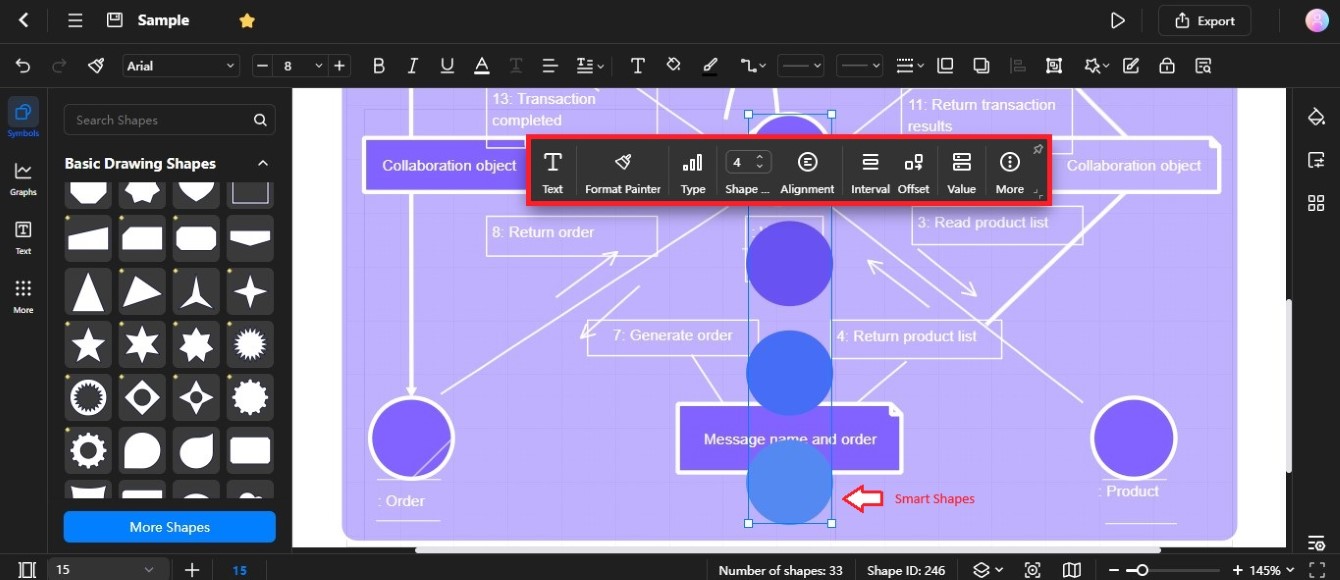
Use the floating toolbar to customize the smart shapes on the editing canvas:

- Text
Click the Text icon to change the text font, size, style, and color.
- Format Painter
Format Painter is a tool that allows you to quickly copy formatting from one piece of text or object to another. Click the Format Painter icon, and your cursor will change to a paintbrush. Then, select the shape or object where you want to apply the formatting. That's it! The formatting is instantly copied.
- Type
Click the Type icon to change the distribution style of the smart shapes. Select from Distribute Vertically, Distribute Horizontally, Overlap in Center, Circle, and Half Circle.
- Shape Numbers
Add or lessen the number of smart shapes created. Enter a value in the Shape Number input stepper.
- Alignment
Alignment ensures the smart shapes are consistently and symmetrically positioned, enhancing the visual appeal of the diagram. The default in Edraw.AI is Arrange in Line. To change it, click the Alignment icon and select an option from the dropdown list, including Arrange in Arc and Even Column.
- Interval
Click the Interval icon, then use the slider to increase or decrease the space between the smart shapes.
- Offset
The Offset value corresponds to the angle of tilt, with positive values making the smart shapes slant to the right and negative values to the left. Use the slider or the input stepper to adjust the direction in which the smart shapes will lean towards.
- Value
The value tool lets you add, delete, and move the smart shapes up and down. You can also use it to change their color. Click Value in the floating toolbar, then click the Menu icon of a smart shape and select an option from the list.
- More
Click the More icon in the floating toolbar to set the Horizontal Flip and Vertical Flip.