Edraw.AI User Guides
-
Getting Started
-
Diagram from Scratch
-
Files Operation
-
Shapes Operation
-
Import Data to Make a Chart
-
Format and Style
-
Insert Object
-
View the Diagram
-
-
Mind Map from Scratch
-
Insert Objects
-
Topics Operation
-
Files Operations
-
View a Mind Map
-
Outline Mode
-
Theme and Style
-
-
Create with Templates
-
Create with AI
-
AI Image Tools
-
AI Diagram
-
AI File Analysis
- AI Chat
- AI OCR
- AI Flowchart
- AI Mind Map
- AI Drawing
-
-
Project Management
Grid in a Diagram
A grid in a diagram editing tool helps you create organized and aligned designs. It makes it easier to position and space elements consistently, giving your diagrams a cleaner look. The grid helps you snap objects into place so your diagram stays balanced as you work. Here's how to show the grid on the diagram with Edraw.AI:
Step ❶
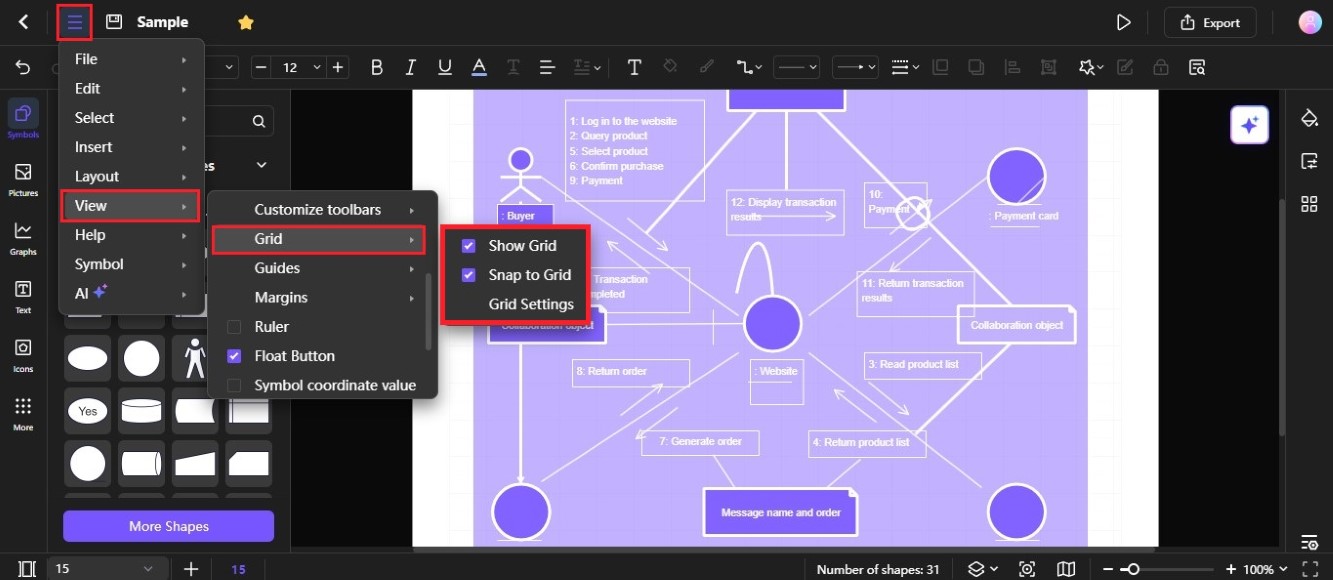
Click the Menu icon on the upper-left side navigation pane.
Step ❷
Choose View > Grid, then select the Show Grid and Snap to Grid checkboxes from the cascading menu.

Tip:
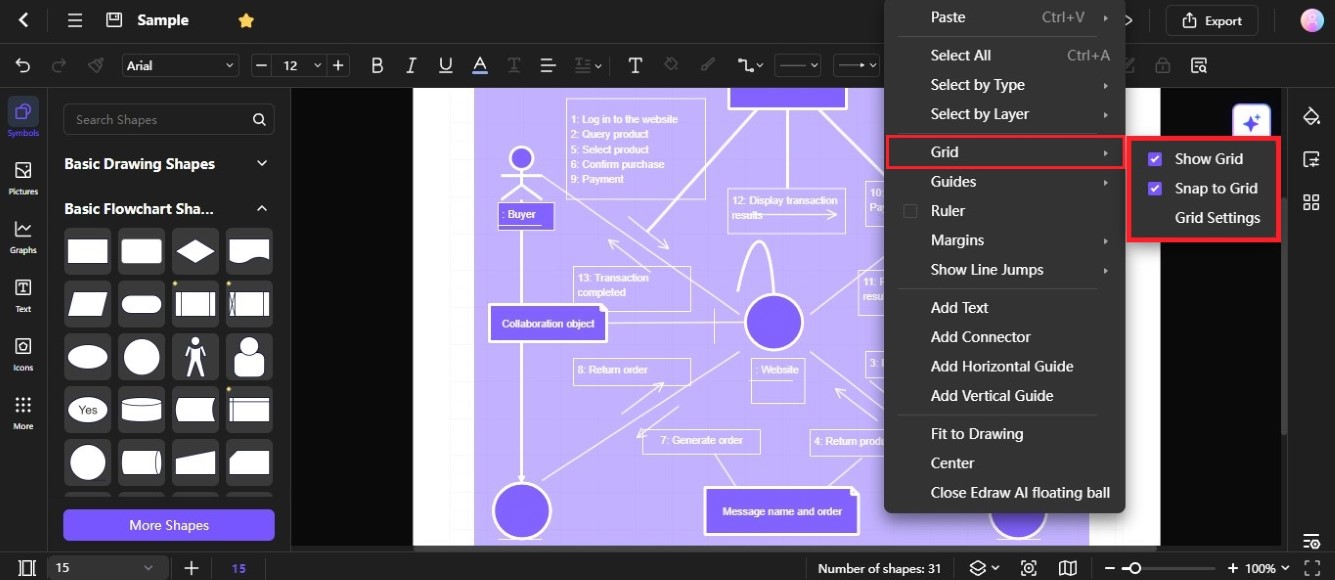
You can also right-click the diagram, choose Grid, then select the Show Grid and Snap to Grid checkboxes from the cascading menu.
Step ❸
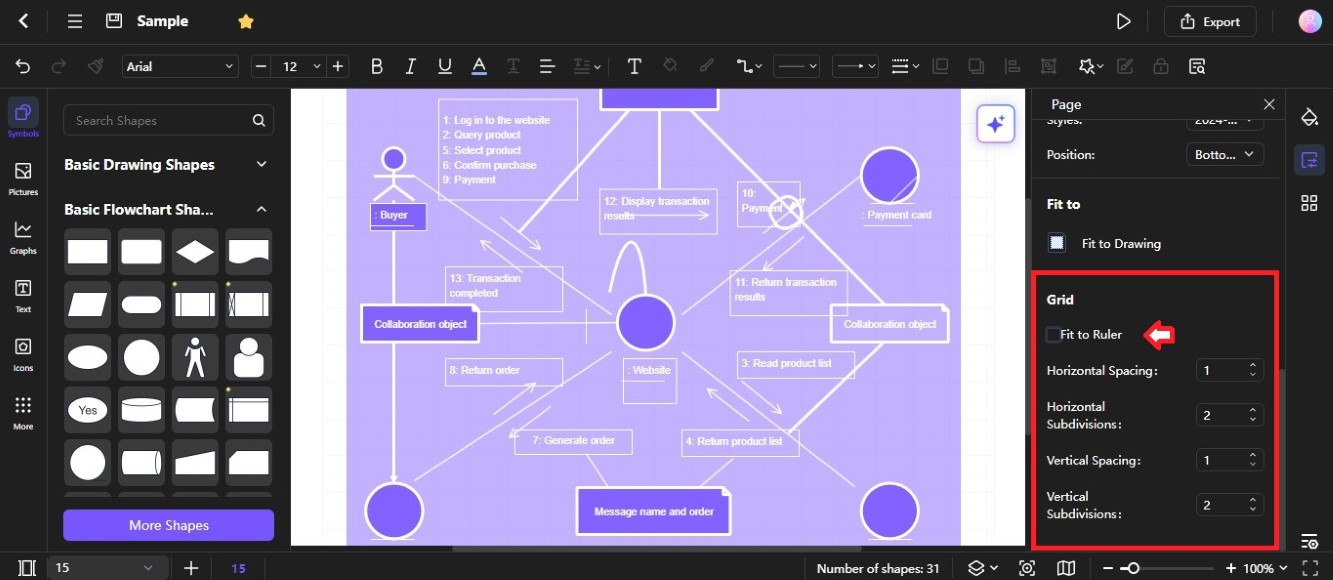
Choose View > Grid, then select Grid Settings to open the Page panel on the right side of the editing canvas. Scroll down to the Grid section, then clear the Fit to Ruler checkbox to adjust the horizontal and vertical spacing. You can also set the horizontal and vertical subdivisions.
