Edraw.AI User Guides
-
Getting Started
-
Diagram from Scratch
-
Files Operation
-
Shapes Operation
-
Import Data to Make a Chart
-
Format and Style
-
Insert Object
-
View the Diagram
-
-
Mind Map from Scratch
-
Insert Objects
-
Topics Operation
-
Files Operations
-
View a Mind Map
-
Outline Mode
-
Theme and Style
-
-
Create with Templates
-
Create with AI
-
AI Image Tools
-
AI Diagram
-
AI File Analysis
- AI Chat
- AI OCR
- AI Flowchart
- AI Mind Map
- AI Drawing
-
-
Project Management
Page Margins
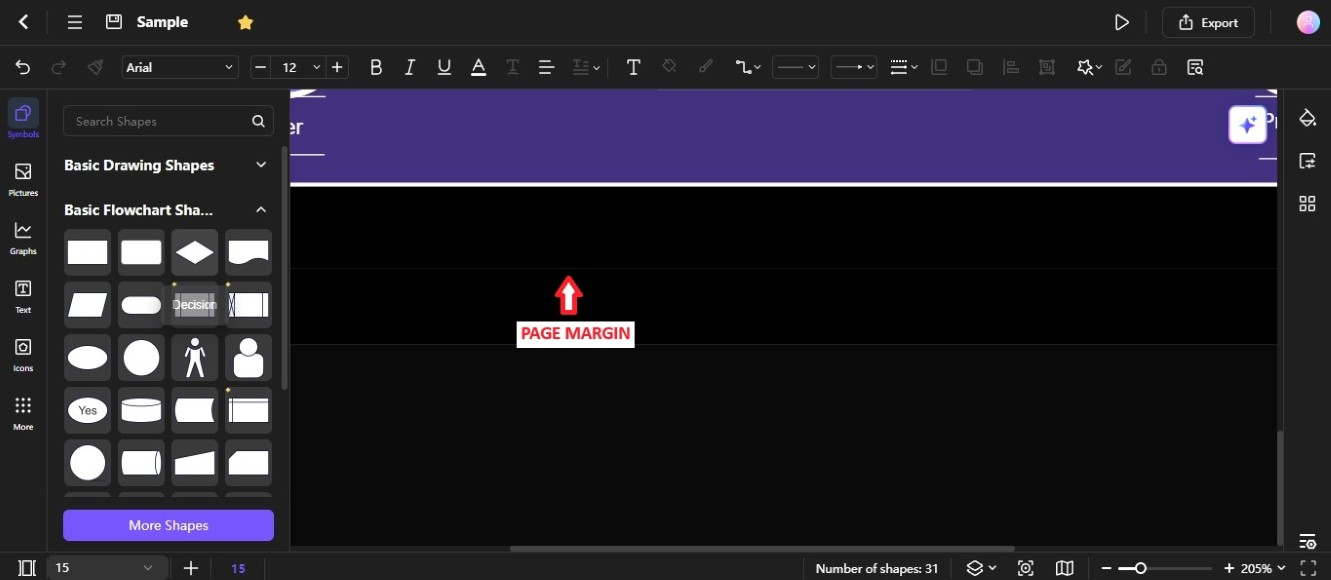
Adding page margins in a diagram ensures that your content is neatly framed and doesn’t get cut off when printed or viewed on different devices. It prevents the elements from getting too close to the edges, making your diagram easier to read and more visually appealing.
Show or Hide Page Margins
There are two ways to show page margins on the diagram:
Option ❶
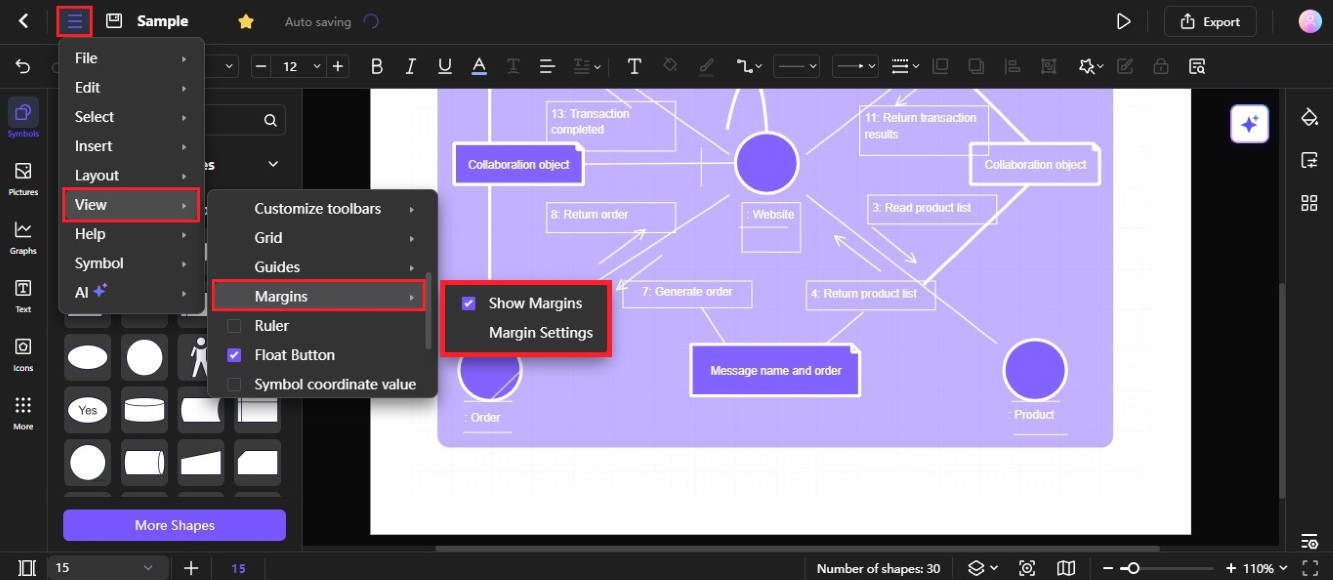
Click the Menu icon on the upper-left side navigation pane, then choose View > Margins, and select the Show Margins checkbox.

Option ❷
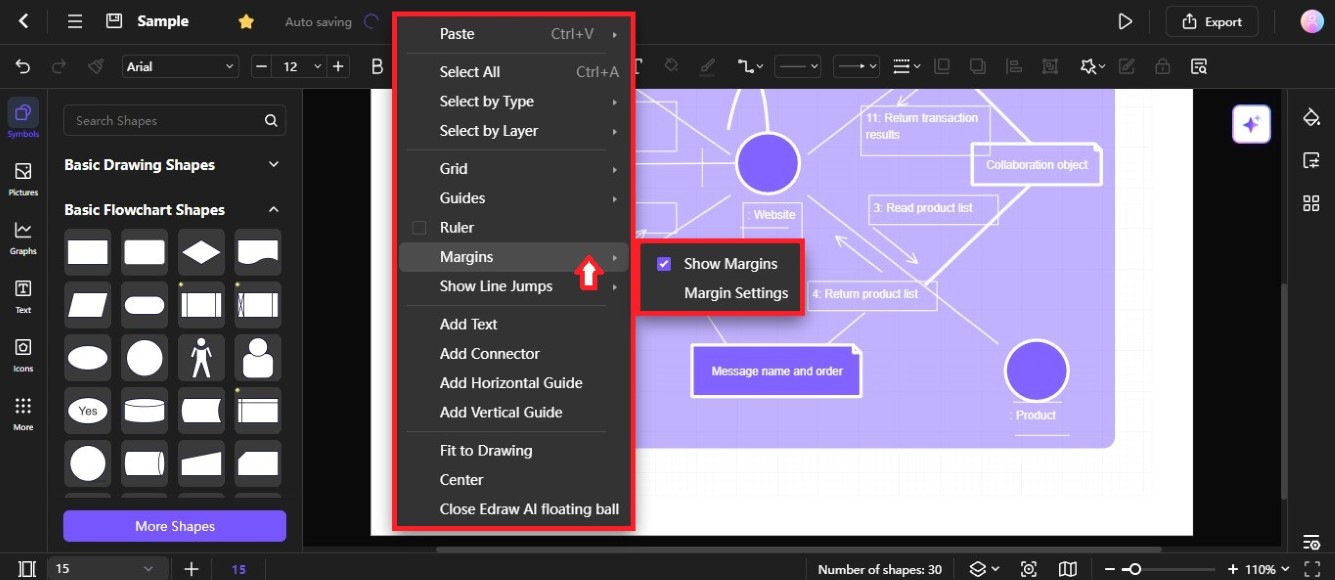
Right-click any space in the diagram or editing canvas, then choose Margins. Next, select the Show Margins checkbox from the cascading menu.

To hide page margins, clear the Show Margins checkbox.
Note:
Adding a background to a diagram page hides the page margins, even if you select the Show Margins checkbox. So, if you want to see the page margin, you’ll have to remove the background first.
Change Margin Settings
Here’s how to customize the page margin size:
Step ❶
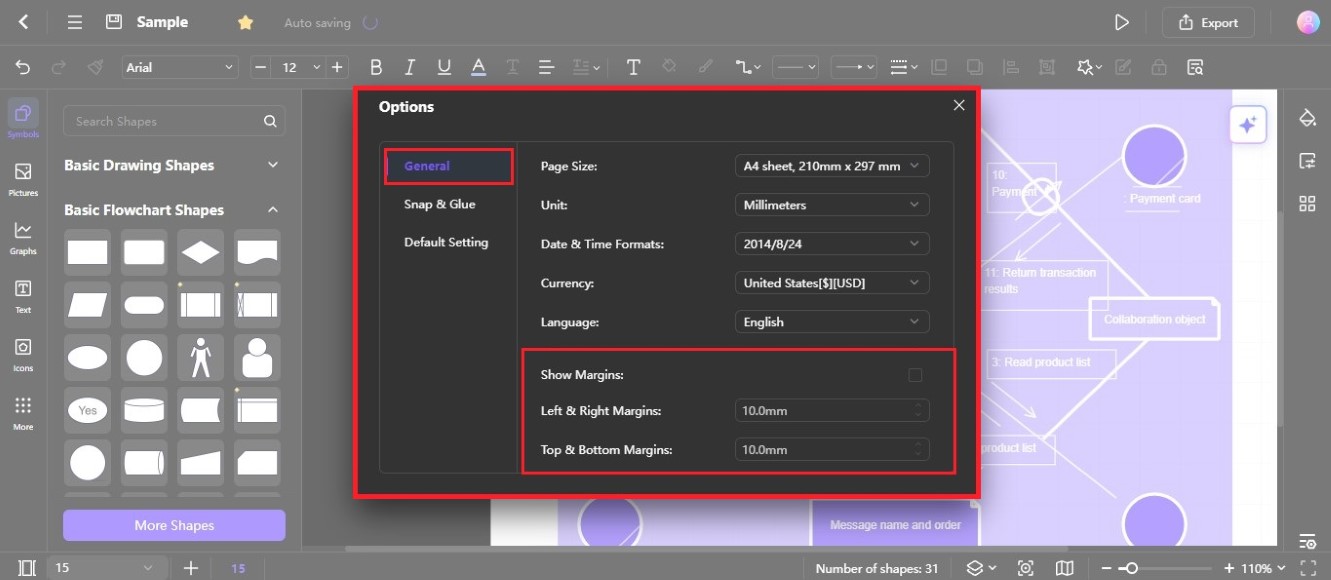
Right-click on the editing canvas, then choose Margins > Margin Settings from the cascading menu.
Step ❷
The Options pop-up window will open. In the Show Margins section, you can set the size of left, right, top, and bottom margins.
