Edraw.AI User Guides
Edraw.AI User Guides
-
Getting Started
-
Diagram from Scratch
-
Files Operation
-
Shapes Operation
-
Import Data to Make a Chart
-
Format and Style
-
Insert Object
-
View the Diagram
-
-
Mind Map from Scratch
-
Insert Objects
-
Topics Operation
-
Files Operations
-
View a Mind Map
-
Outline Mode
-
Theme and Style
-
-
Create with Templates
-
Create with AI
-
AI Image Tools
-
AI Diagram
-
AI File Analysis
- AI Chat
- AI OCR
- AI Flowchart
- AI Mind Map
- AI Drawing
-
-
Project Management
Page Settings of a Diagram
Learn how to control every aspect of your diagram's page in Edraw.AI with this guide.
Step ❶
Open the Page settings from the right panel in Edraw.AI using two ways:
- Click the Menu icon from the top-left side navigation pane. Then, choose File > Page Setup from the cascading menu or press the keyboard shortcut F6.
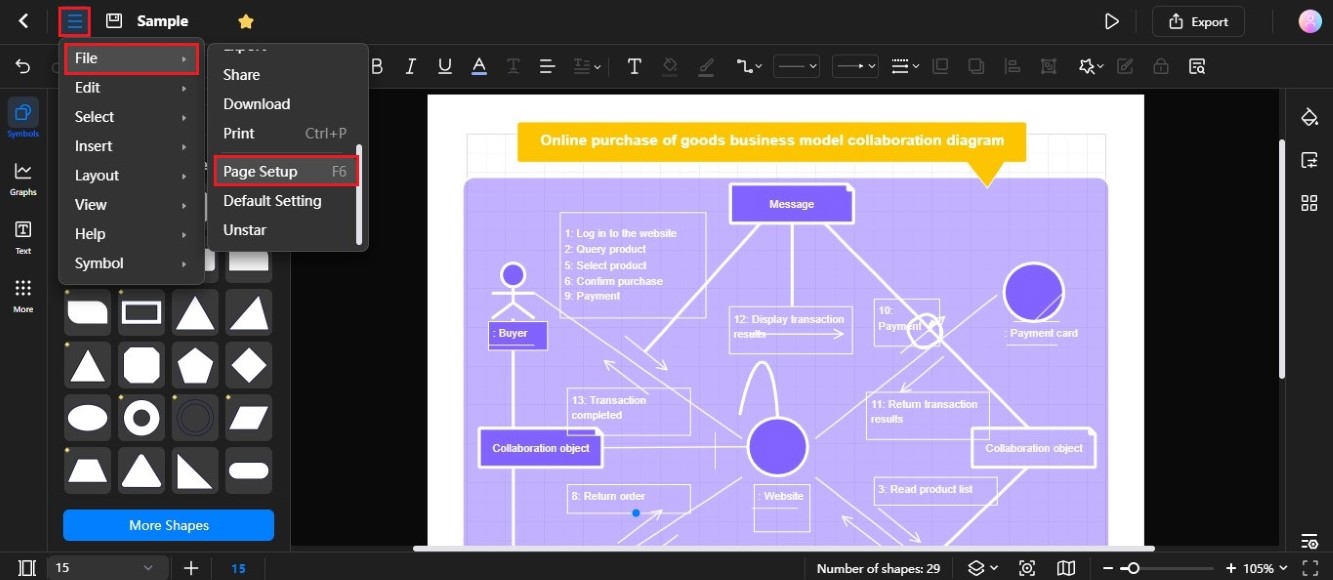
Click the menu icon and select File > Page Setup or press F6
- Click the Page Settings icon from the right-side navigation pane.
Click the Page Settings icon on the right-side navigation pane
Step ❷
Click Background on the Page from the right panel to change the page background to draw attention to the diagram. You can also click the Remove Background icon to delete it.
Note:
If you want to add a custom watermark, click the Watermark icon on the Page settings from the right panel. Then, from the Insert Watermark pop-up window, you can set the Text Watermark.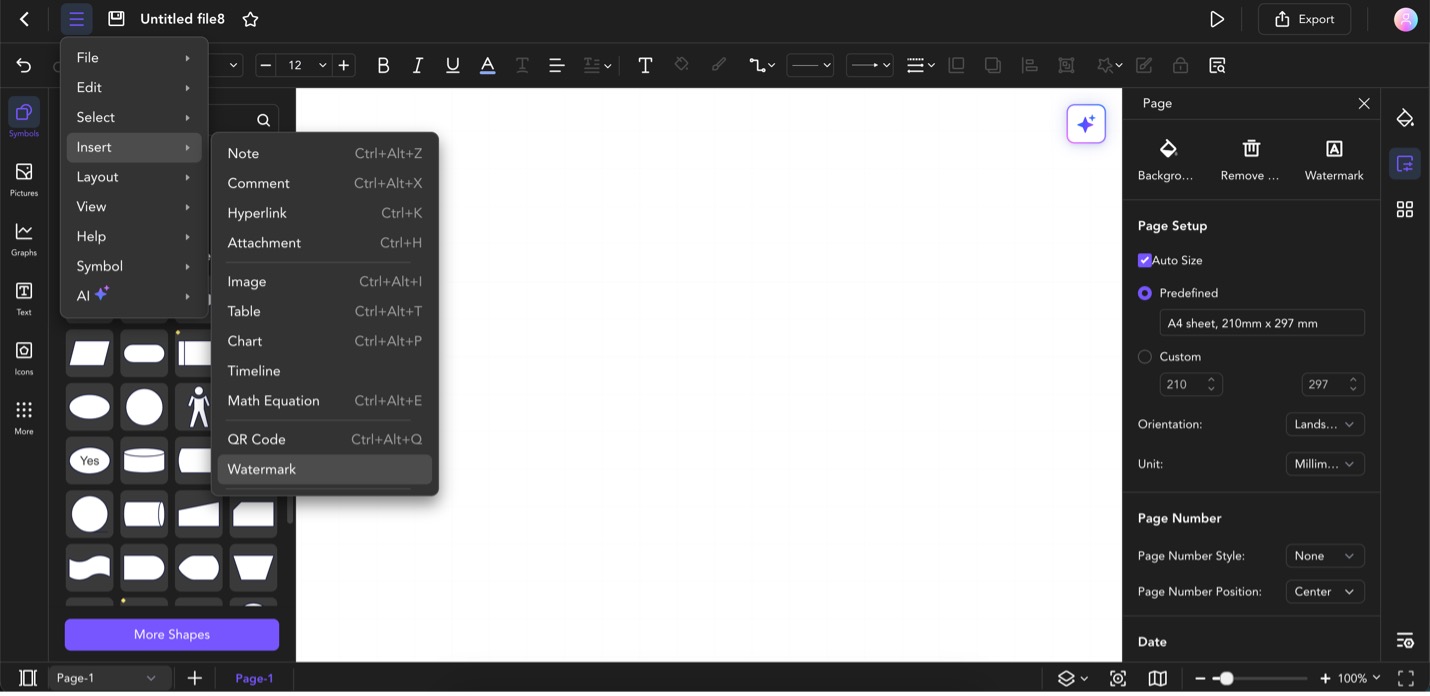
Step ❸
Under the Page section in the right panel, customize the following:
Page Setup
- Auto Size: If you select the Auto Size checkbox, Edraw.AI will scale the content of the diagram to fit within the orientation and size of your chosen paper size. It can be useful if you're unsure about the exact dimensions you need.
- Predefined: This option allows you to choose from a set of predefined page sizes. Select the page size that best suits your diagram's intended use. You can choose from Statement, #10 Envelope, Monarch Envelope, Tabloid, Letter Small, C Sheet, D Sheet, E Sheet, A3, and more.
- Custom: This option gives you control over the page dimensions. Enter the width and height in pixels, inches, centimeters, or other units supported by the online tool in the textbox.
- Orientation: This determines whether the page is displayed in Portrait (taller than wide) or Landscape (wider than tall) mode.
- Unit: This specifies the measurement unit used for page dimensions. Edraw.AI supports several measurement units such as millimeter, yard, mile, pica, and more.
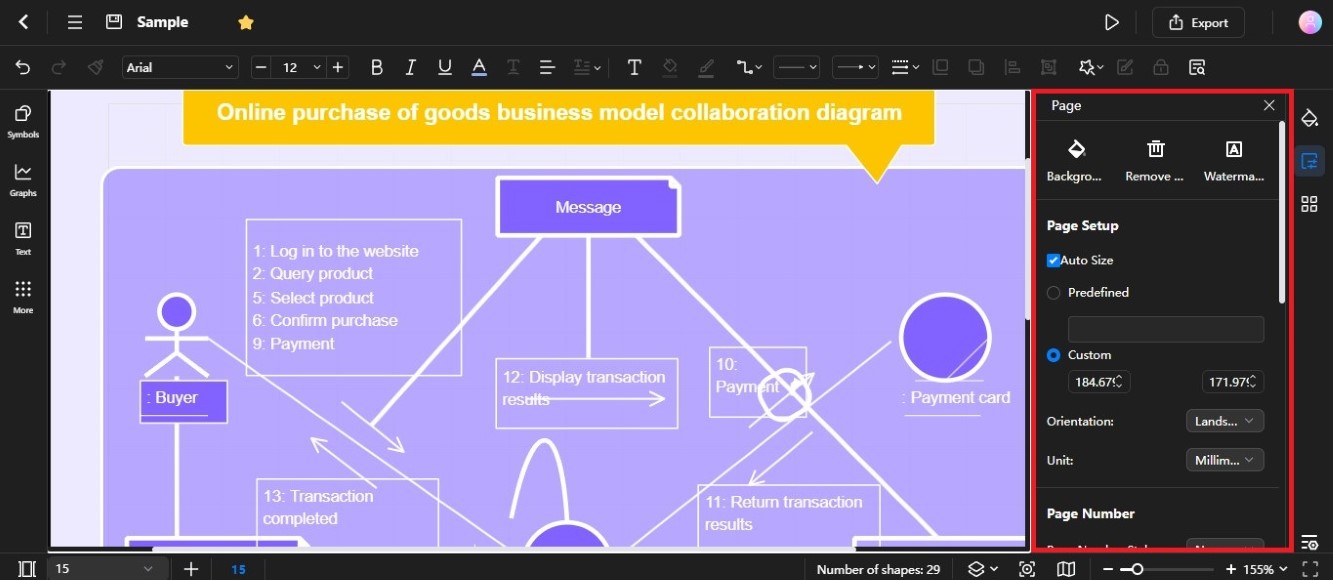
Set auto size, page dimensions, orientation, and units for your diagram
Page Number
- Page Number Style: The default is set to None. However, you can select from 1, 1/1, Page 1, and ~1~ on the Page Number Style dropdown list.
- Page Number Position: Click the dropdown arrow to choose where you want the page numbers to appear on the page. Options include left, center, and right.
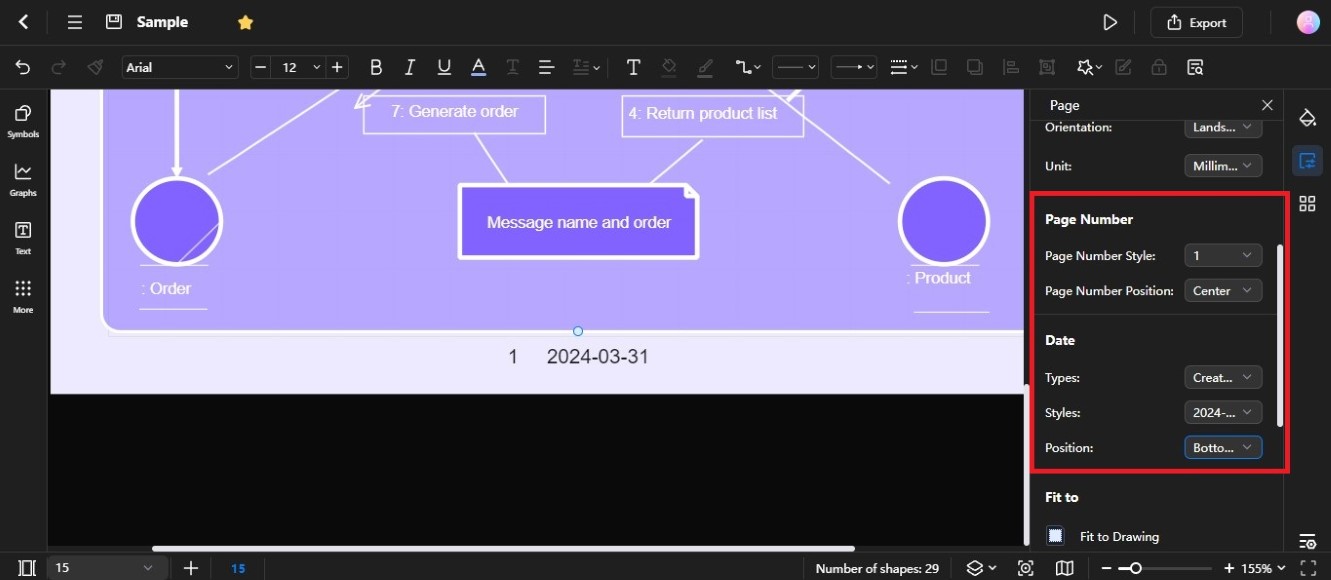
Select page number style and position from the dropdown options
Date
- Types: Select the type of date you want to include from the Types dropdown list. You can change the default from None to Create date, Current date, or Recent edited.
- Styles: If you included a date on the page, select the format from the Styles dropdown list. Date styles include various combinations of day, month, and year in different numerical and text formats.
- Position: Click the dropdown arrow to select the placement of the date on the page. You can place the date in several areas of the diagram, such as the upper left, top center, and lower right of the page.
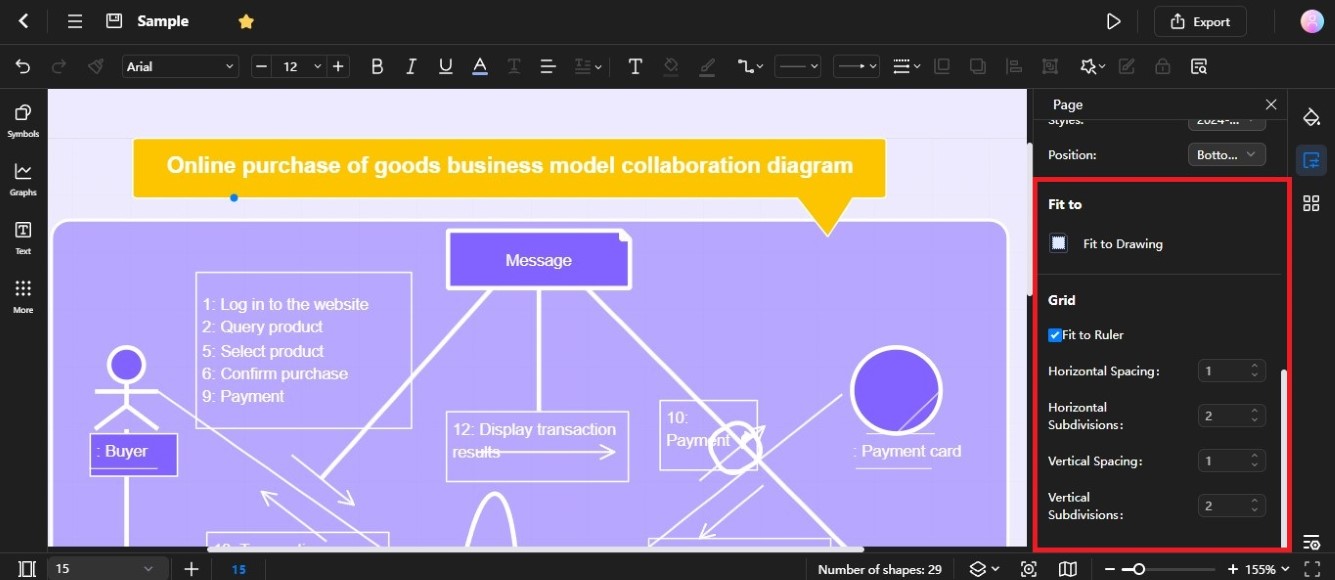
Fit to
- Fit to Drawing: Select this checkbox to scale the diagram to fit the current viewable area.
Grid
- Fit to Ruler: Select the Fit to Ruler checkbox to adjust the grid spacing to align with the ruler's divisions. If selected, you can't change the Horizontal Spacing and Vertical Spacing, as well as the Horizontal Subdivisions and Vertical Subdivisions.
Desc