Are you planning to design a two-story floor plan or a commercial building? If that's the case, stairs are not just a functional feature but a crucial element that connects floors and influences how people navigate the design. They are the backbone of any floor plan, seamlessly blending practicality and aesthetics.
In this article
Designing stairs on a floor plan is a task that requires creativity and a good vision. But fear not, as this guide is here to walk you through a comprehensive, step-by-step process for designing stairs. It's designed to ensure that even beginners can master the art of drawing stairs on a floor plan.
Let's dive into it!
What Are Floor Plans?
A floor plan is a diagram that shows relationships between rooms, corridors, traffic patterns, and other objects from above. It is a 2D visual representation shown above. Floor plans help architects and planners to collaborate effectively and boost communication.
Moreover, it includes components such as windows, doors, furniture, appliances, and fixtures. A floor plan helps construction workers and designers to transform ideas into reality by providing a clear image.
Whether planning a renovation, buying a new home, or designing a multi-story building, floor plans offer clarity, save time, and help avoid costly mistakes.
How to Draw Stairs on a Floor Plan?
Designing a splendid stair design enhances the overall layout of the floor plan. It is an essential skill for an architect, designer, and planner. Here is a step-by-step comprehensive guide for drawing stairs on a floor plan.
1. Choose the Right Type of Stairs
You are probably thinking, do stairs have types? Yes, they do. Let's understand them, respectively.
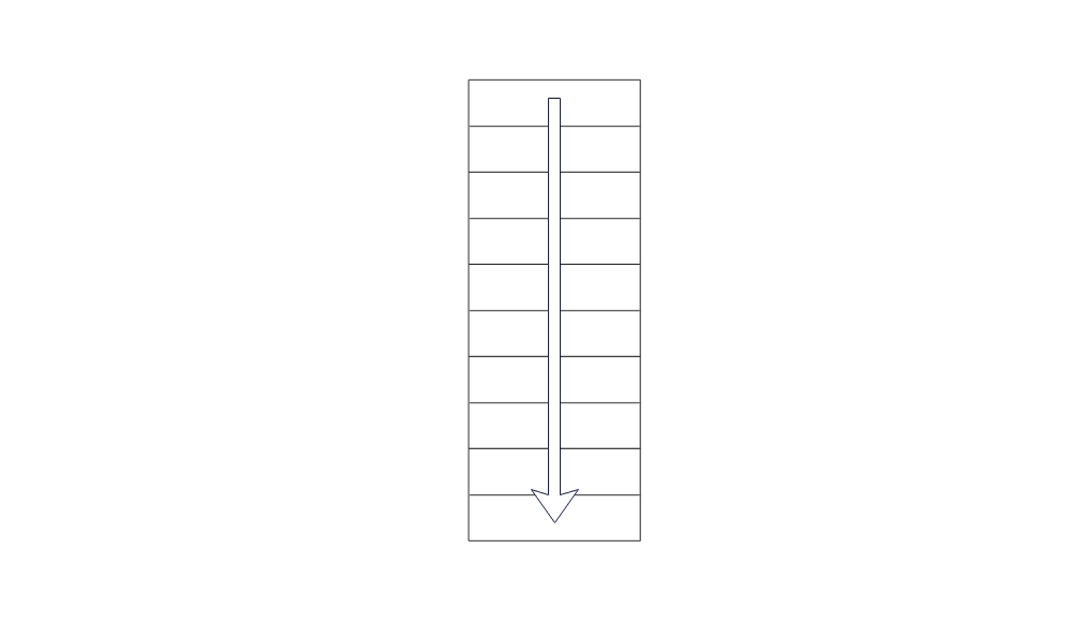
- Straight Type Stairs
Stair stairs are simple types of stairs. They have no interrupted flights of steps, unlike others. Their straightforward design makes them versatile and suitable for various applications for residential houses, buildings, warehouses, and commercial buildings.
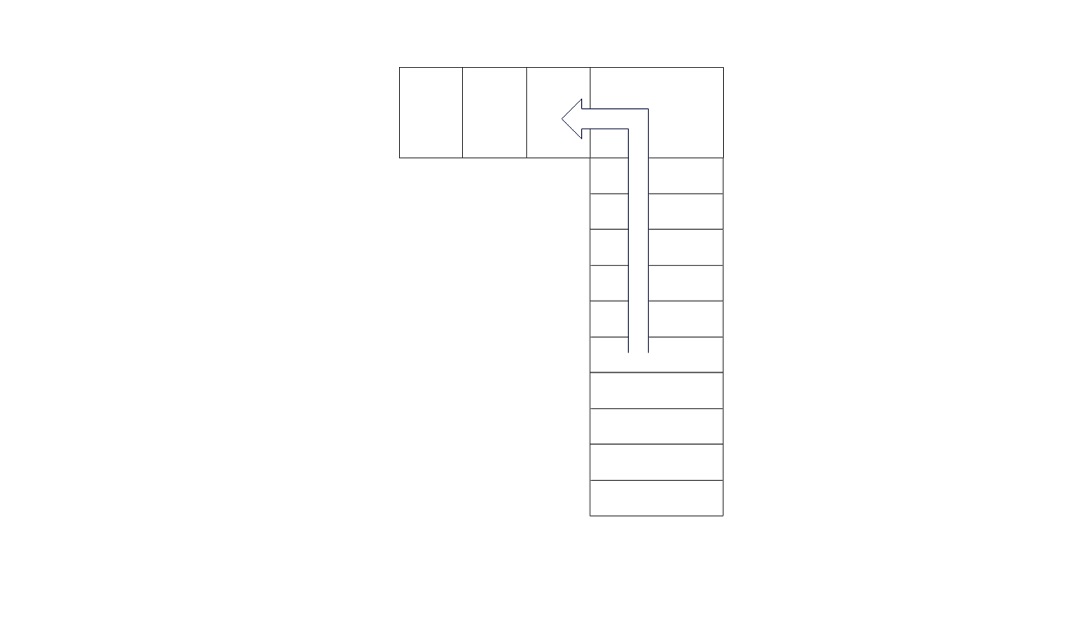
- L-Shaped Stairs
L-shaped stairs are also known as quarter-turn stairs with a left or right turn. It forms a 90-degree turn, which is called L-shaped stairs. The turn is designed at the landing or the winder at the direction change point.
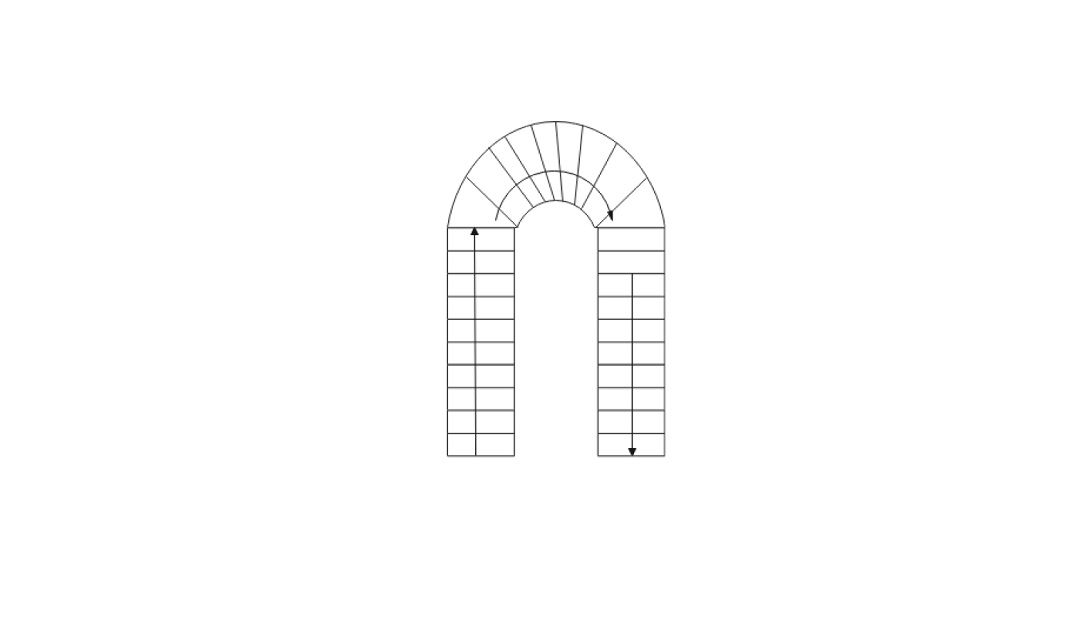
- U-Shaped Stairs
U-shaped stairs are also known as half-turned stairs. They consist of two flights, which are designed in opposite directions. They are ideal for tiny houses or apartments as they occupy less space than other stairs.
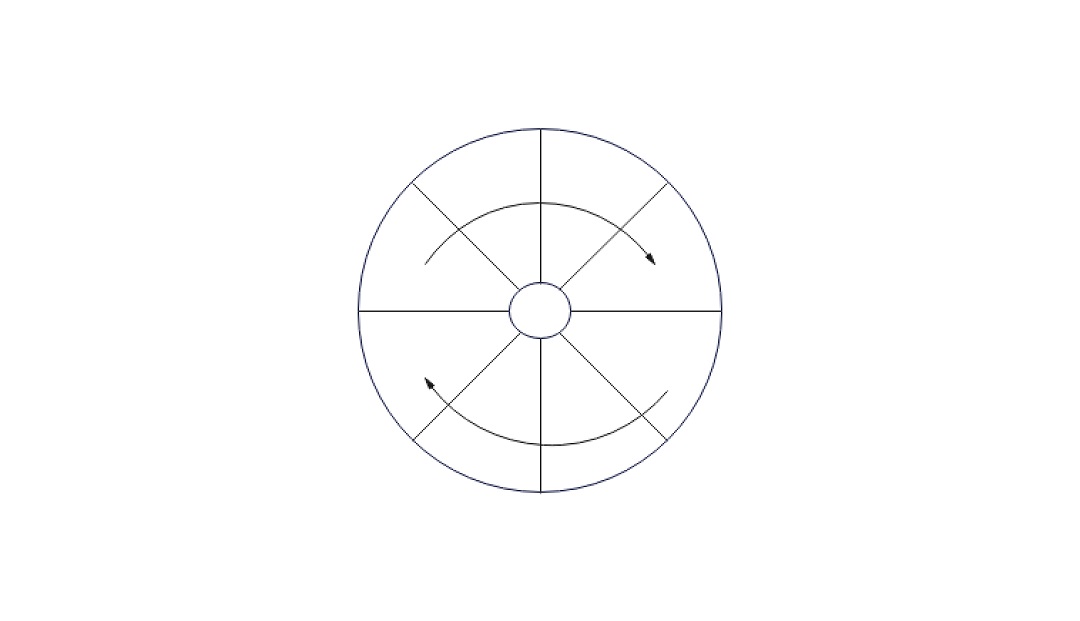
- Spiral Stairs
Spiral stairs are a popular choice for residential houses and apartments. They take up the least space and are suitable for enhancing the interior design. Each step, or tread, radiates outward from the center, creating a compact and visually striking design.
- Curved Style Stairs
Curve-style stairs are pretty much similar to spiral staircases. They follow a continuous arc without any interference of angular turns. They are primarily used in luxury hotels, resorts, and residential homes.
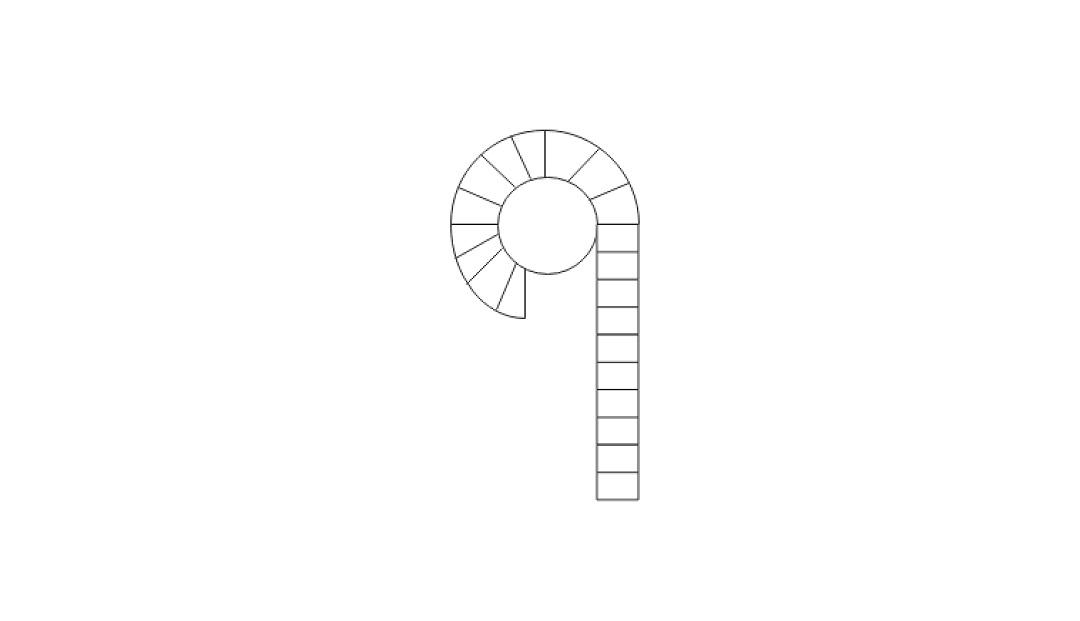
2. Sketch Stairs For A Floor Plan
Once you are familiar with the type of stairs, it's time to draw. You can use different software to design stairs, such as AutoCAD, Edrawmax, SketchUp, and Lucidchart. We personally use Edrawmax as it is easy to use and control.
Start by drawing a vertical or horizontal rectangle. Add perpendicular or parallel lines to the present steps.
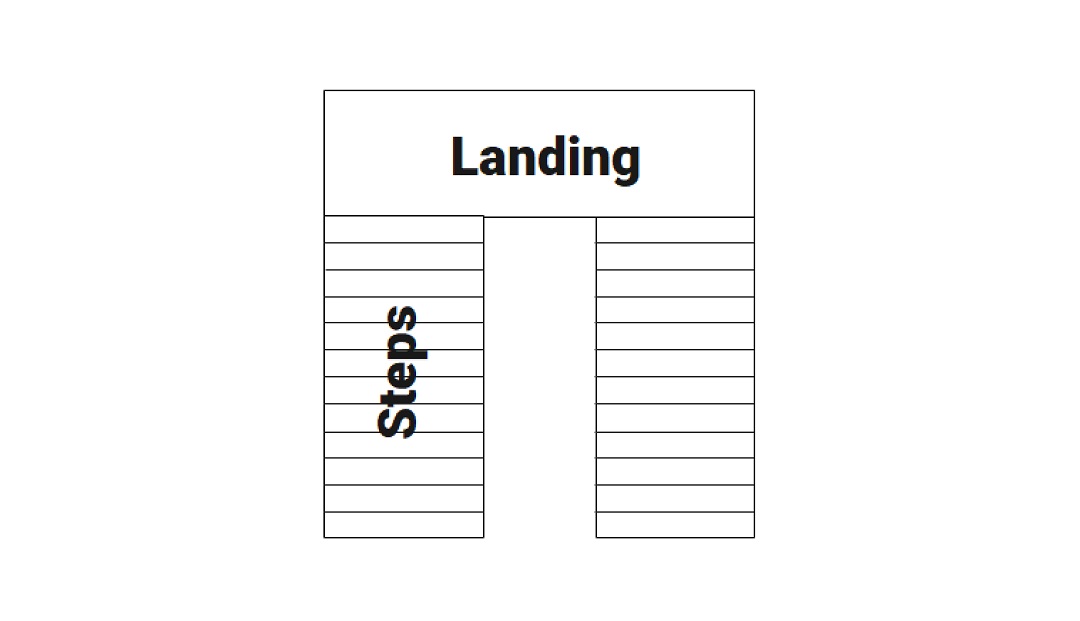
3. Add Required Annotations
Annotations are essential in designing a staircase for your house. Add stairs numbers, elevation spot, an arrow, and stairs dimensions.
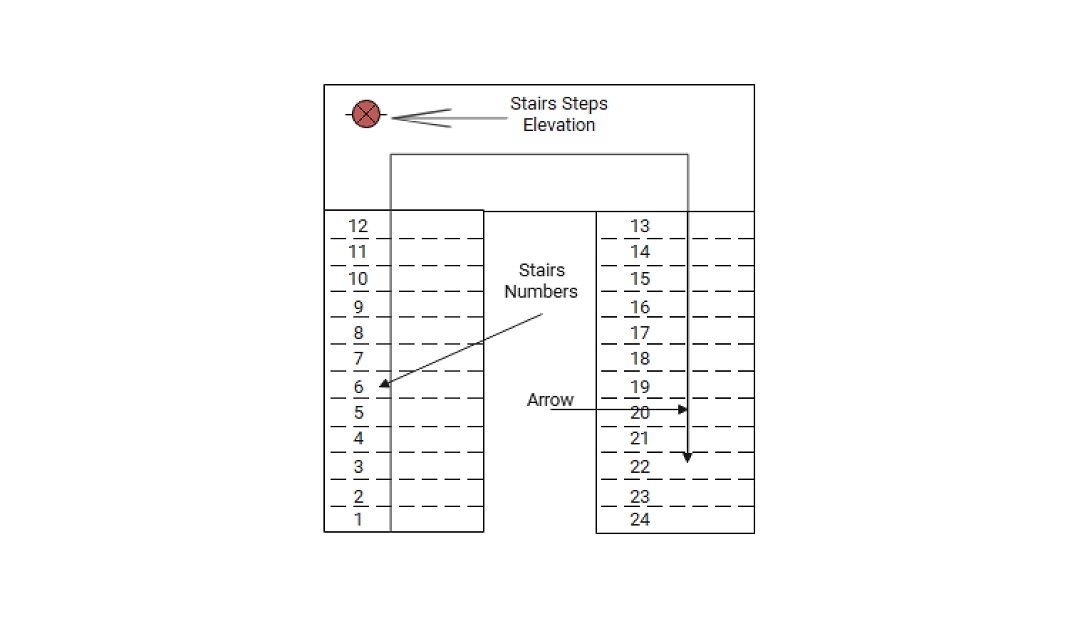
Stair's Components and Calculations
In this section, we will delve into the key components and the basic calculations involved in stair design. Understanding these components and calculations is indispensable for designing a stair on a construction site.
Stairs Components
- Riser: The riser represents the vertical portion of each tread in a staircase.
- Tread: It is a horizontal surface where a person's foot lands.
- Waist Slab: The lower part of the stair is called the Waist slab.
- Noise: The extension of a few millimeters on the tread is called the Noise.
- Landing: A flat platform between flights of stairs used for resting or changing direction.
Stairs Calculations:
Before calculating, please note that the maximum height of a Riser is between 4 inches and 7 inches. It should not exceed 9.5 inches (0.22 M). At the same time, the maximum depth for the tread is 250 millimeters (0.25 M).
Calculation for the Number of Steps:
We will understand this with an example.
Suppose,
The height from floor to floor is equal to 6 meters. We are assuming a riser of 0.22 meters and a tread of 0.25 meters.
The formula for the calculation of number of steps is:
Number of steps = Floor to Floor height / Riser
Therefore,
The number of steps would be 27. The total number of steps is equal to the total number of risers.
Moreover, the total number of treads is calculated by this formula:
Number of treads = Total risers – 1
Number of treads= 27 – 1
Number of treads = 26
Tips for Drawing Stairs on a Floor Plan
If you are a beginner, designing stairs for a floor plan requires precision, creativity, and acknowledgment of building codes. Here are some vital tips to consider for drawing stairs on a floor plan:
1. Measure the Floor to Floor Height & Acknowledge Building Codes
It must be one of the primary steps to do as a designer or architect. It helps you calculate the number of steps, risers, and treads. Furthermore, check all the building codes of your local area. Figure out minimum and maximum dimensions for risers, treads, and headroom.
2. Select the Type of Stairs
There are different types of stairs available. Check the overall interior design of the building and choose according to it. Moreover, the available space for the stairs and the purpose of the design should be checked.
3. Calculate Risers and Treads Accurately
Measure the total rise (floor-to-floor height) and determine the number of risers and treads. For comfort and safety, leverage standard dimensions (e.g., 6-8 inches riser height, tread depth 10-12 inches).
4. Draw Annotations and Symbols
Symbols and annotations for the staircase are critical as they provide more information and provide functionality for the stair.
5. Consider Space Efficiency
Use your creativity to adjust the stairs to simplify the space. Consider spiral or L-shaped stairs for compact spaces to maximize functionality without compromising design.
Start for Free on Edraw.AI
Edraw.AI is a cloud-based software specially developed for creating diagrams, flowcharts, floor plans, and network charts. It has hundreds of templates with over 26,000 symbols and icons for customizing diagrams and templates. It has AI integration that allows users to create diagrams with one click. Let's discuss two methods for designing stairs:
Method 1: Customize A Template
Edraw.AI has a vast amount of templates available online for editing. It is a cost-effective way to create diagrams and charts.
If you do not find any template available for your design, you can easily import it in any format. Edraw.AI accepts PDF, EDDX, PNG, JPG, and Visio formats.

Step 1 Import a Template
On the Edraw.AI homepage, select New button > Import file.
Note: Download the EDDX file from the Edrawmax template library and import it.

You will see different options for importing a file. Upload the file and start editing.

Step 2 Edit the Template
Once you have uploaded the template, you can start editing it. As this is a staircase design, no high-end changes will be required. You can change the stairs' design and add annotations, numbers, and dimensions.
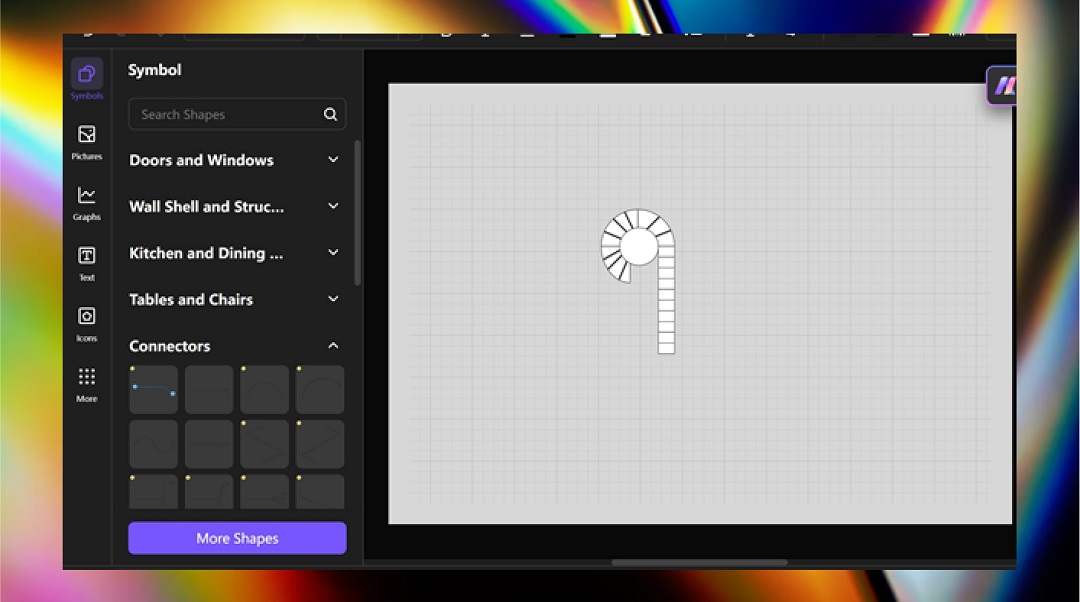
Step 3 Export Template
After editing, click the Export button in the top right corner and export the file in PDF, Word, Excel, Eddx, HTML, and Visio formats.
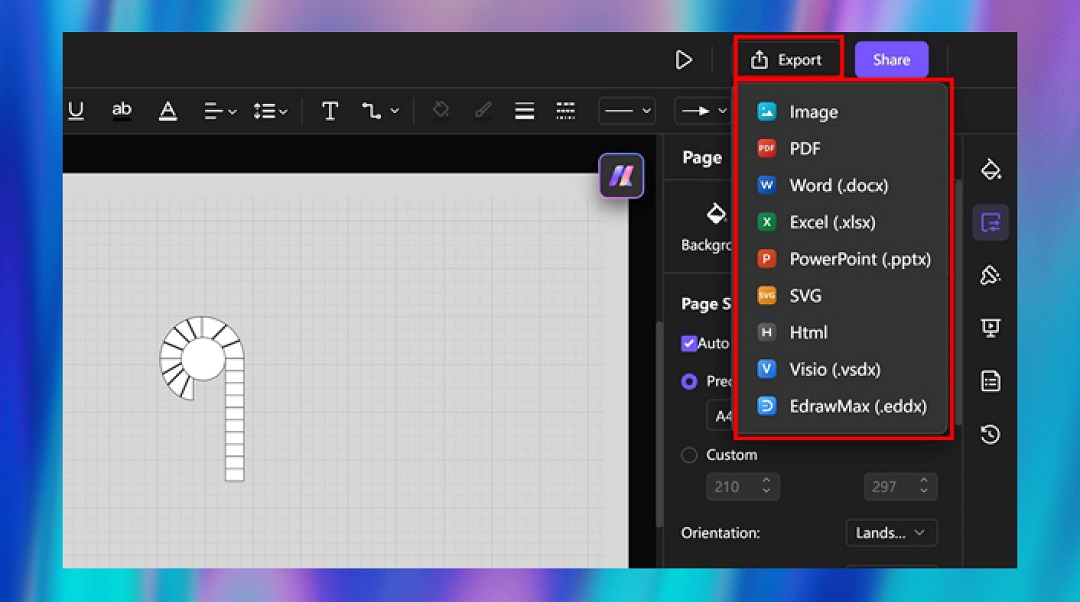
Similarly, you can share the file with a link or add a team member's email to start working on the same design. Click on the Share button right beside the Export button.

Method 2: Start from Scratch
Follow these steps to create a staircase on Edraw.AI from scratch:
Step 1 Start a New Drawing
On the Edraw.AI homepage, click the New button, scroll down, and select Floor Plan > New Floor Plan.
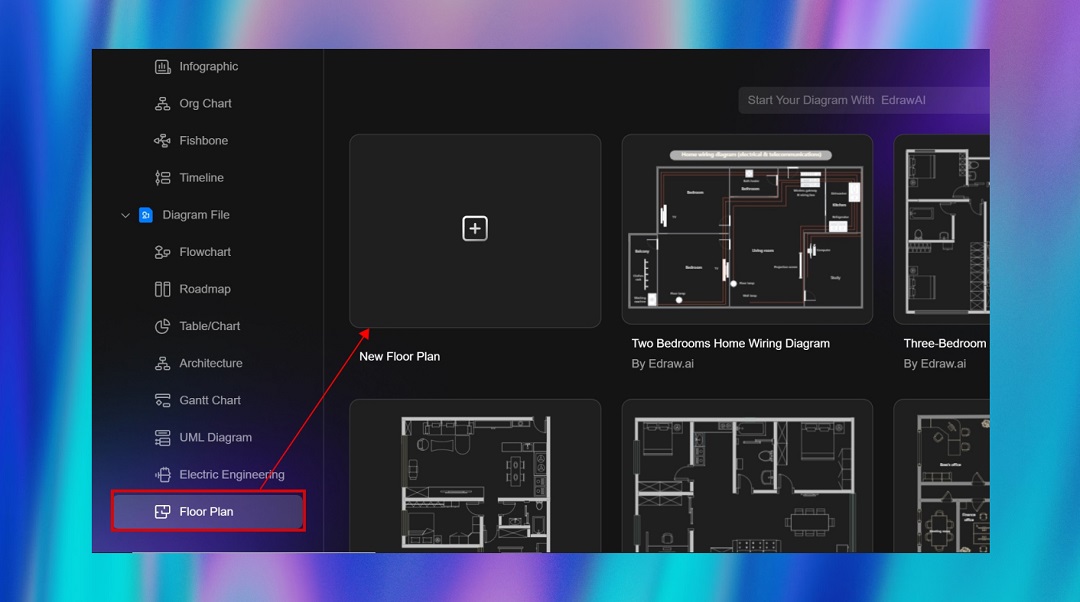
Note: if it takes time to load, refresh the page, and it will load immediately.
Step 2 Add Basic Shapes For Rectangle
For a basic staircase design, we need a rectangle. Therefore, add more shapes from the More Symbols option on the lower left option.
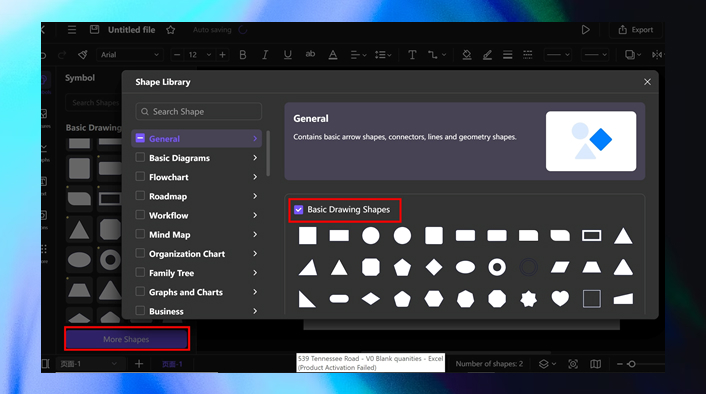
Select a rectangle and make a vertical staircase. There is no need to select a rectangle every time. You can copy the same and put it above the current one to make a staircase.
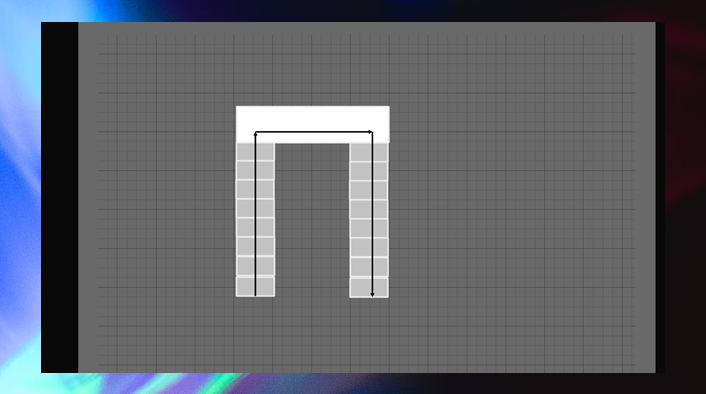
Make sure to add text to the staircase and provide stair numbers. Add an arrow from the Connectors in the symbol library.
Step 3 Save and Export
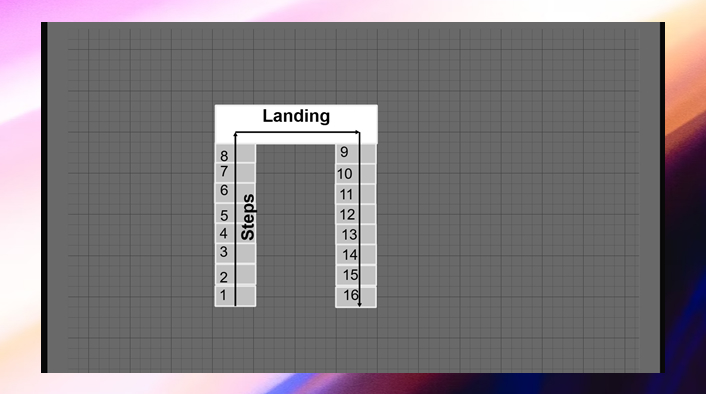
Export and share the file similarly to the one you did above in method 1. This is just a basic staircase design. You can easily design your with symbols and icons.
Final Verdict
Creating drawing stairs for a floor plan involves crucial steps. It requires knowledge of basic building codes and creativity. Follow the above steps to draw stairs for your floor plan. Use Edraw.AI features for more easiness and creativity.

Try Our Products
Now for Free


