
To engage the target audience effectively, we need to present information in an organized manner. If you want to emphasize some important points in your presentation, they must be presented differently compared to the whole stuff. This is where a list plays a key role.
For example, a list simplifies long sentences and focuses on important points to make reading more valuable and appealing. At the same time, if a list is not properly formatted, it may create confusion for the readers instead of enhancing the readability.
You can create lists with different tools to emphasize important ideas. PowerPoint is one such utility. In this guide, we present a comprehensive discussion on how to create a list in Microsoft PowerPoint. You will learn to make both basic and professional lists in this tool.
Why prefer PowerPoint over other list-making utilities? Is this what you have in mind at the moment? If so, PowerPoint is the number one choice for millions of people worldwide because of its amazing features, including easy navigation, quick access, free to use, and real-time interactions with the team.
In this article
Part 1. How to Create a Basic List PowerPoint?
We have divided this section into multiple stages, such as creating a basic list, making it multi-level and clickable, adding pictures to the list, and more. Let’s look at them one by one.
How to Make a Bulleted List in PowerPoint?
Follow the three steps below to generate this type of list.
Step 1: Open PowerPoint and create a new slide.
Step 2: Add the text to the slide that you want to convert into the list.
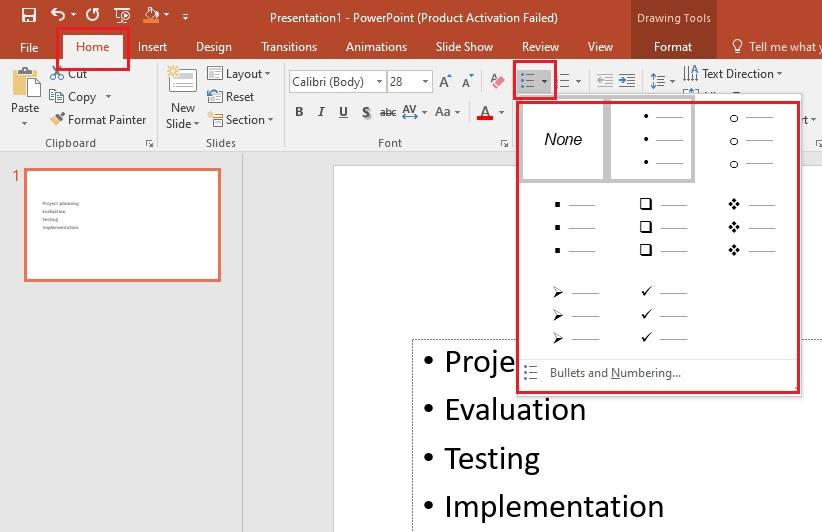
Step 3: Now, select the text, go to the Home tab, and open the Bullet dropdown list, as shown below. Here, you can choose different styles to make a list of the chosen text.
How to Create a Numbered List in PowerPoint?
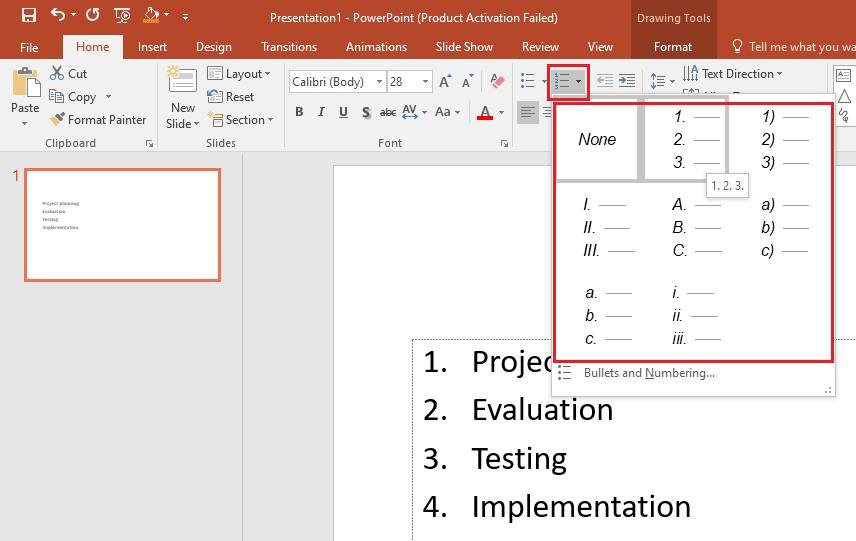
Open the Number dropdown list, as shown below. Here, you will see different styles to make a numbered list, such as numbers with brackets, numbers with full stops, Roman numbers, and small and capital alphabets. Don’t forget to choose the text before you apply this function.
How to Create a Multilevel List in PowerPoint?
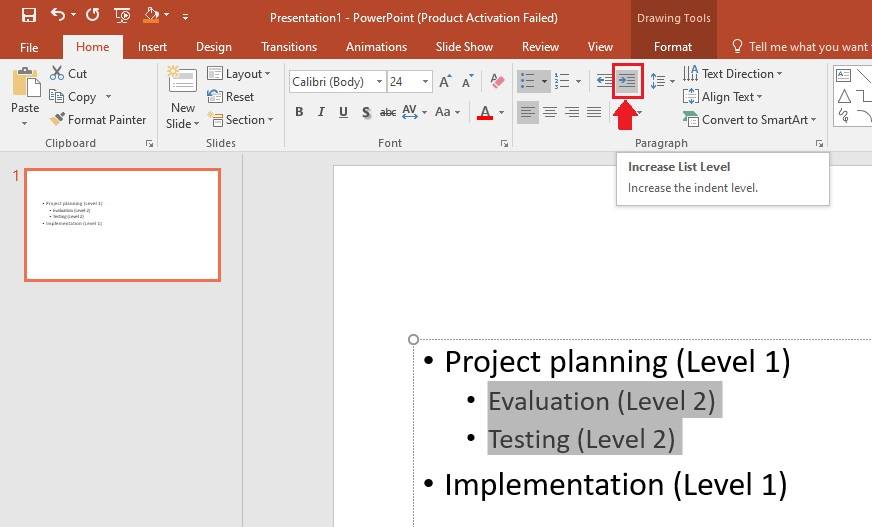
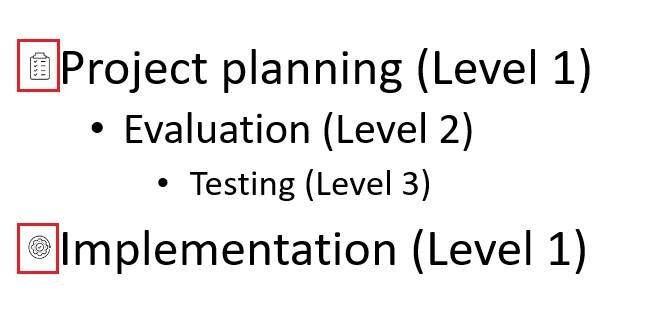
Lists can be of different levels, such as Level 1, Level 2, Level 3, and more. To create a multilevel list in PowerPoint, all you need to do is select the text you want to place in Level 2, Level 3, or more and click on Increase List Level from the top ribbon inside the Home tab, as shown below.
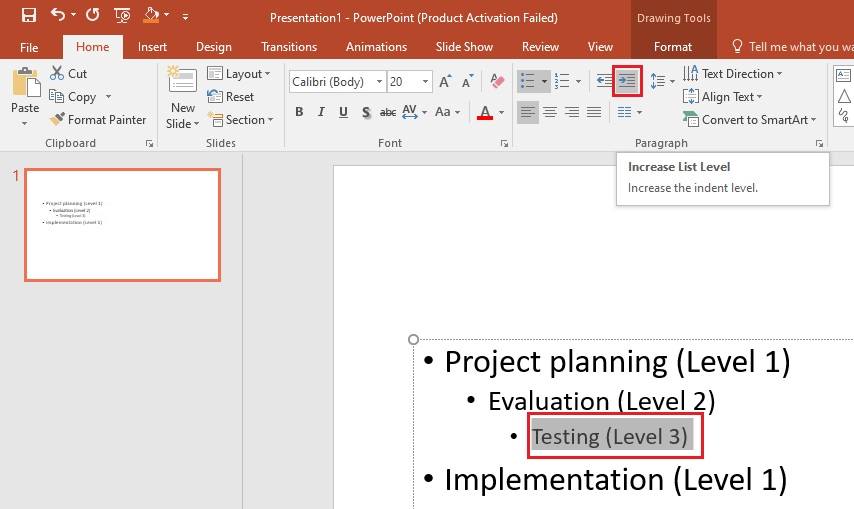
To introduce Level 3 to the list, choose the text and press the Increase List Level again.
You can introduce Level 4 and more to the list in the same manner.
How to Make the List Clickable?
Follow the three steps below to create a clickable list in PowerPoint.
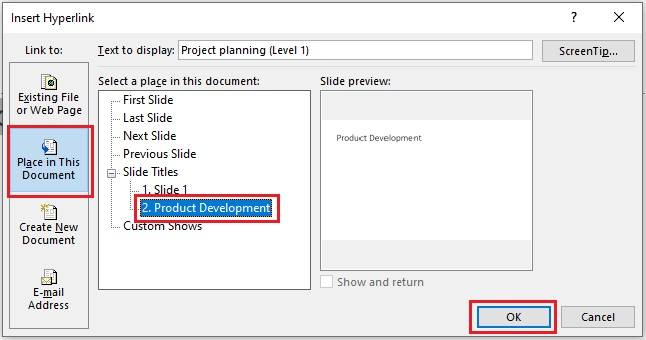
Step 1: Select the text you want to make clickable.
Step 2: Right-click and tap on Hyperlink.
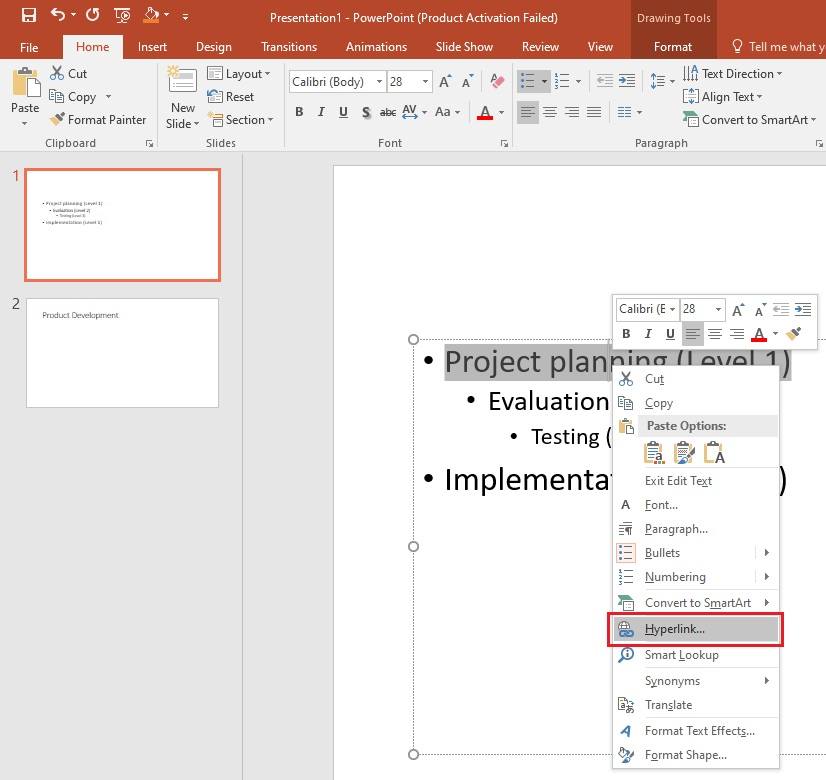
Step 3: Now, click on Place in This Document and select the destination text, as shown below. Once done, tap on the OK button.
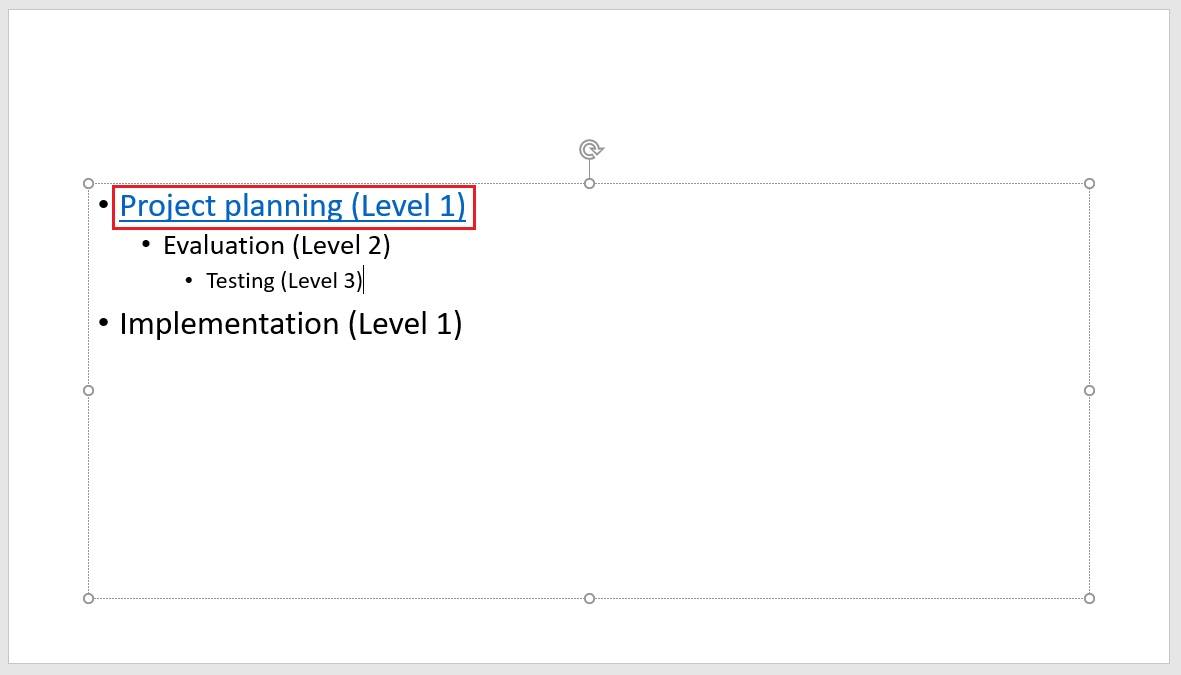
When you click on the clickable text, it will take you to the target text or slide in PowerPoint.
How to Insert a Picture List in PowerPoint?
PowerPoint allows you to either use the same or a separate picture for each bullet point. Let’s look at how you can do both.
i) Use a Separate Picture for Each Bullet
It involves four quick steps.
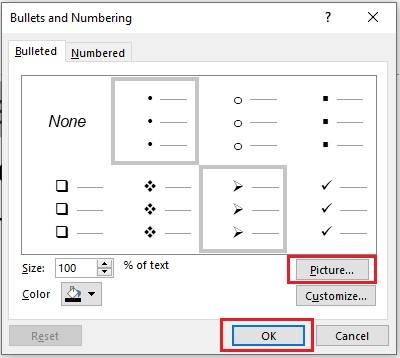
Step 1: Select the text and open the bullet points list from the Home tab, as shown below. Then, choose Bullets and Numbering….
Step 2: Tap on Picture and press OK.
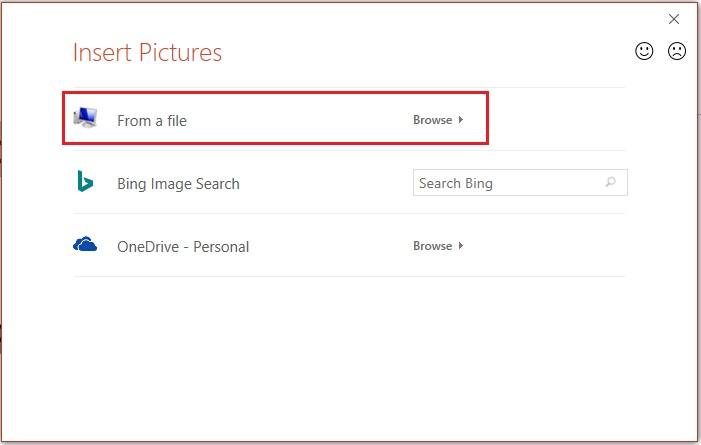
Step 3: Click on the From a file option to load the picture or icon from your system. You can also load an image from Bing Search or OneDrive into the PowerPoint.
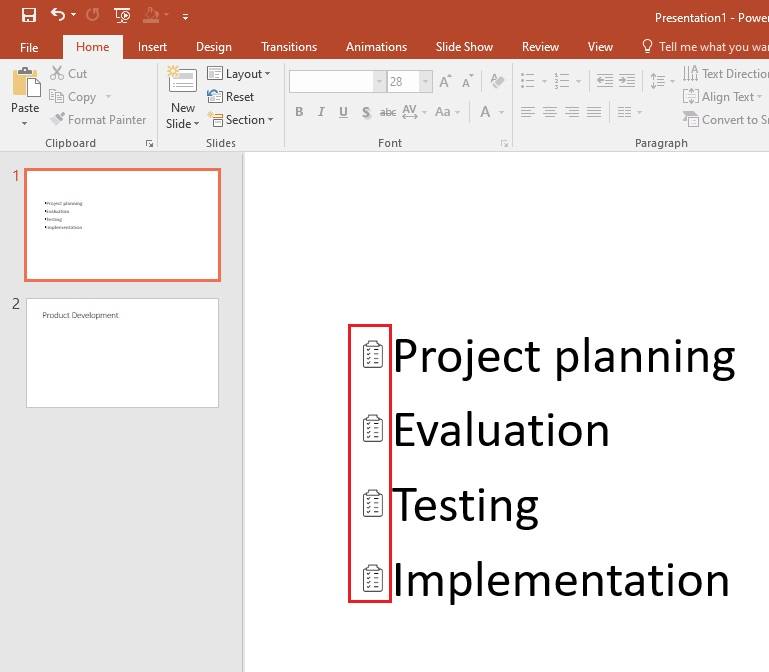
Step 4: Once you select the picture or icon from your computer, click Insert, and it will be displayed as the bullet point, as shown below. Similarly, you can load different pictures for each bullet point.
ii) Use the Same Picture for Each Bullet
To insert the same picture for each bullet point, select the whole text, open the dropdown list, and tap on Bullets and Numbers.

Choose the picture from your system and hit the Insert button. You will now see the same image for each bullet, as shown below.
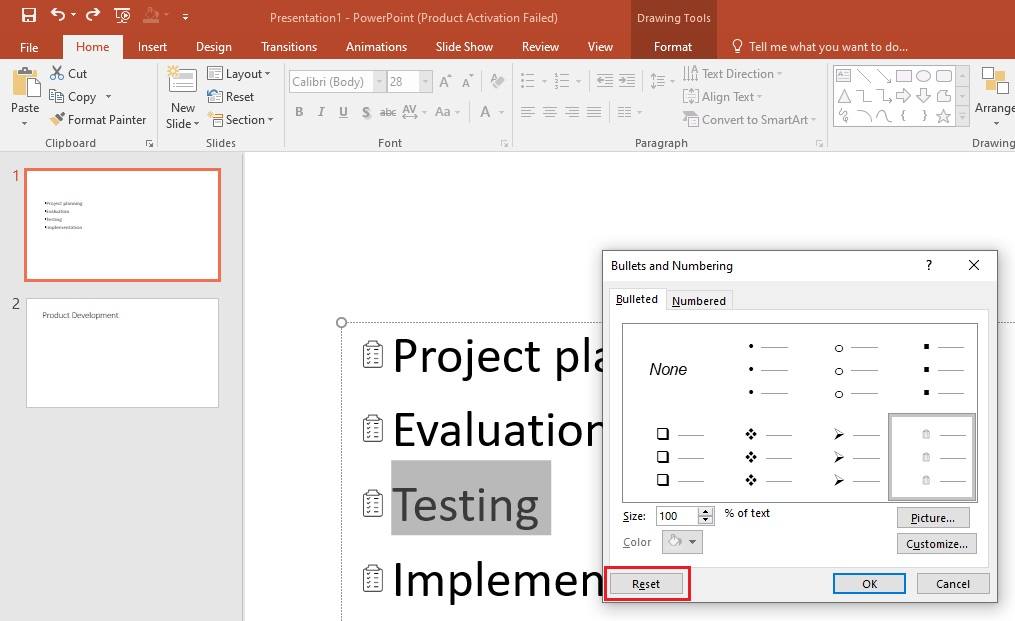
How to Reset a List Back to Default?
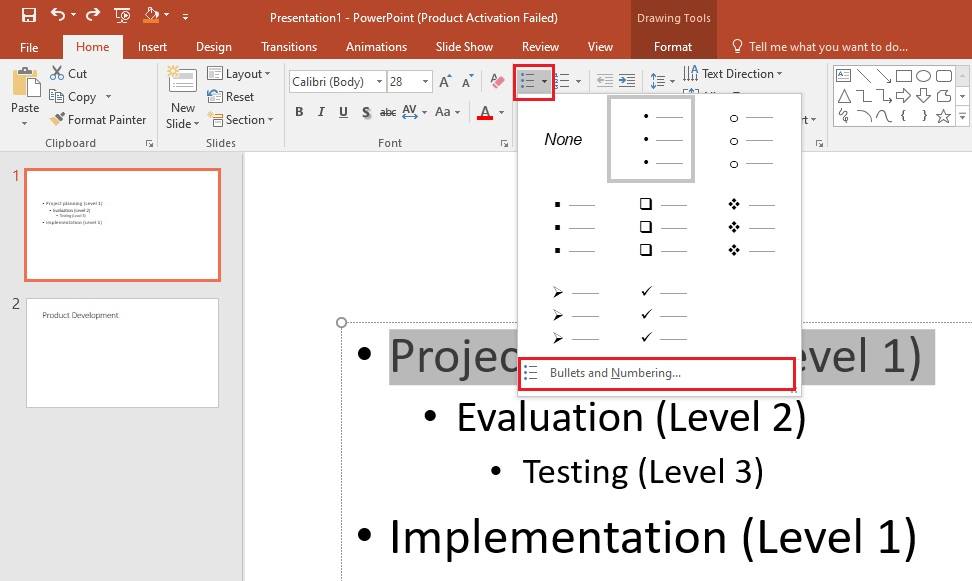
Suppose you notice that a picture bullet is inserted to the wrong text. In that case, you can reset it to its default position. To do this, select the text, go to the bullet list, choose Bullets and Numbers, and tap on Reset, as shown below.
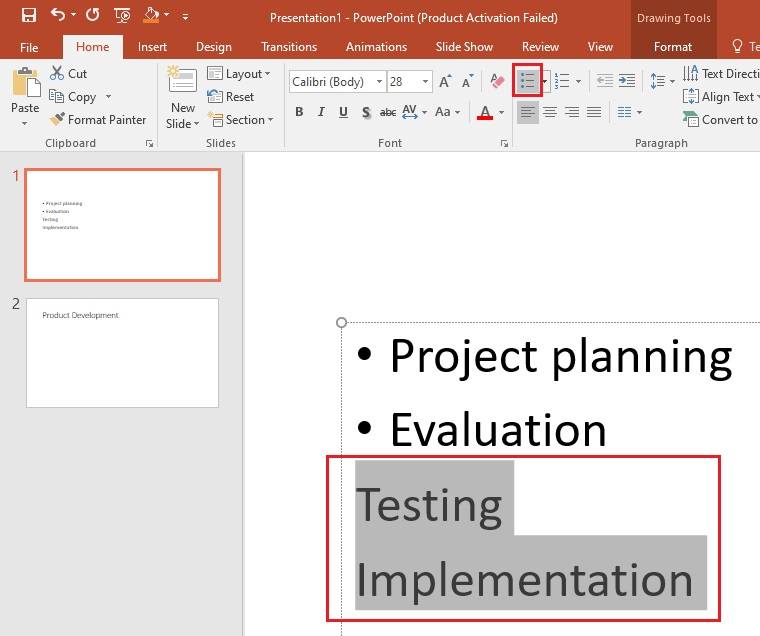
Similarly, if you want to remove the basic bullet list, select the text, and click on the bullet symbol in the top ribbon, as shown below.
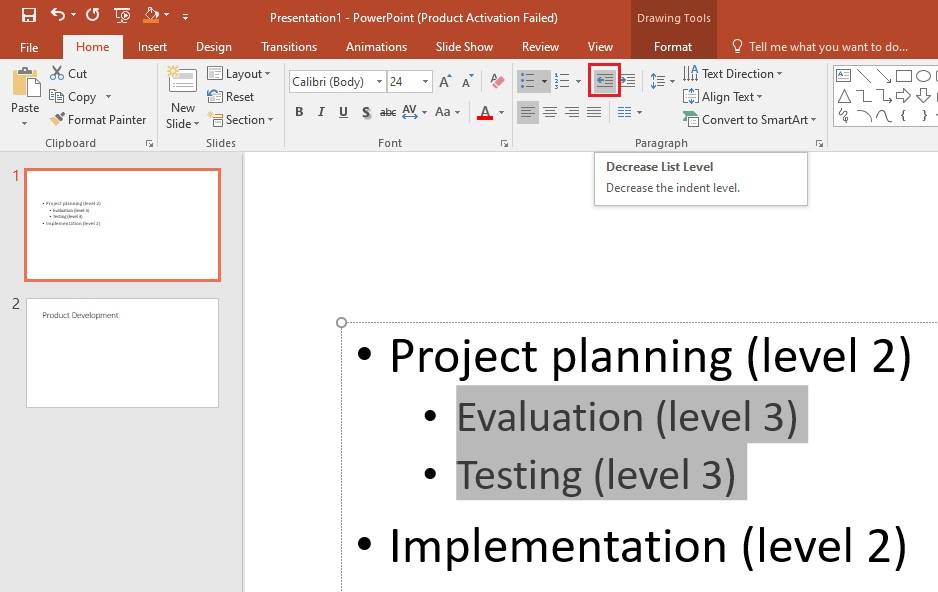
Moreover, to reduce the level, select the text, and click on Decrease List Level from the top bar.
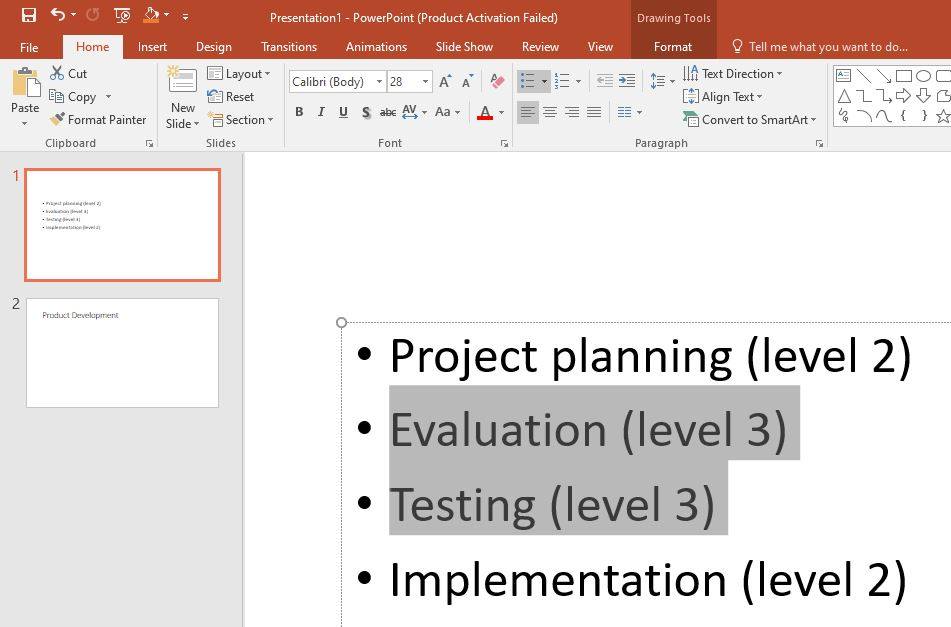
The reduced level of the list is shown in the image below.
Part 2. How to Create a Professional List in Microsoft PowerPoint?
Now that you are familiar with creating a basic list in MS PowerPoint. It is time to create a professional one with the same tool.
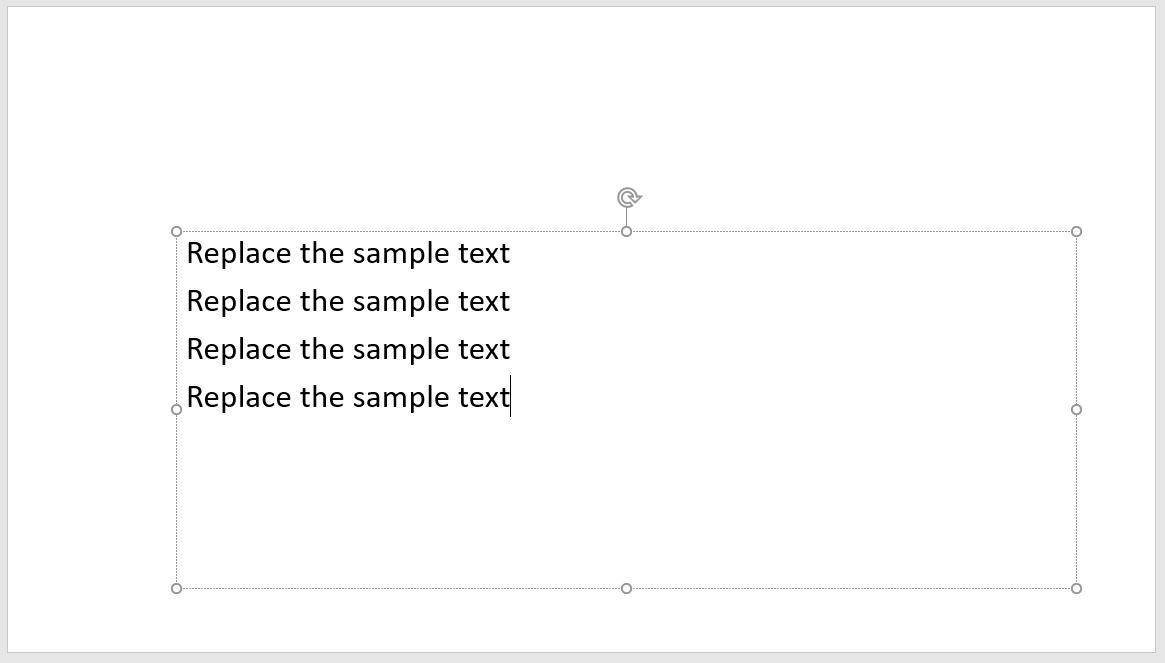
Step 1: Open PowerPoint, create a new slide, and write the text for different points.
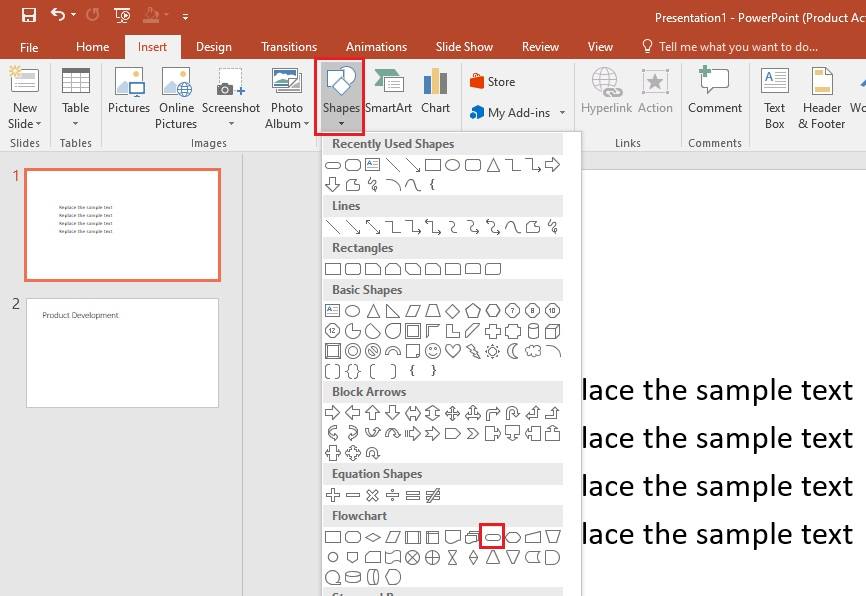
Step 2: Now, enter the Shapes list, and choose the highlighted shape.
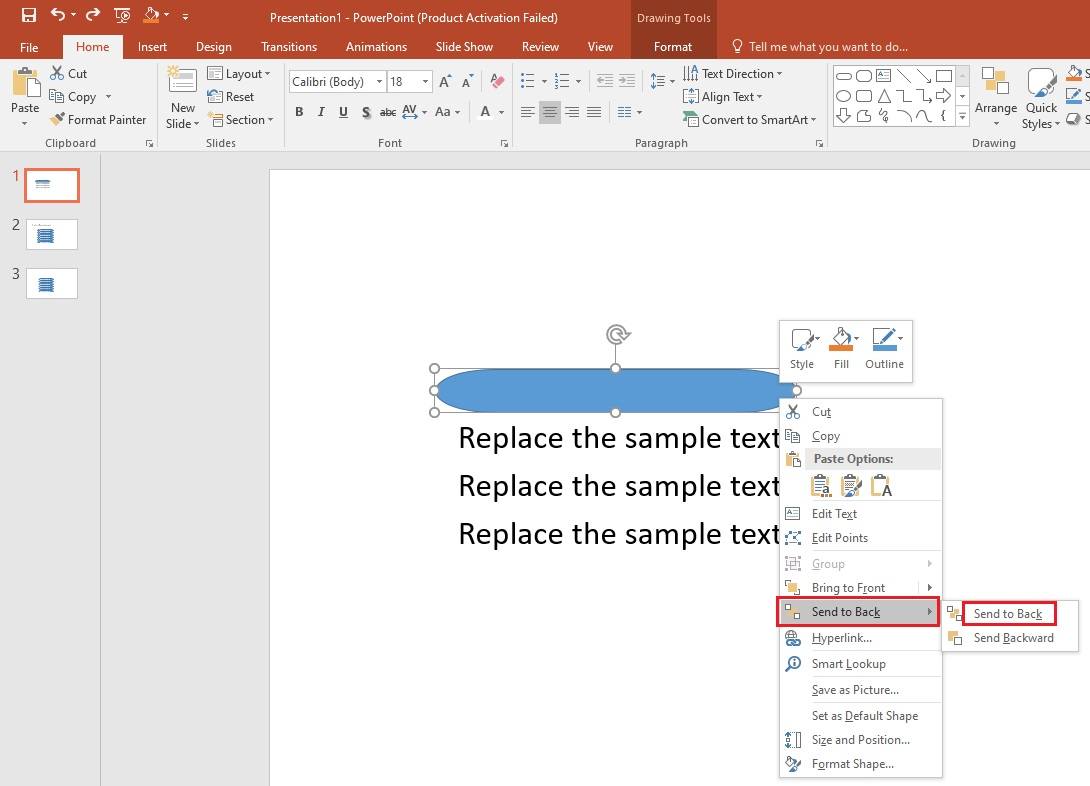
Step 3: Place the chosen shape for each point on the slide. When you place the shape it will hide the text, as shown below. To move the shape behind the text, right-click on the shape, move the cursor over Send to Back, and then choose Send to Back.
Now, place the shape behind each point.

Step 4: Go to the Shapes again and choose a circle from the list. Then, place the circle on the left side of each point, as shown below.

Step 5: Number each point of the list. The list is now ready.
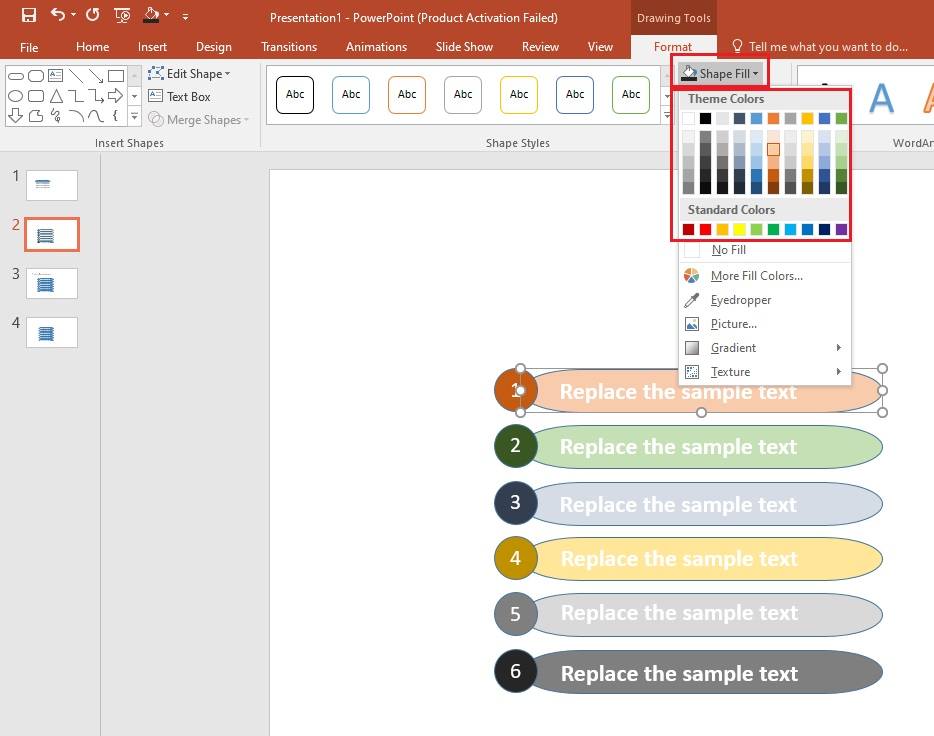
Step 6: We can colorize the PowerPoint list to make it more appealing. To add colors to the list, click on the shape, go to the Format tab, open Shape Fill, and choose the desired color from the list. You can do the same for all shapes, as shown below.
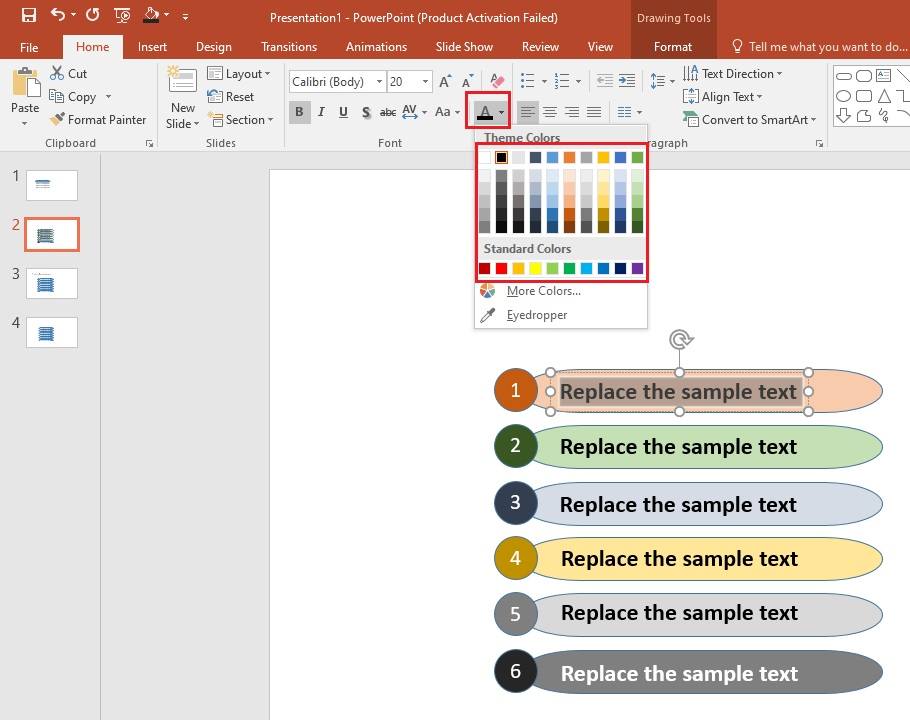
Step 7: Now change the text color to make it more visible for everyone.
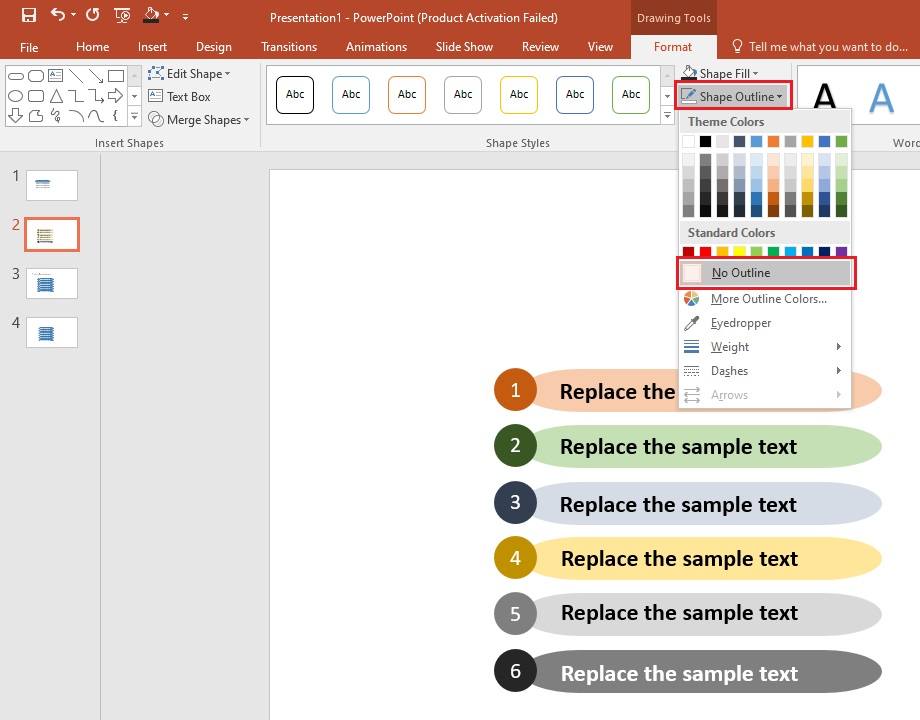
Step 8: It is time to remove the shape outlines. To do this, select the shape and go to the Format tab. Then, open the Shape Outline list and tap on No Outline, as shown below.
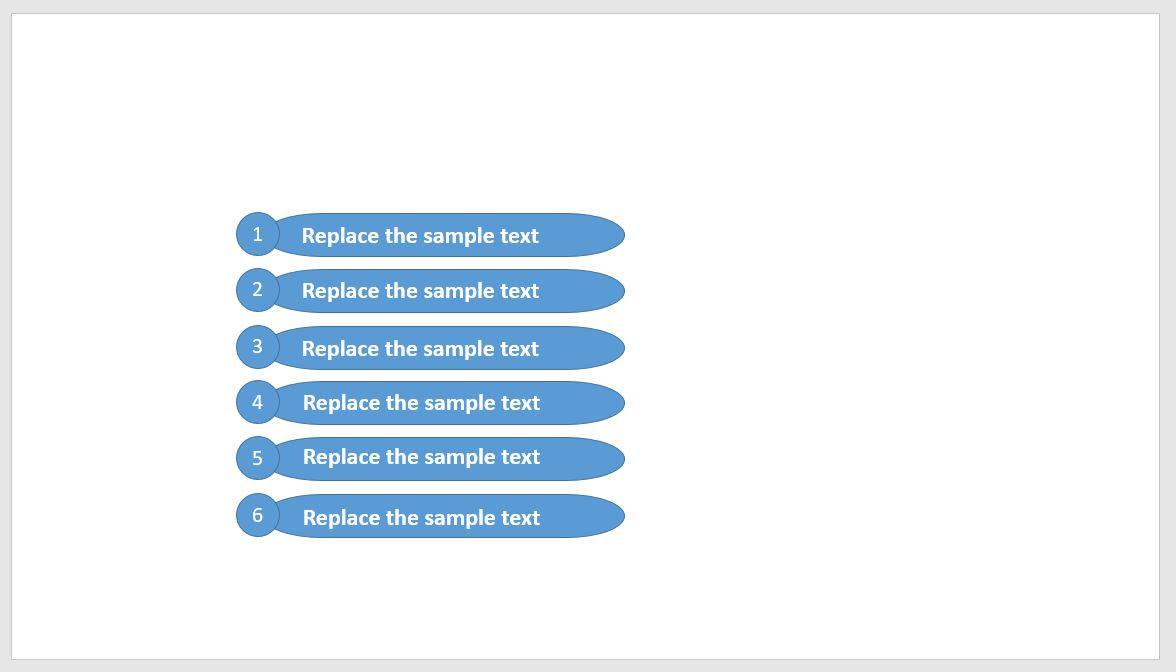
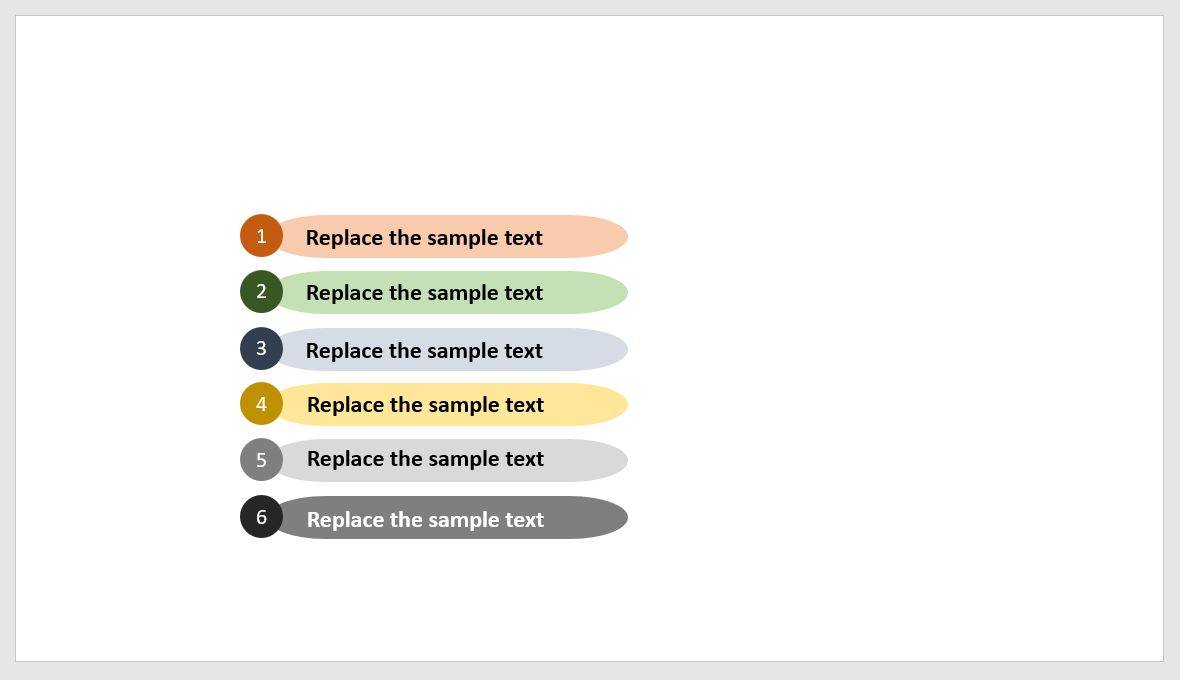
Below is a professional list created in Microsoft PowerPoint. While using this pattern, you can replace the sample text with yours.
Part 3. Best Practices for Making a More Visually Appealing and Effective List
Now that you know how to create a basic and professional list in Microsoft PowerPoint. Following the tips below will assist you in making more eye-catching and effective lists.
- Keep each bullet short, concise, to-the-point, and simple to understand.
- The length of each bullet should ideally be the single line.
- Write text inside the separate shape for each bullet point.
- Add colors to the selected shapes to make the list look more appealing.
- Use icons or pictures instead of using traditional bullet point symbols.
- Use a circle or semicircle layout to display the elements of the list.
- Follow the 6x6 rule. It states that no PowerPoint slide should contain more than six bullet points.
- Introduce animations to the list to make them look stunning.
Part 4. Easily Make a Better One with Edraw.AI
Edraw.AI is an unmatched, easy-to-use online visual collaboration tool. Along with hundreds of diagrams, this utility helps you make effective lists with the built-in templates created by professionals. Easy navigation, user-friendly interface, and effective diagraming ability have attracted millions of new users to try Edraw.AI.
Step 1: Login to Edraw.AI with your Wondershare ID or social media credentials.
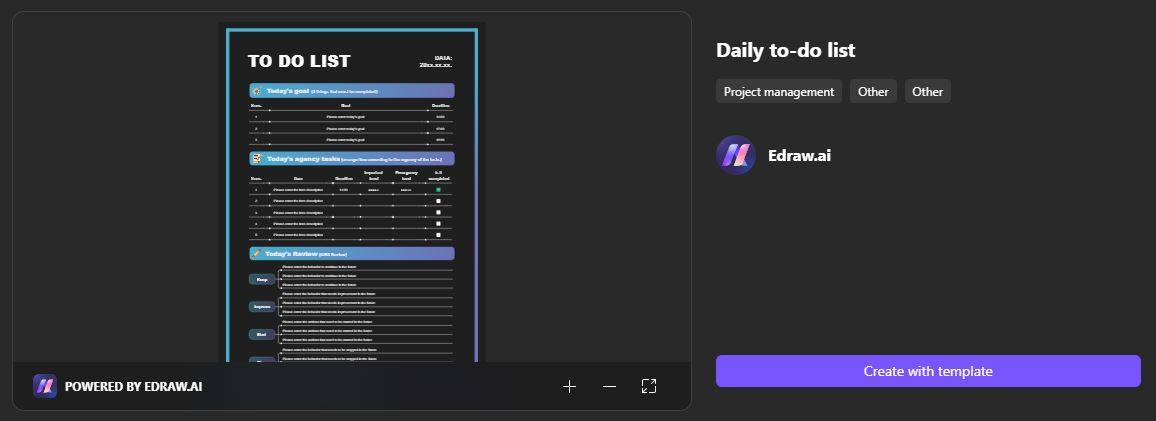
Step 2: Go to the template section and search for list templates.
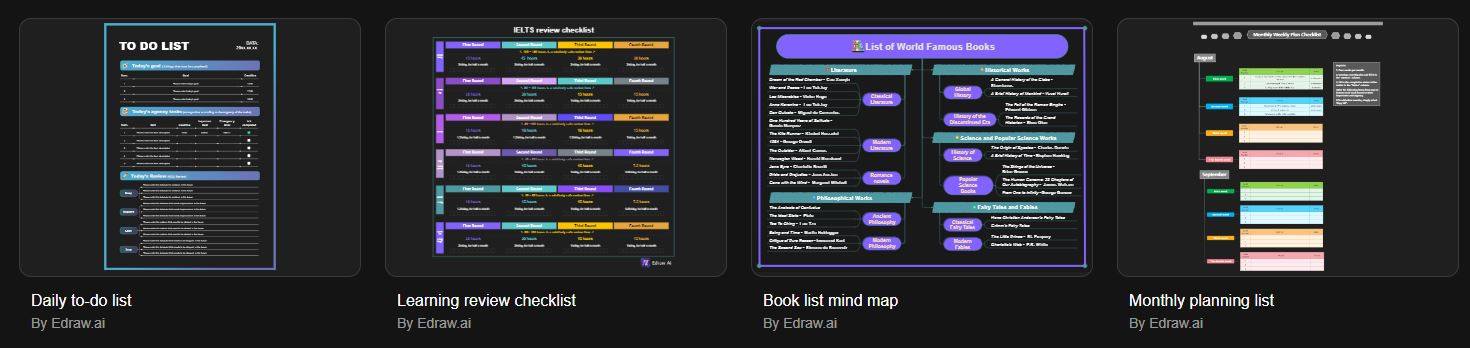
Step 3: Choose the suitable template, click on it, and press the Create with template button.
Export the List to PowerPoint
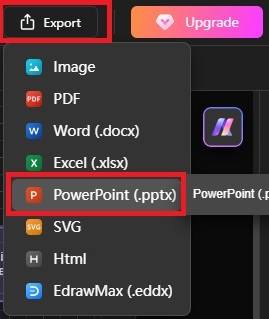
Once you make the changes to the chosen list template and make it exactly according to your requirements, click the Export button from the top-right section of the window and choose Powerpoint (.pptx).
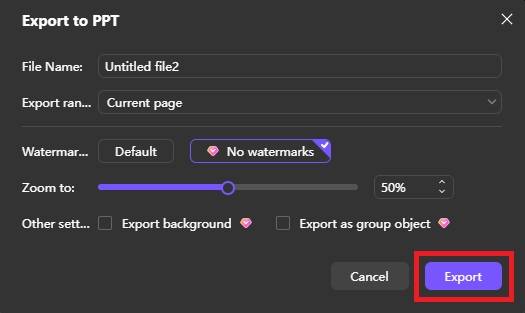
Set the File Name and press the Export button.
To sum up the whole discussion, a list emphasizes important points of the entire process or the idea. It helps readers gather key components from the entire discussion. When it comes to making a list, PowerPoint is the choice for millions of people across the world.
We have discussed in detail above “how to create basic and professional lists in PowerPoint”. If you want to make a more compelling list effectively and efficiently, try Edraw.AI.
FAQ
-
What are the different list types in Microsoft PowerPoint?
Different types of lists in PowerPoint include:- Bulleted list
- Numbered list
- Picture list
-
Can I create a multilevel list in PowerPoint?
Yes, PowerPoint allows you to create a list with different levels: Level 1, Level 2, Level 3, and so on. However, most lists are made with no more than three levels. -
Is adding pictures to the list worth it?
Yes, when we create a picture list in PowerPoint or any other tool, it becomes more appealing than a simple bulleted list.

Prefer working locally?
Make 210 types of diagrams: flowcharts, blueprints, UML, etc
AI Mind Map, AI PPT, real-time
collaborative brainstorming