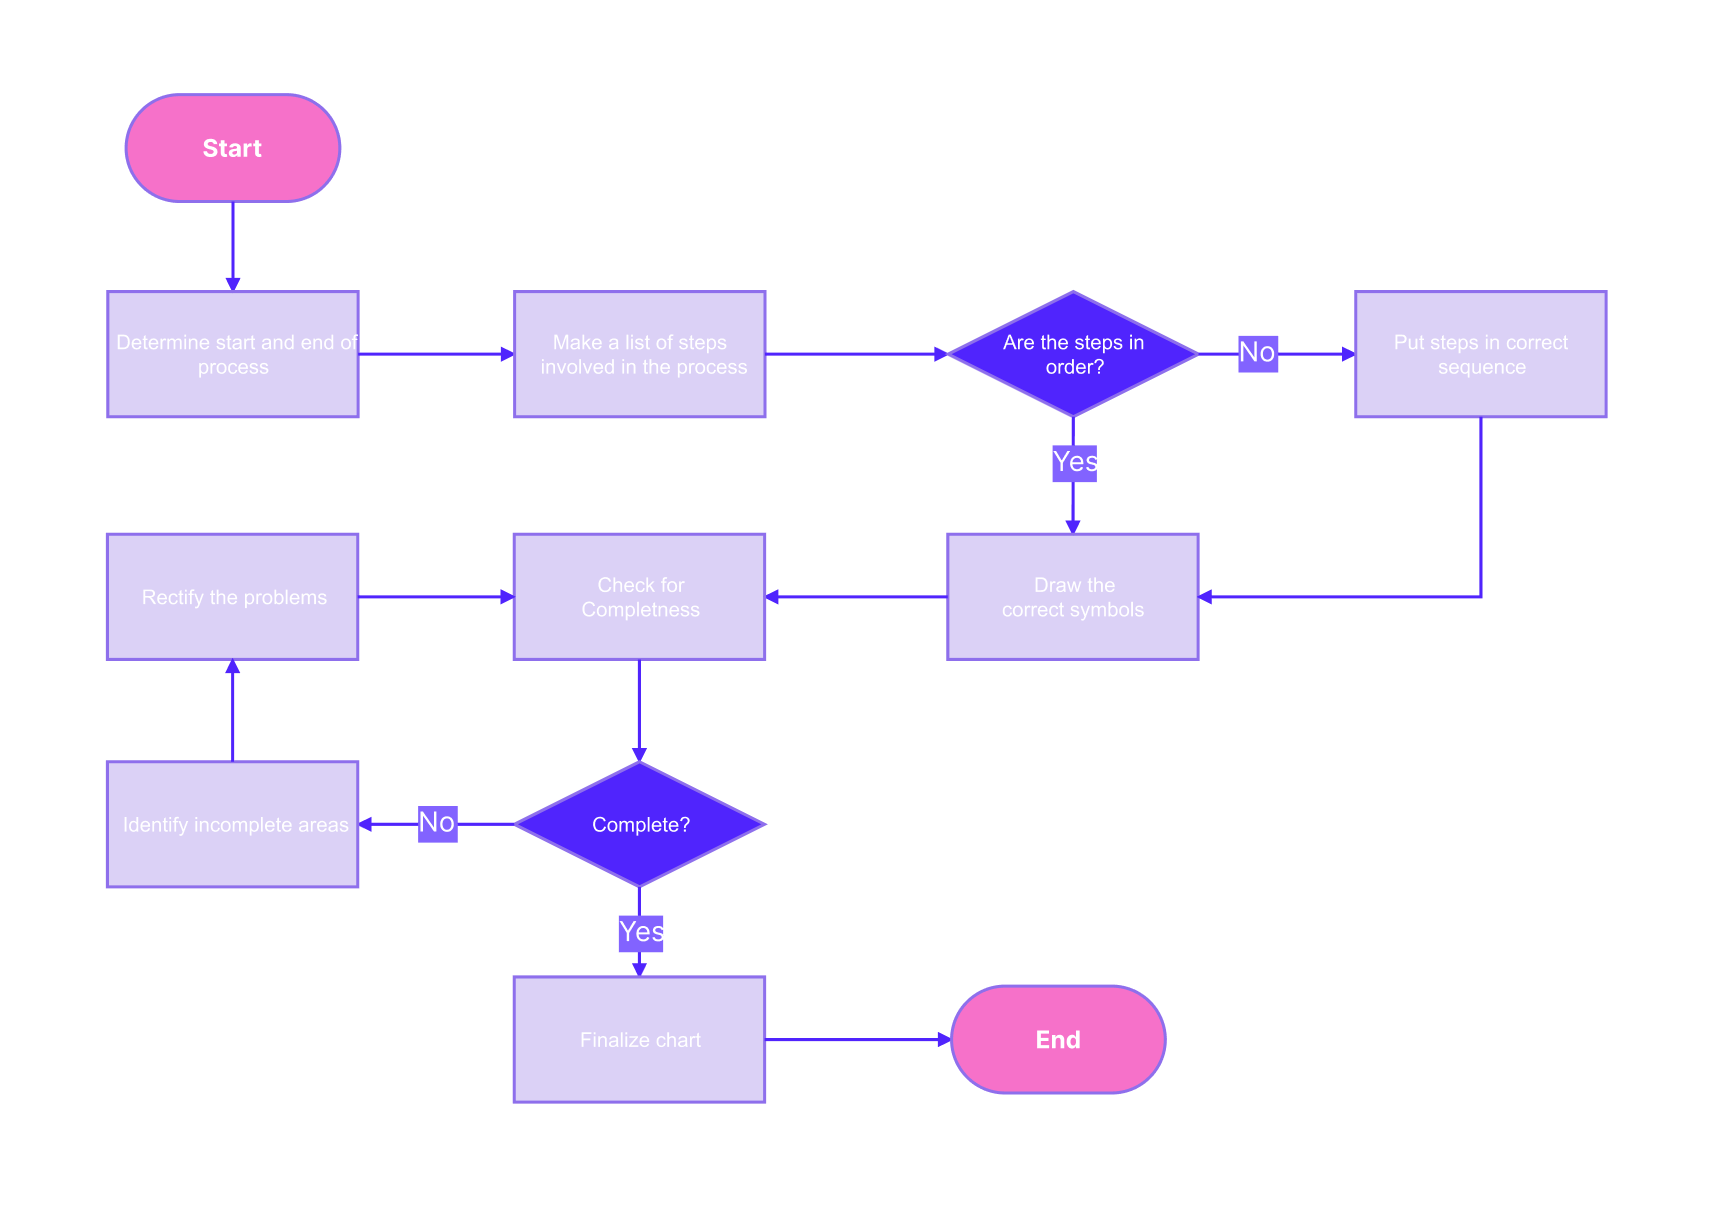
These days, many workplaces use the Atlassian suite to connect their teams together. One of the tools in the suite is Confluence. It’s a shared workspace where teams can create pages, whiteboards, etc. Of course, it also integrates with Atlassian’s project management tool called Jirah.
When using Confluence, you might want to create a flowchart to share certain processes with your teammates. After all, it’s a dedicated tool for centralized information within your workplace. Having flowcharts might help improve the accessibility of information in your Confluence pages.
You’ll learn how to create flowcharts in Confluence step by step in this article. There are two primary ways to make them within the Confluence workspace, which will be covered later.
In this article
2 Ways To Make a Flowchart in Confluence
As mentioned earlier, Atlassian’s Confluence provides two ways to create flowcharts within the app. One is through templates, and the other is from scratch. Note, however, that you can only do this through a Whiteboard.
After making a flowchart through a whiteboard, you can link it or embed it in the pages. But since you’re here to learn how to create flowcharts in Confluence, look at the methods and steps below.
Method 1: Make a Flowchart with Templates
If you’re busy at work, it’s better to learn how to create flowcharts in Confluence with the help of templates first. This is especially true when you only plan to create flowcharts a few times. Having templates can, after all, save you a lot of time.
By removing the need to craft, design, and create your flowcharts from scratch, templates help keep you focused on what’s more important: the content you will put on the chart. To create flowcharts with Confluence’s templates, follow the steps below:
Step 1
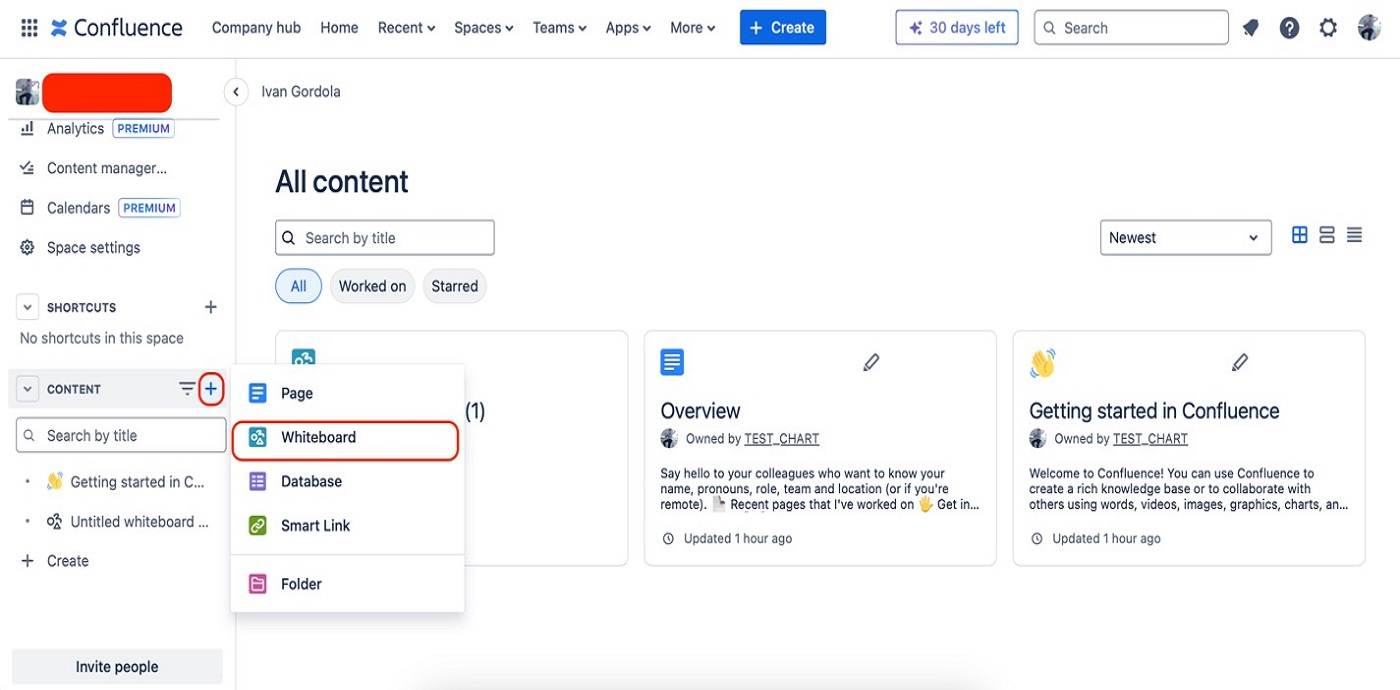
Start by creating a Whiteboard. To do this, click the + button beside CONTENT.
Step 2
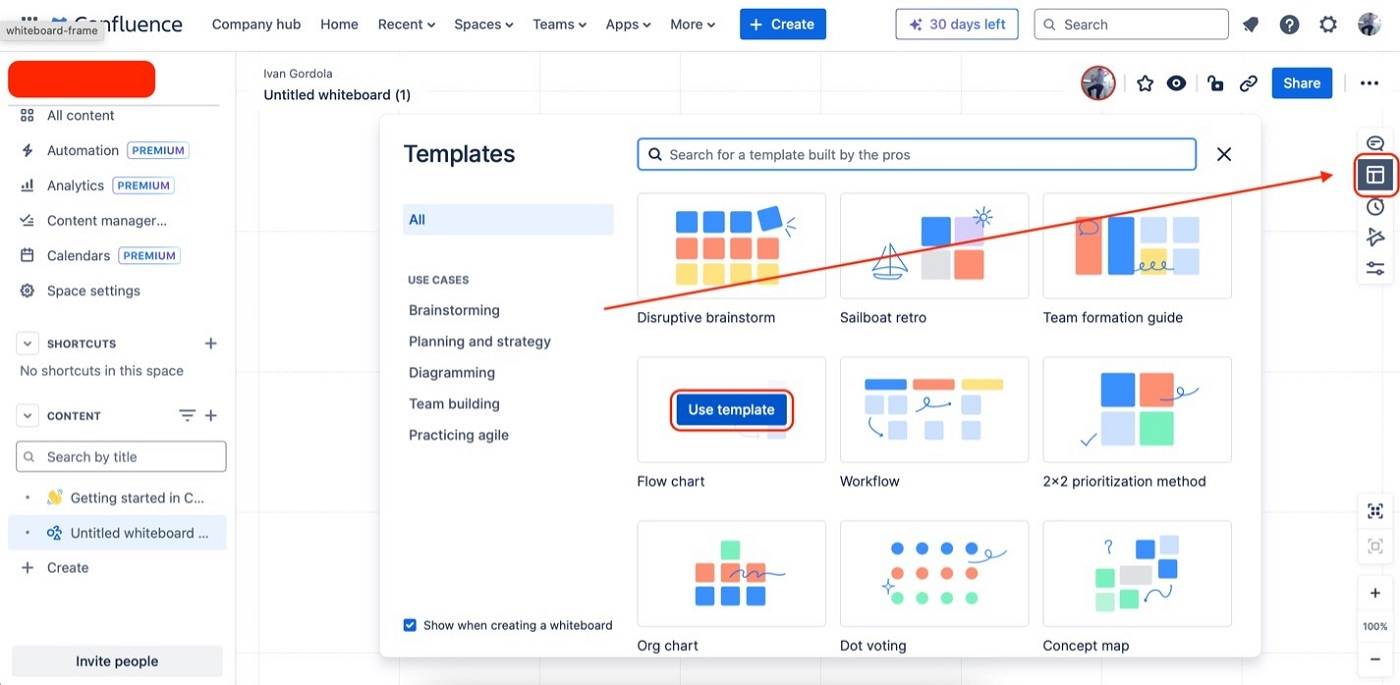
Click the Templates button from the right-hand toolbar. Then, look for the Flow chart and click Use template.
Step 3
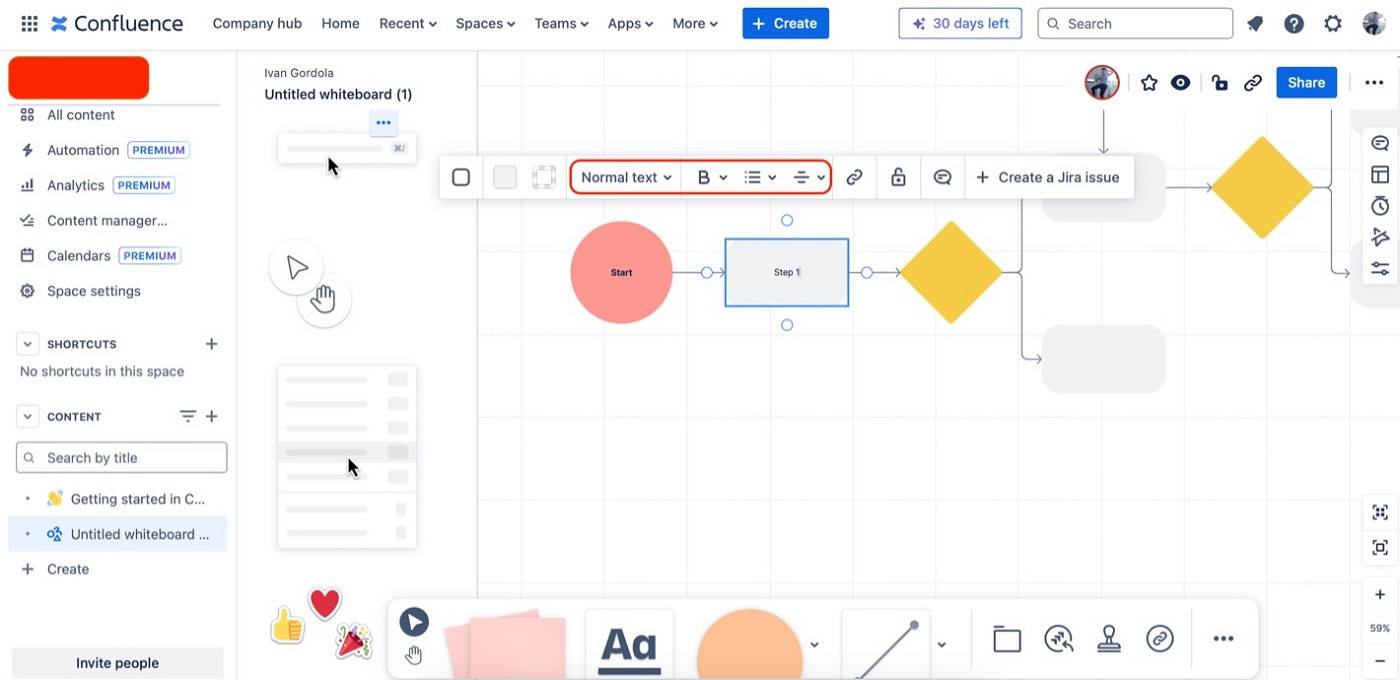
Edit the text in the template by clicking any shape and typing away. Use the floating toolbar to change font styles, alignment, and more.
Step 4
To edit a shape, click it and use the floating toolbar. Then, use the (from left to right as marked below) Change Shape, Color, or Border icons to change its appearance.

Step 5
Lastly, you can add shapes by clicking the Shape tool. Delete shapes by clicking them and pressing Delete on your keyboard.
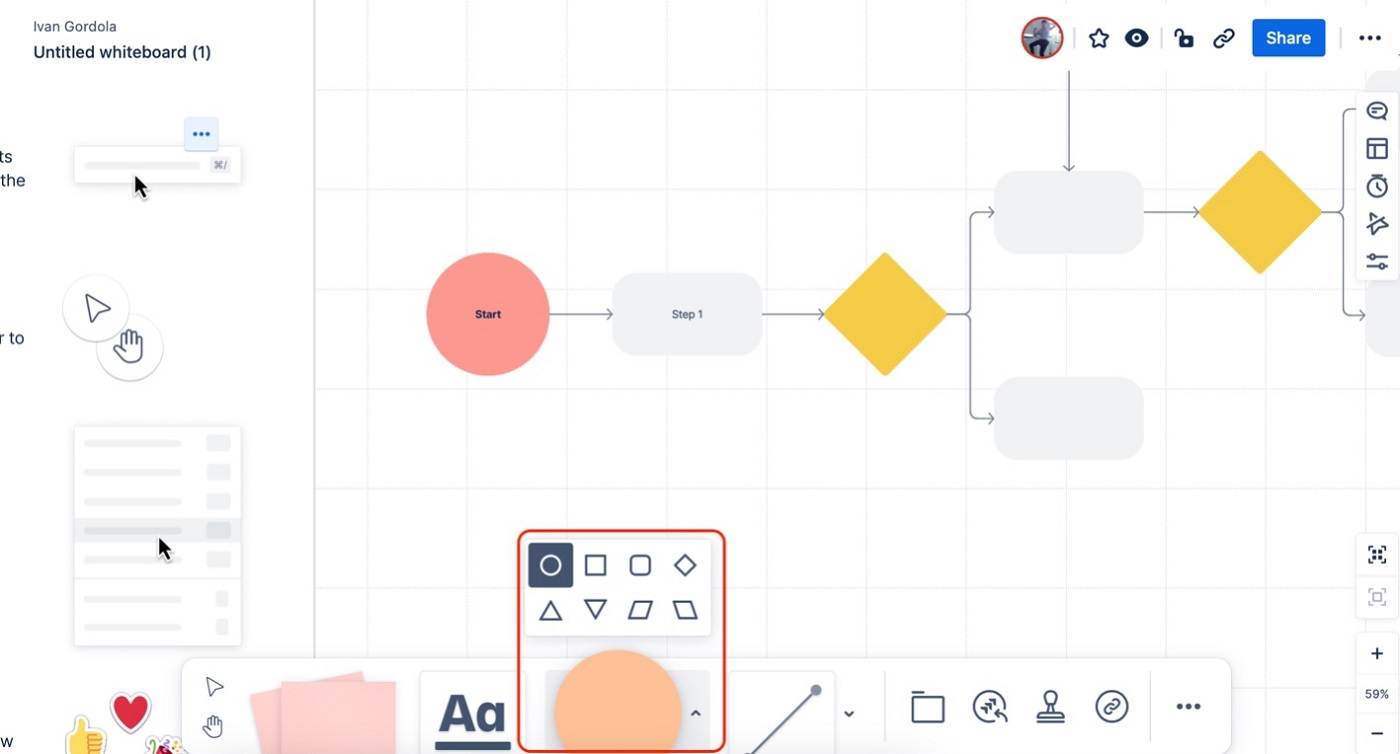
Method 2: Make a Flowchart from Scratch
While templates are convenient, it’s normal to feel limited or locked in their initial design when using them. This is why it’s almost always better for more advanced users to learn how to create diagrams, or anything for that matter, from scratch. The creative freedom it provides is unparalleled.
So, to learn how to make flowcharts in Confluence from scratch, follow the steps below:
Step 1
Add shapes from the Shape menu on the toolbar.
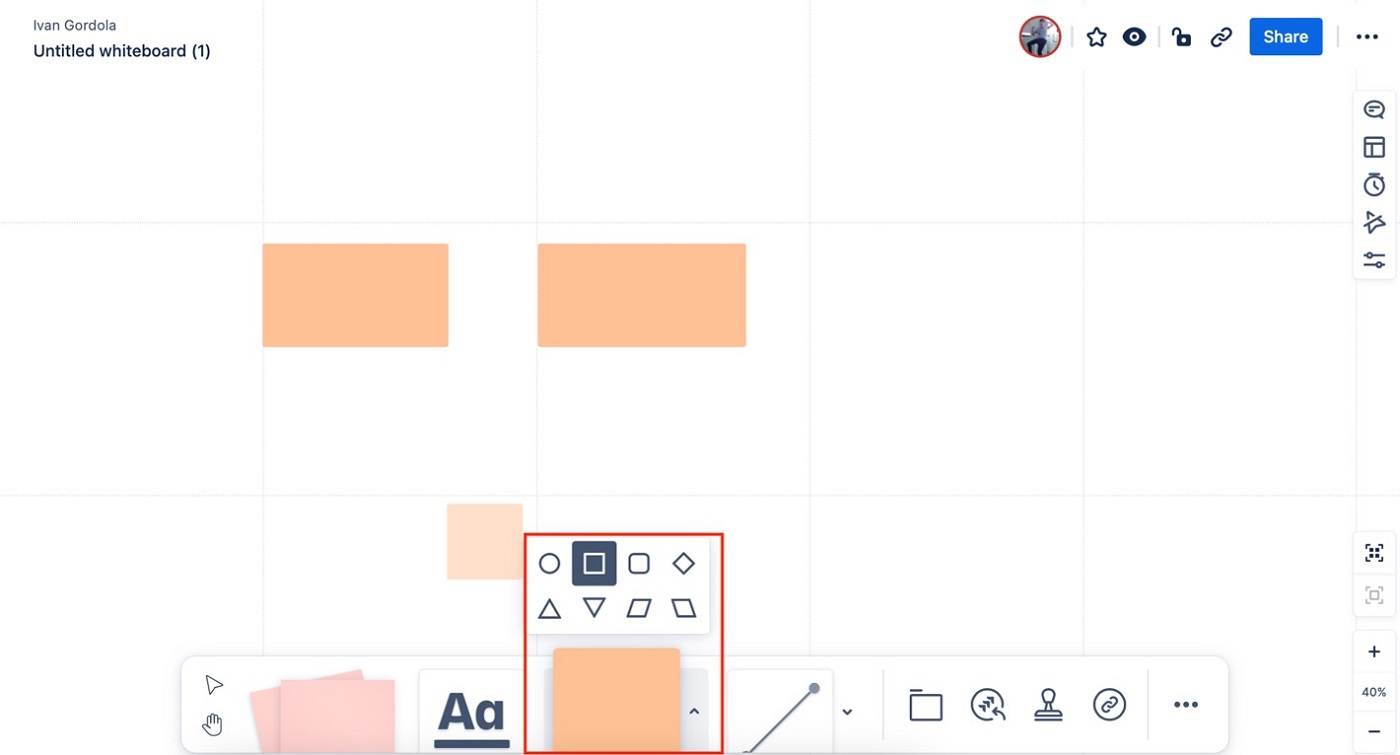
Step 2
To connect the newly added shapes, use the + button on each side of the shape. Then, drag this to the destination shape to create an arrow.
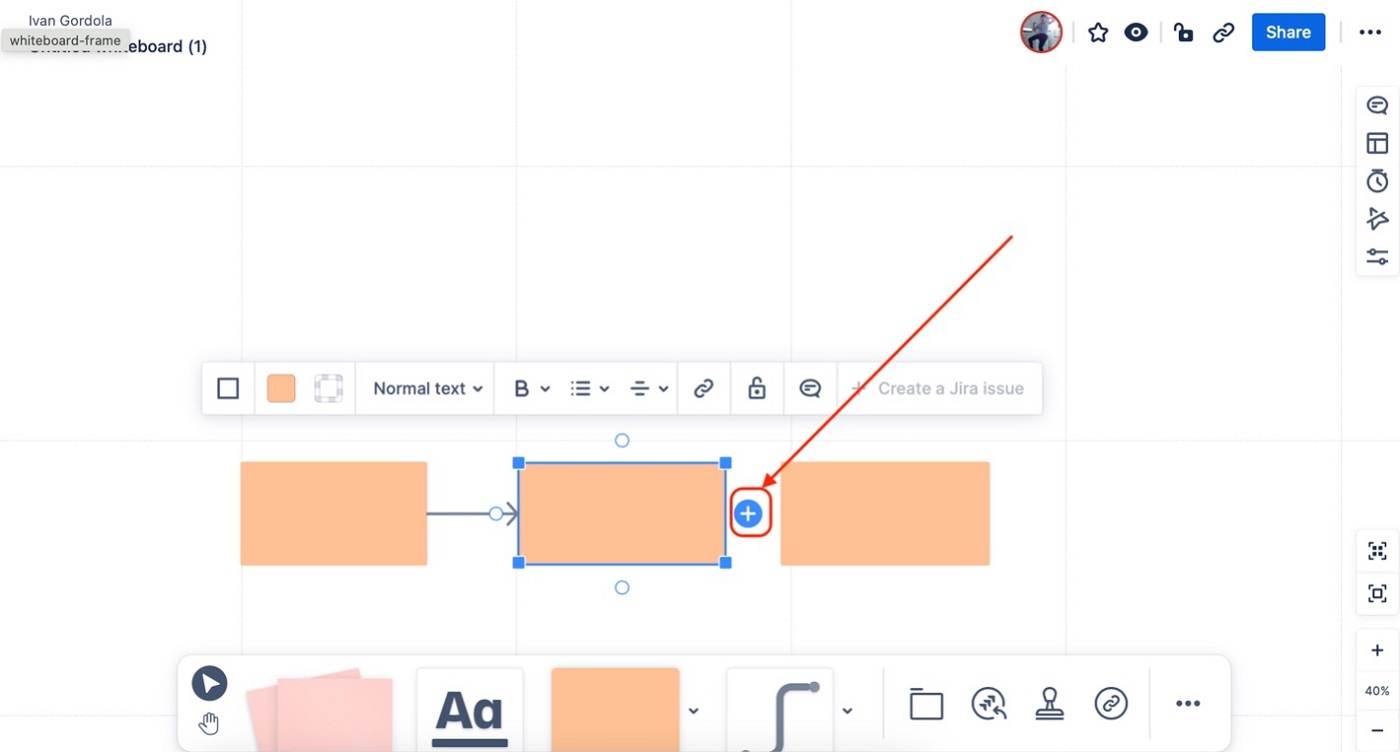
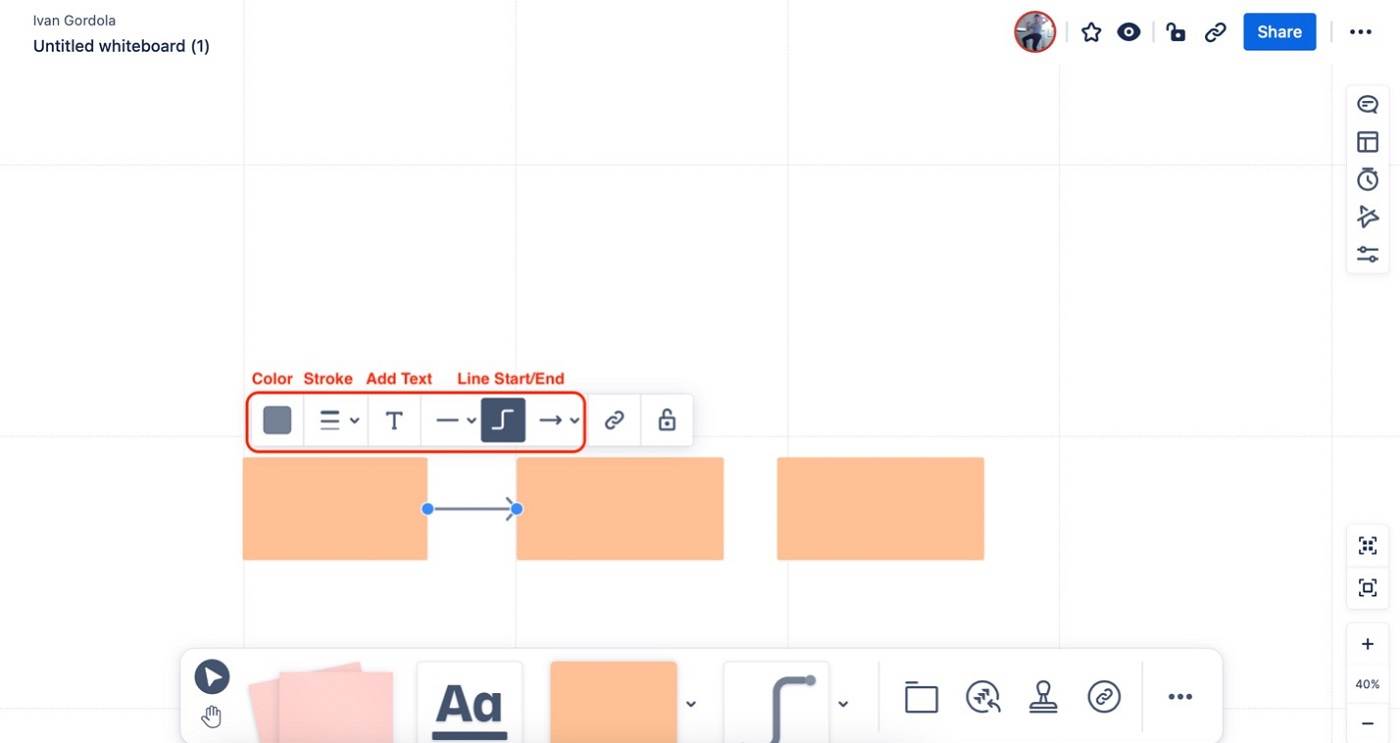
Step 3
After editing the style of your flowchart’s shape/lines, add the text as necessary.
In this article
It’s Easier and Faster To Flowchart on Edraw.AI
While creating flowcharts in Confluence is convenient, the tools they provide might sometimes be limiting. That’s why you might need a more advanced, dedicated tool. After all, Confluence allows its users to import files or images to the whiteboards/pages. That’s where Edraw.AI comes in.
This online, AI-powered diagramming tool will solve all your diagramming needs. With this tool, you can generate flowcharts or create one from templates. Also, your team will love that it has real-time collaboration, just like Confluence.
With its export capabilities, you can also upload your flowcharts directly to Confluence pages, not just whiteboards. This means that you can have more deeply customized process charts in your workspace.
Method 1: Use AI To Generate One
As mentioned, Edraw.AI has flowchart generation capabilities through the AI Flowchart tool. To access it, follow the steps below:
Step 1
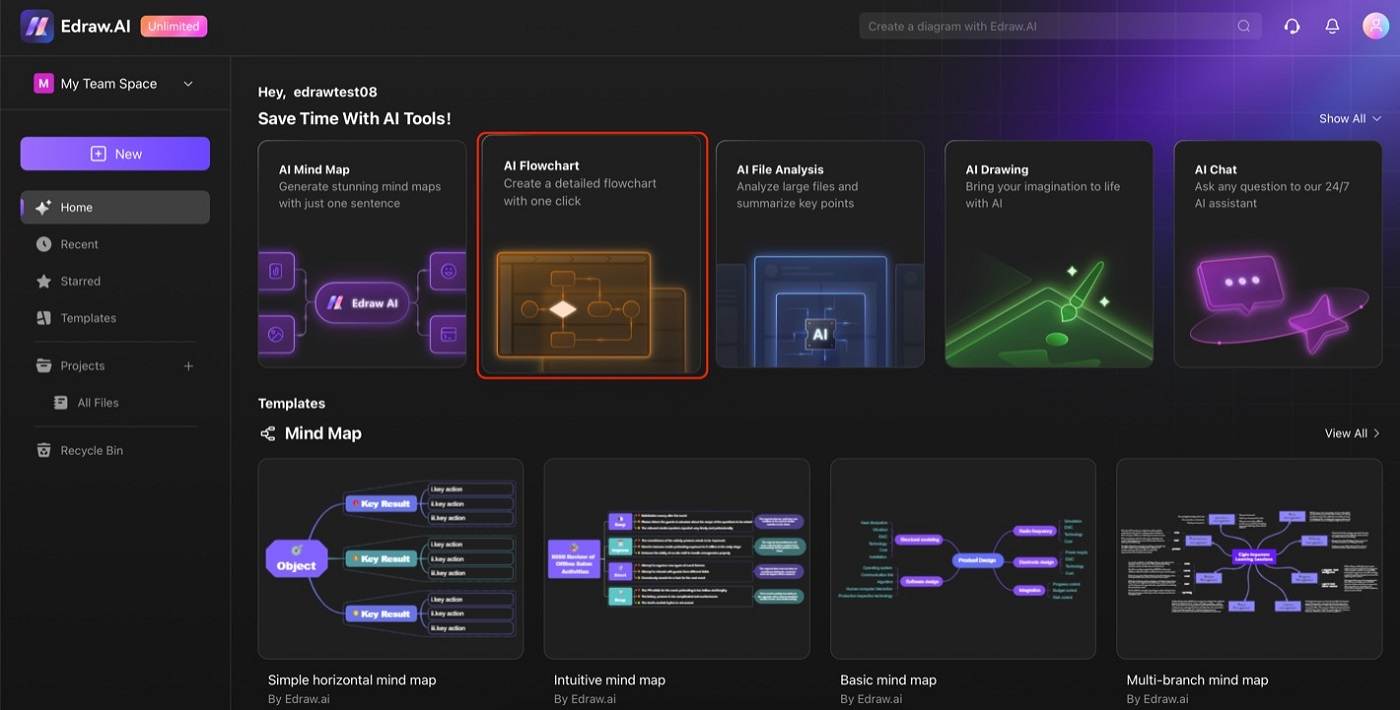
On the Home page, click AI Flowchart in the left sidebar.
Step 2
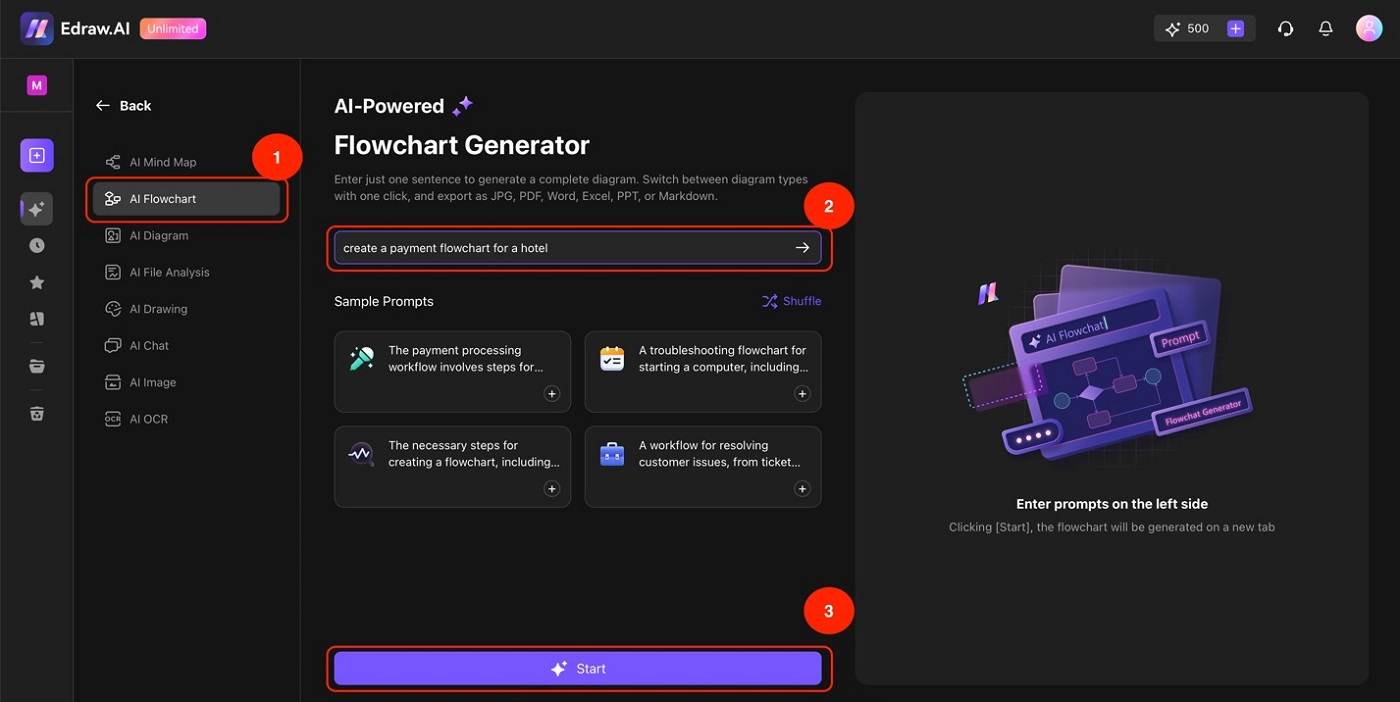
Under the AI Flowchart on the next page, type in your prompt in the text box. Once satisfied with your prompt, click Start.
Step 3
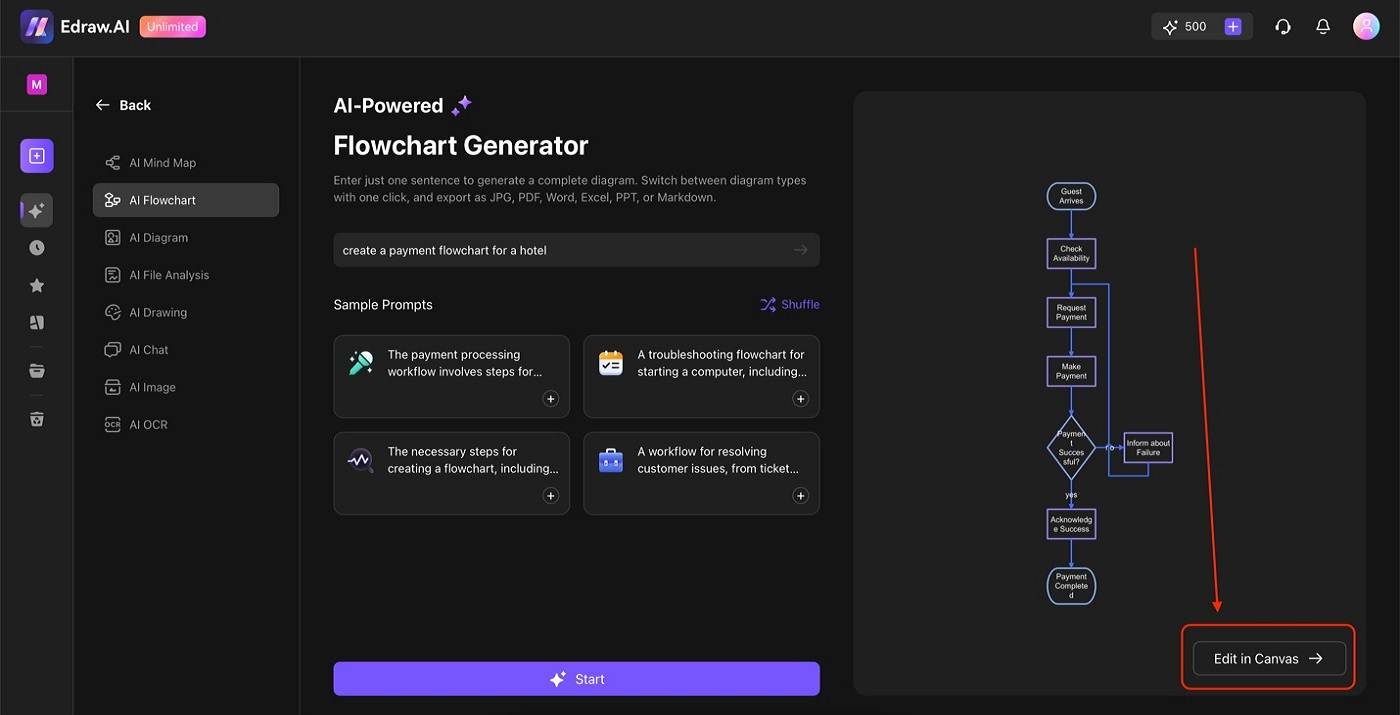
Once generated, click Edit in Canvas.
Step 4
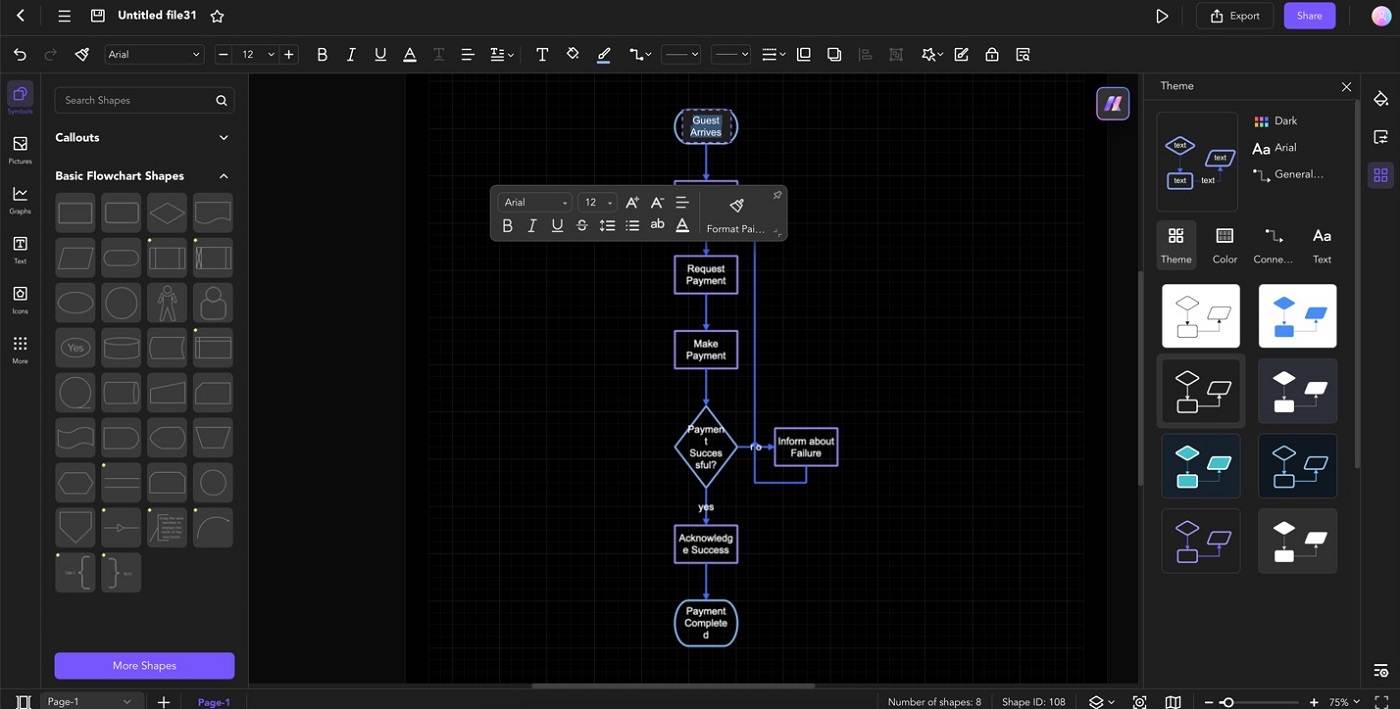
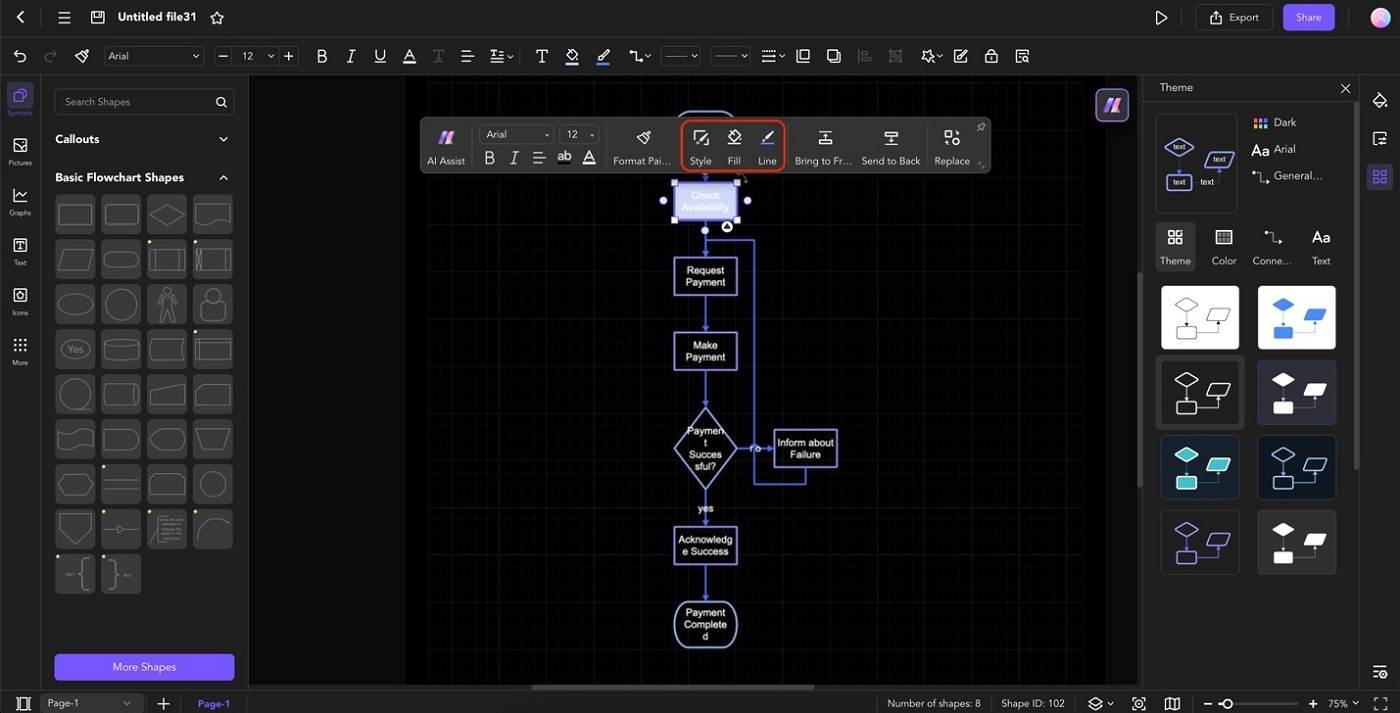
Add/edit texts by double-clicking any text field or shape. Use the appearing customization bar to change font styles, sizes, or colors.
Step 5
To customize the appearance of elements, use the Shape, Fill, or Line in the floating toolbar. For one-click changes (overhaul), use the Theme menu on the right.
Method 2: Use a Template
If you want to try Edraw.AI’s user-powered and platform-made templates, that’s also possible. To access the templates library for flowcharts, follow the steps below:
Step 1
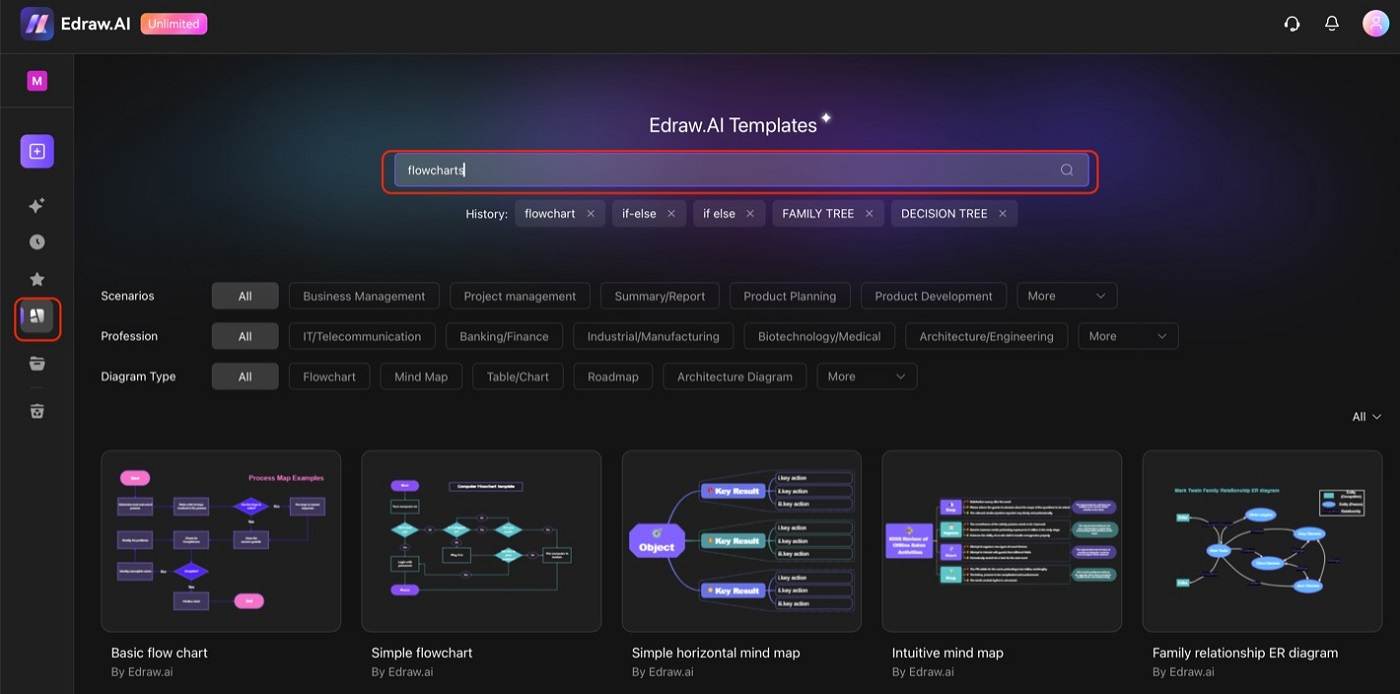
Click the Templates icon on the homepage. In the search bar, type in “flowchart” as the keyword.
Step 2
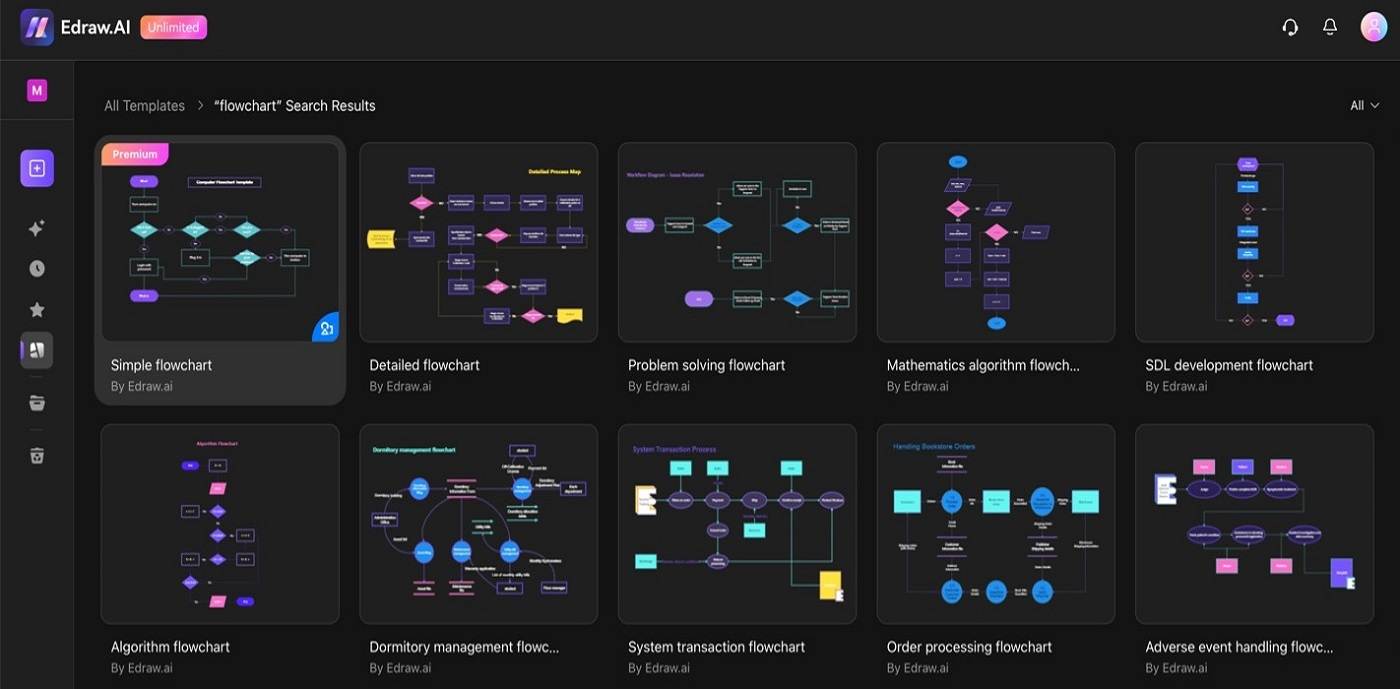
Choose any template from the results.
Step 3
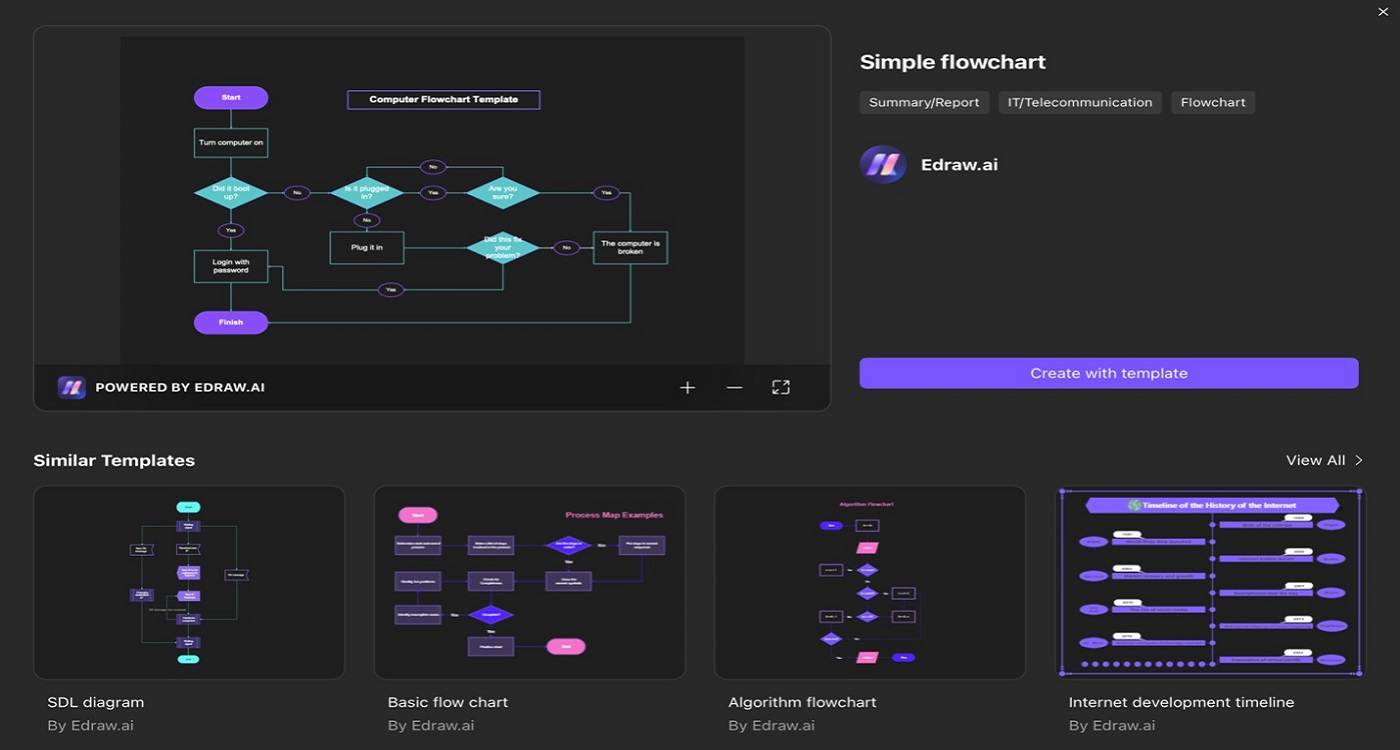
Click Create with template to access them in the canvas. Then, follow the steps provided for customization in the previous method.
Start Flowcharting With Edraw.AI
Whether you choose to use AI generation or start with a template, as you may have seen, Edraw.AI offers you more versatile options to customize and create flowcharts. With the help of the tool, you can create more advanced and visually appealing flowcharts while saving time.
This lets you focus on conveying your ideas clearly and effectively, enhancing communication within your Confluence workspace. So why not give Edraw.AI a shot for your next flowcharting project? Its powerful AI tools are not just limited to generation but also writing, chat, and more. You’ll have an assistant that will help you in your work.

