No one likes to read long paragraphs to figure out how a process works. It’s dull and loses your audience fast, especially during presentations.
Sure, you can use images or flowcharts, but simply linking shapes won’t cut it. You want them to be engaging and feel more personal.
There are plenty of dedicated flowcharting software for personal and professional use. But if you’re looking for an online tool, Google Slides has you covered. Stick around, and you’ll learn step-by-step how to create a flowchart in Google Slides.
In this article
2 Ways To Create a Flowchart in Google Slides
Google Slides lets you make your flowcharts in two ways.
One is using its built-in process flowchart templates. The other starts from a blank page and adds shapes from the top.
Click to jump
Method 1: Use a Template
Before you start, make sure to open a new slide. Is there any placeholder text there? Go ahead and delete it.
This method may be faster than doing it from scratch, but you’ll have less control over the shapes and arrows used in the flowchart. In any case, here’s how to use Google Slides to make a flowchart from a template:
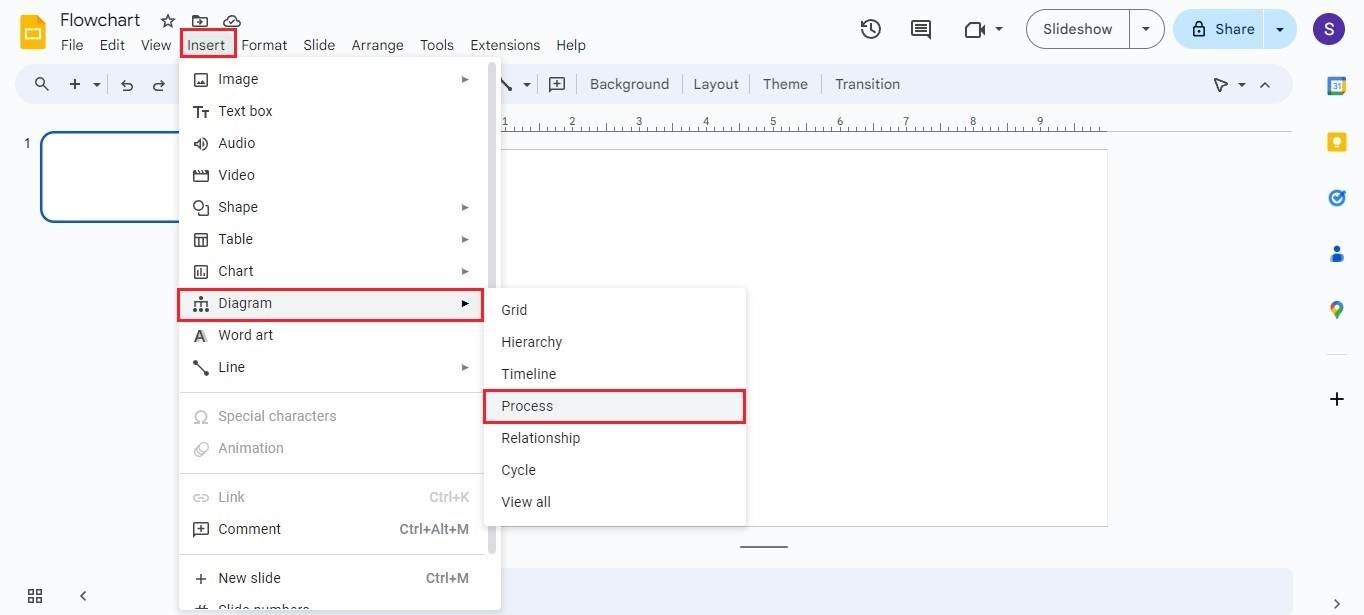
Step 1
Go to Insert > Diagram in the upper navigation pane to find the flowchart templates. On the secondary window, select Process.
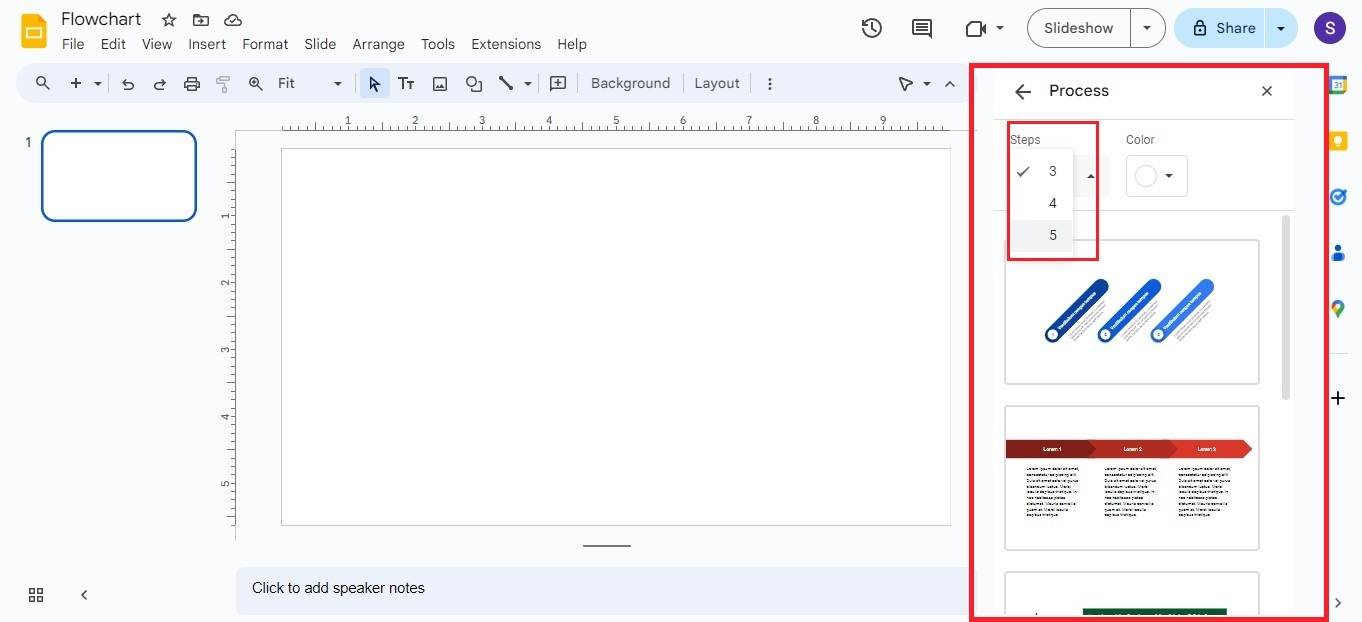
Step 2
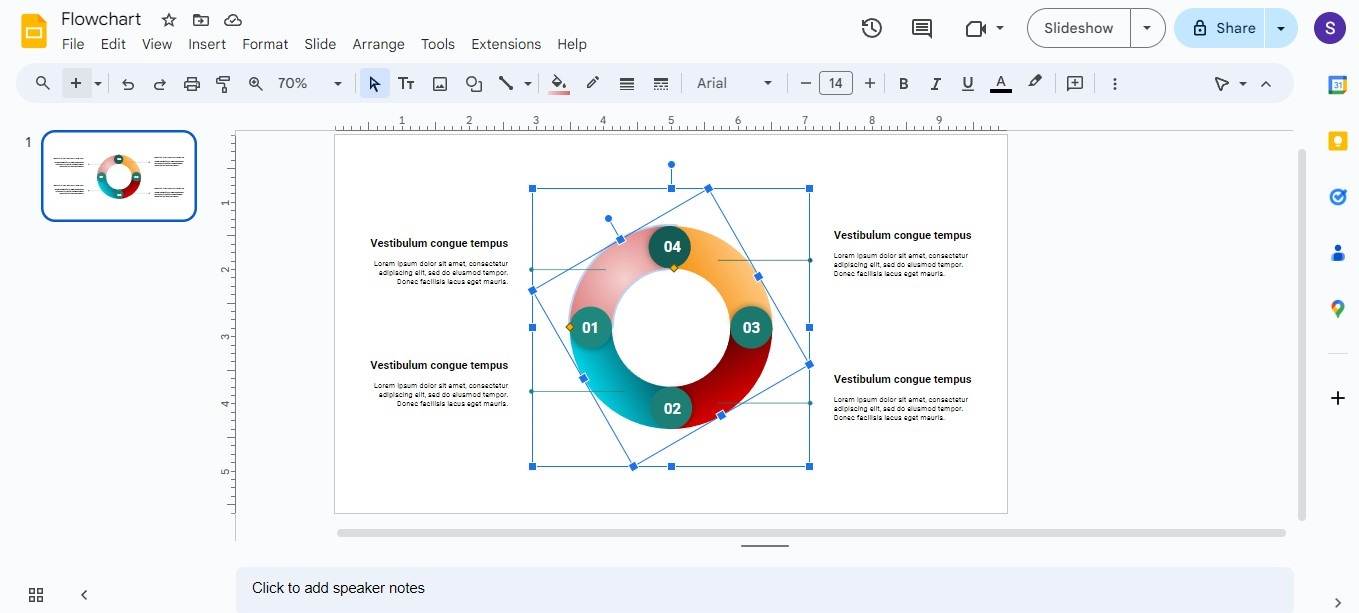
Scroll down and select a flowchart template that works for you on the right panel. You can adjust the number of shapes from the Steps dropdown menu or switch the theme in one click.
Step 3
Click the text boxes or shapes to edit the placeholder texts and add your content.

Step 4
Customize the shape style, text font, size, and alignment. Choose a solid or gradient color from the Fill color dropdown menu in the upper navigation pane.
Method 2: From Scratch
Another option is to build your flowchart manually by adding shapes and connectors to a blank slide, one by one. If time is not a problem, follow these steps to make a flowchart in Google Slides from the start:
Step 1
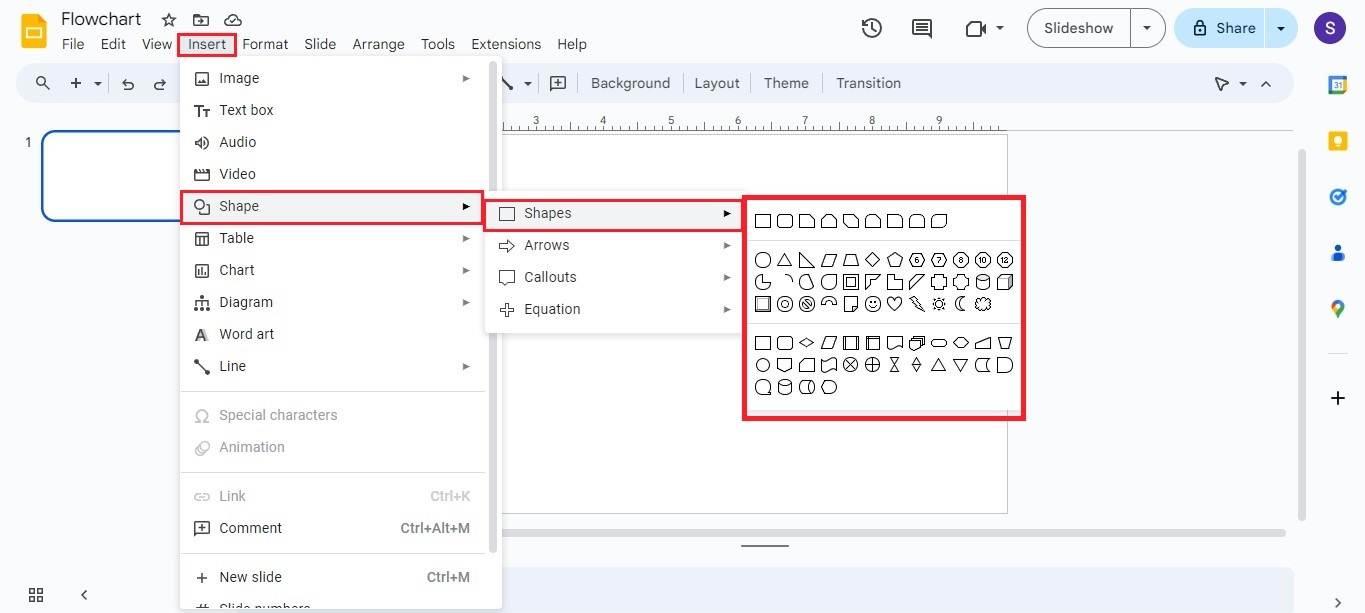
Go to Insert > Shape > Shapes in the top navigation pane. Each flowchart symbol has a different meaning, so make sure to select the ones that will help you visualize your workflow.
Step 2
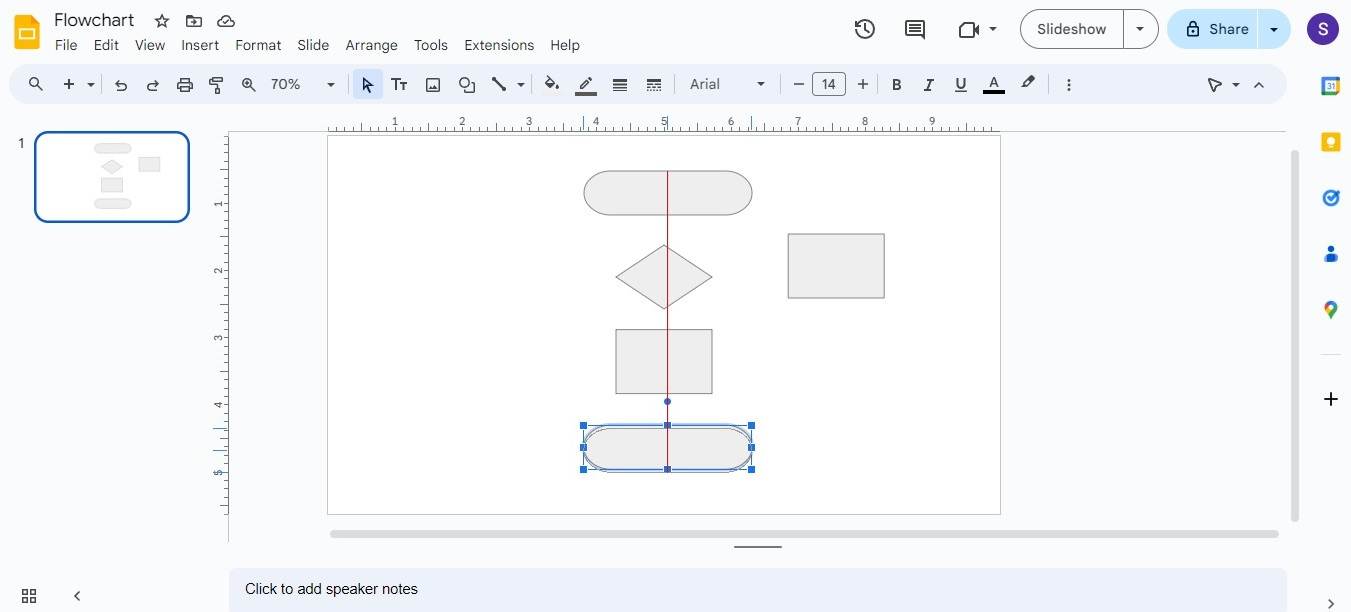
Double-click the shapes to insert them on Google Slides. Drag the shapes to move and align them using the guides.
Step 3
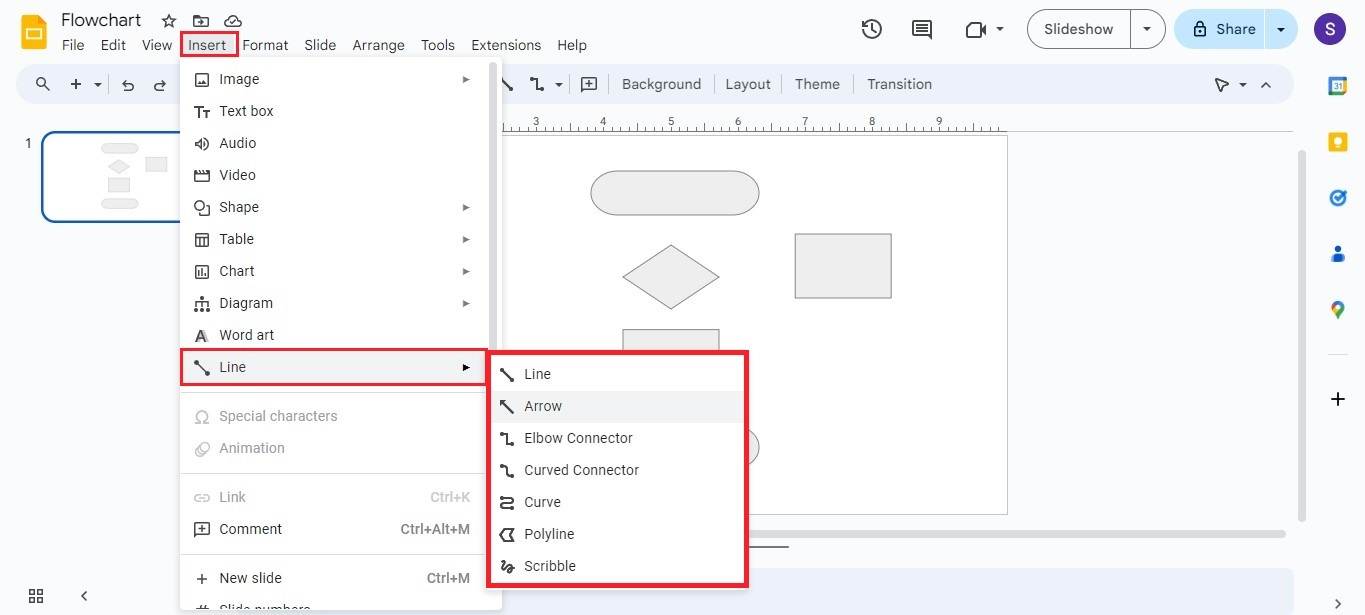
Add connectors to show the flow of the system. Go to Insert > Line > Arrow in the upper navigation pane to link the shapes.
Step 4
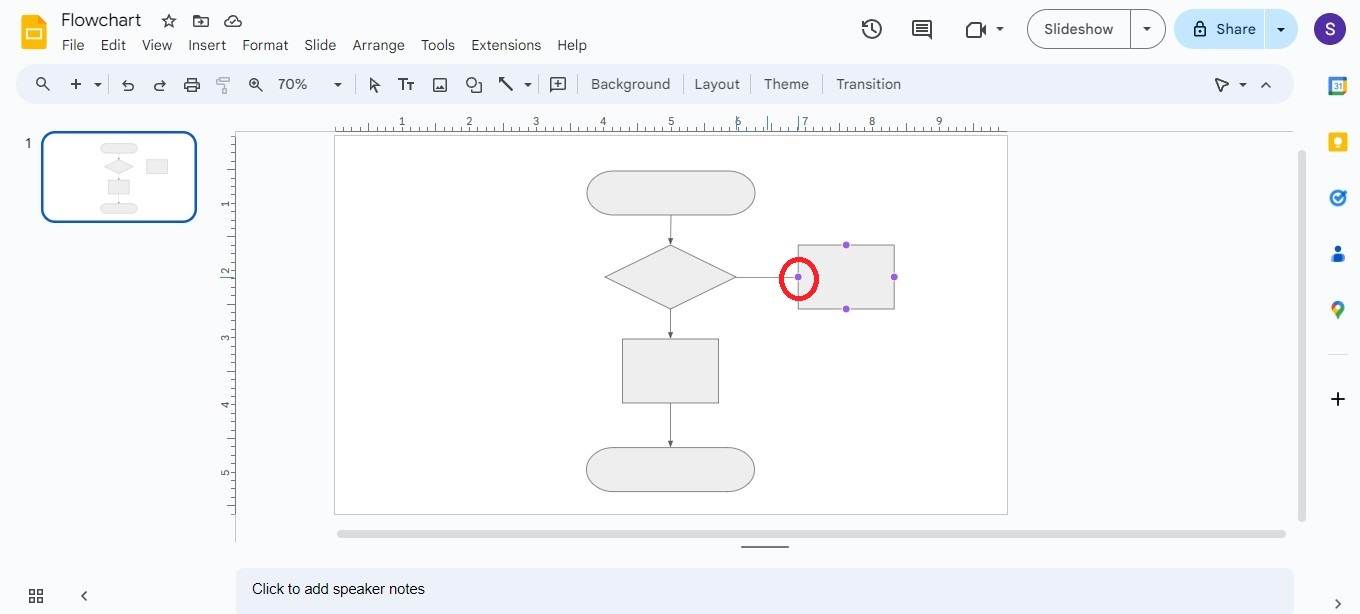
Point your cursor at the shape’s guide points to join it to a second shape.
Step 5
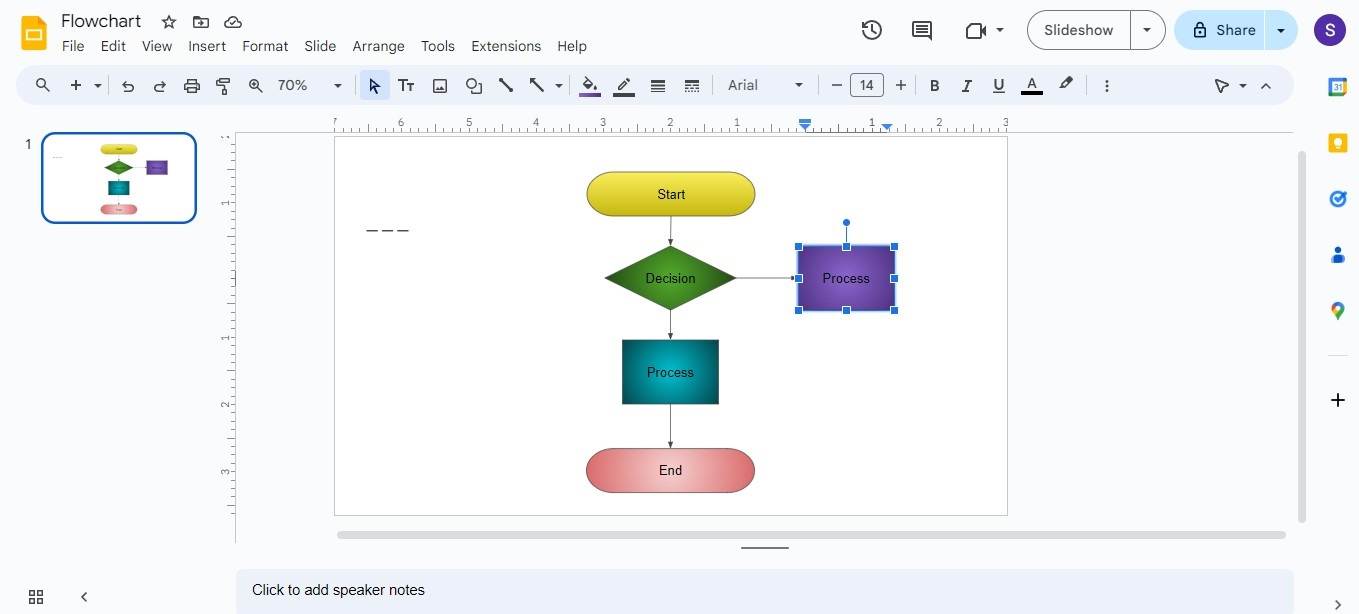
Click a shape in the flowchart to enter your text. Use this space to describe what each symbol represents in the process. Give your flowchart some personality by changing the shape or background colors using the options in the top toolbar.
Making a flowchart in Google Slides—whether from scratch or using its built-in templates—is beginner-friendly. Plus, you don’t need to worry about hitting save every few minutes. Google Slides automatically does that for you.
Google Slides offers five diagram templates, and you can tweak the colors with one click.
But there’s a catch: the templates only allow up to five steps, which might not cut it for more detailed flowcharts. If you need more than five steps, you’ll have to manually add extra shapes.
And to be honest, the limited slide space isn’t ideal for larger, more detailed flowcharts.
If you’re making a simple flowchart with a few steps, Google Slides works well. But for formal presentations or when you need more space and flexibility, especially for complex processes, you might want to check out an alternative like Edraw.AI.
It’s Easier and Faster to Flowchart on Edraw.AI
Similar to Google Slides, Edraw.AI is an easy-to-use online tool that works across various browsers. But Edraw.AI offers a better editing experience. You can try it for free, so you can explore its AI tools, including an AI flowchart generator.
Aside from that, there are more pre-designed flowchart templates to choose from. Work alone or use Edraw.AI’s real-time collaboration for team projects.
How To Make a Flowchart on Edraw.AI
Don’t worry if you don’t have editing experience. You can create a flowchart within a few steps using AI or from its built-in templates.
Method 1: Use AI To Generate One
See how the AI flowchart generator of Edraw.AI can make a flowchart from a text prompt:
Step 1
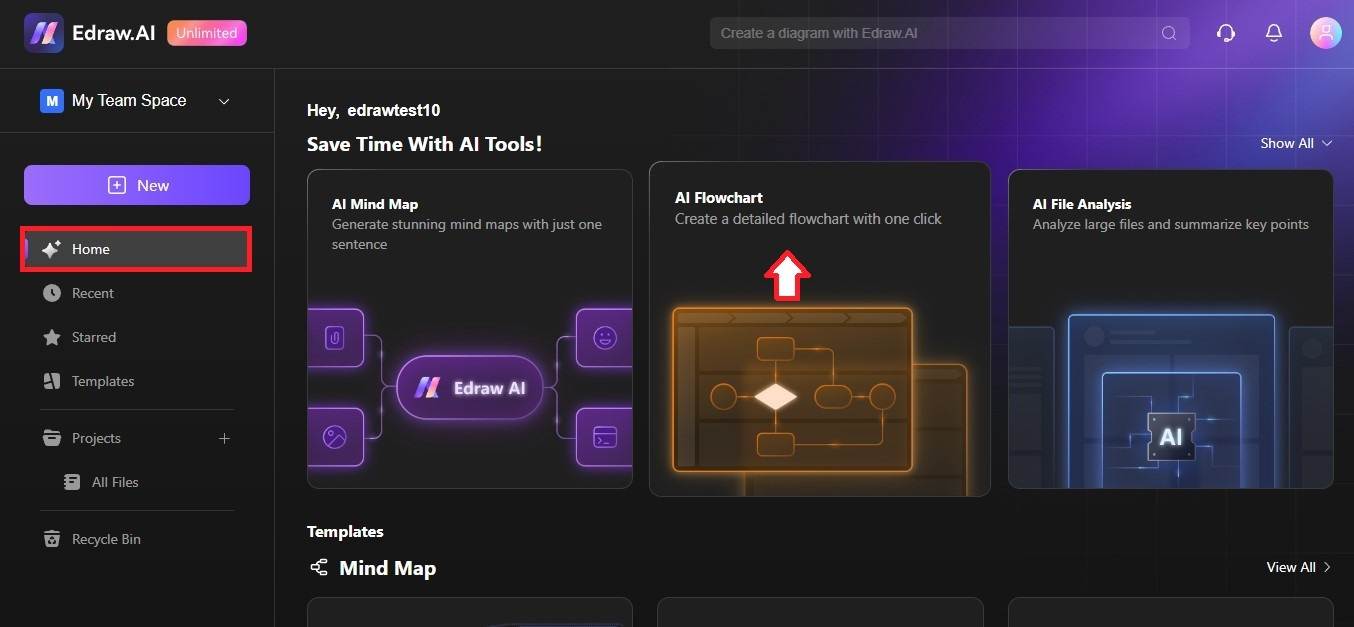
Select AI Flowchart on the main dashboard of the Home page.
Step 2
Describe your flowchart process in the input text box, then click Start. Check the generated flowchart on the right side, then click Edit in Canvas.

Step 3
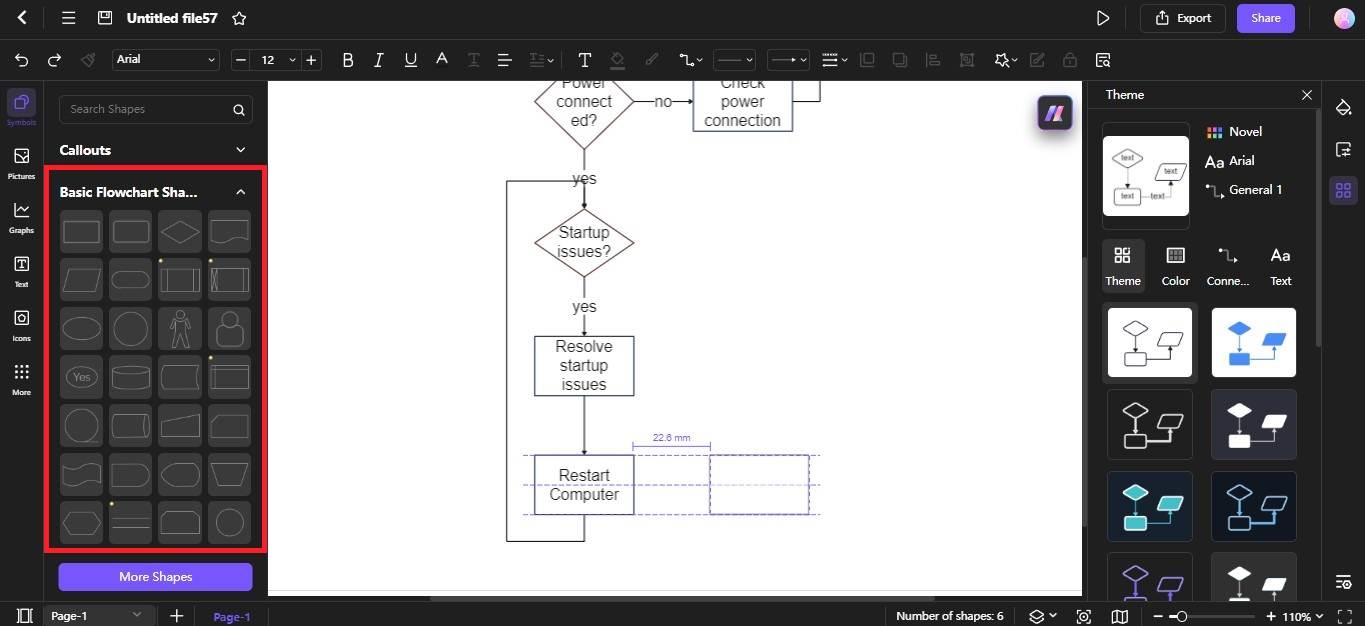
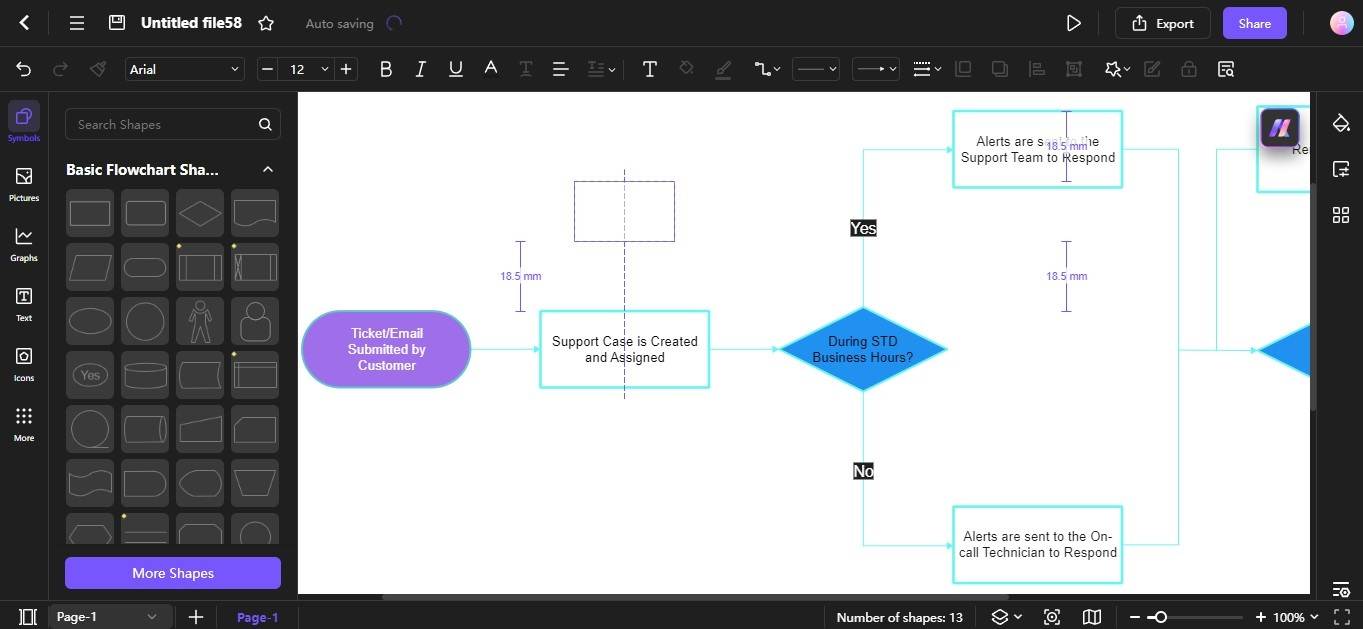
Move the shapes anywhere on the canvas to arrange them depending on the process you will make. To insert more flowchart symbols, select one from the Basic Flowchart Shapes library.
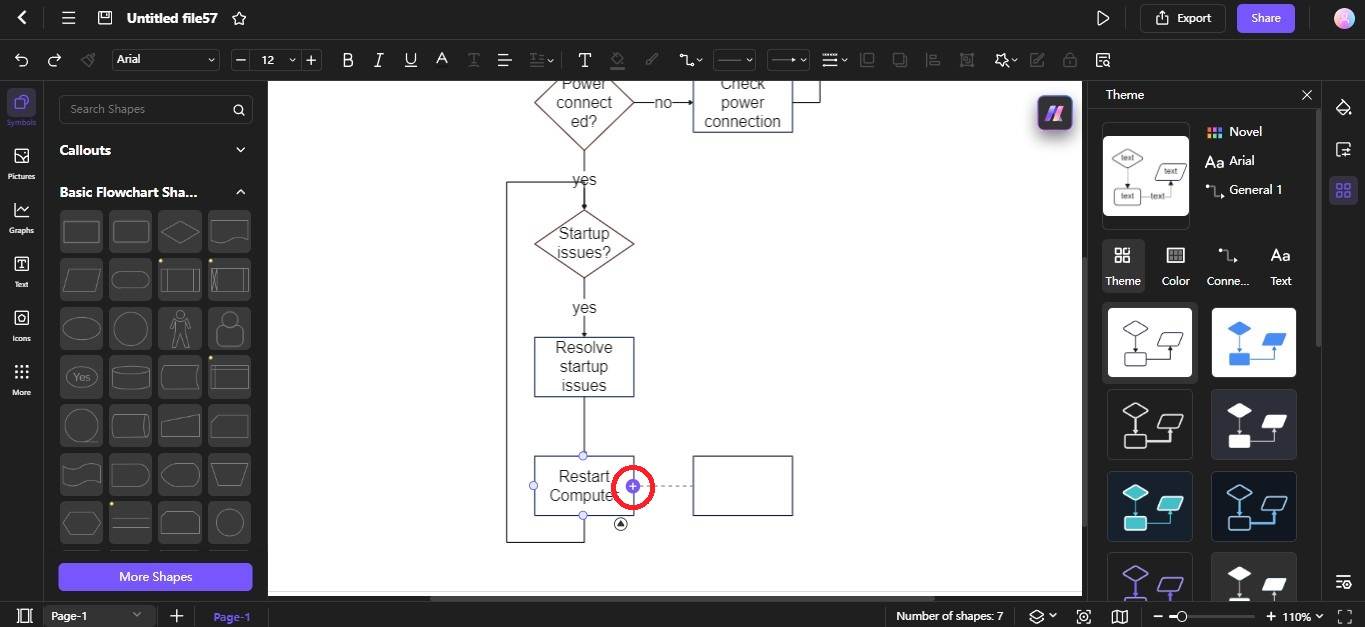
Step 4
Bring your cursor over a shape and click the + icon to join it with another shape in the flowchart.
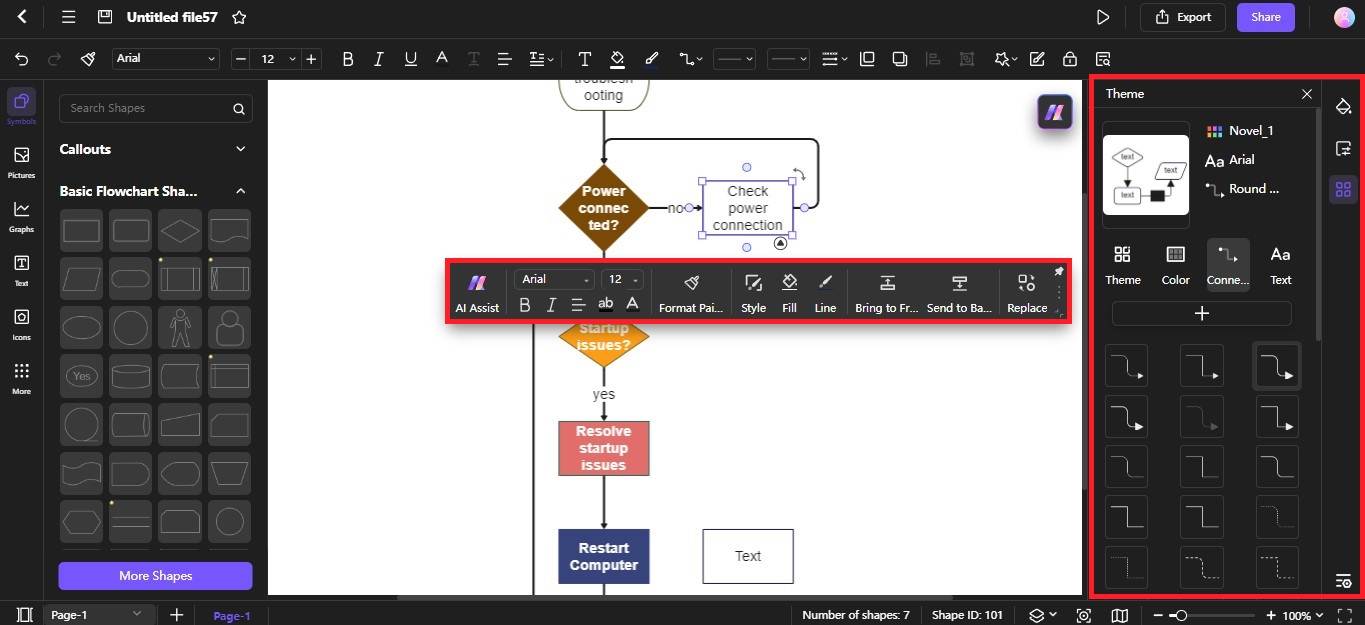
Step 5
Click a shape to add text. Once done, customize the style to match your presentation. Use the right panel and floating toolbar to change the connector style, theme, font, and more.
Method 2: Use a Template
See how simple it is to customize a flowchart template in Edraw.AI:
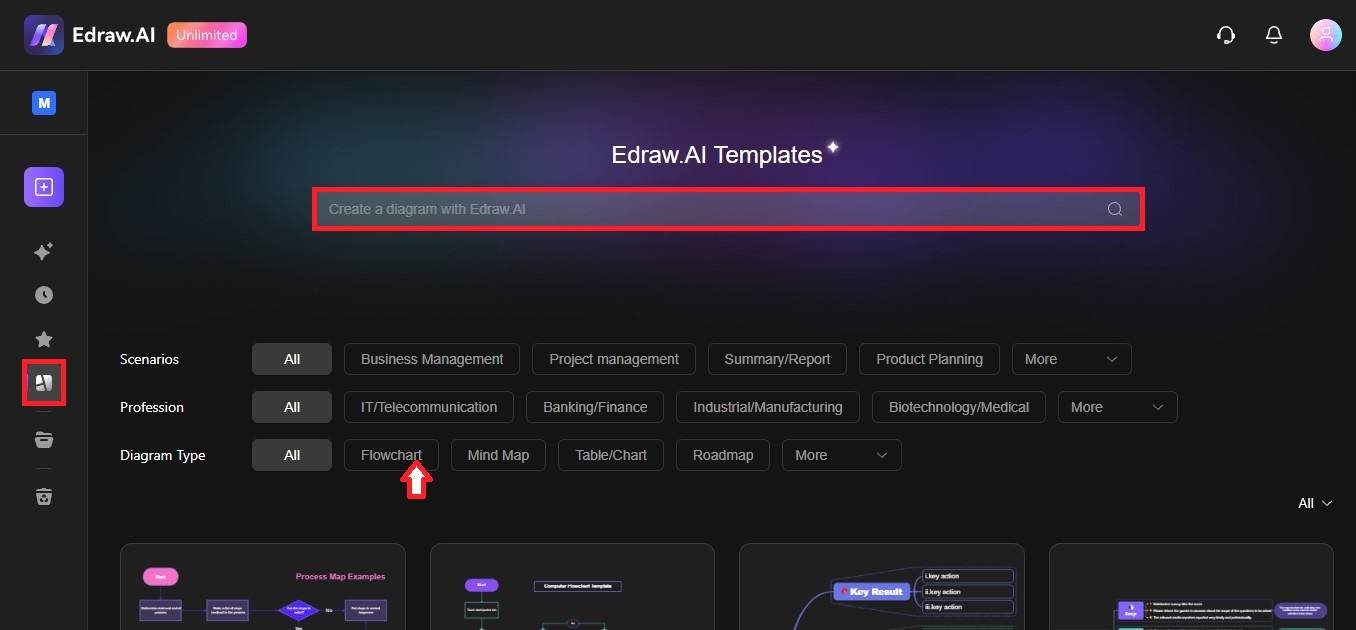
Step 1
Open the templates page from the left-side navigation pane. Enter the diagram you want to use at the search bar or select Flowchart in the Diagram Type category to filter the templates.
Step 2
Scroll down to view all the flowchart templates in Edraw.AI. You can sort the search results with Free or Premium templates.

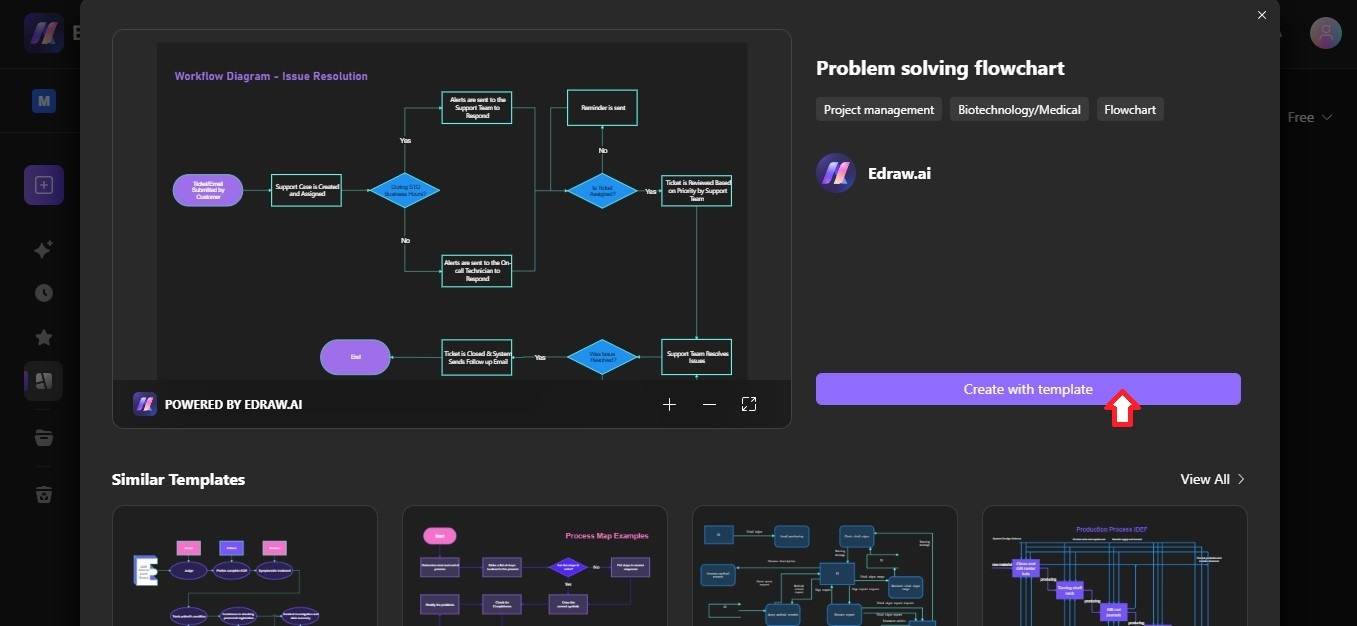
Step 3
Click Create with template to customize it on the editing canvas.
Step 4
Drag and drop the shapes anywhere on the canvas or add more shapes from the library on the left panel. There are guidelines to help you reposition and align the shapes on the flowchart.
Step 5
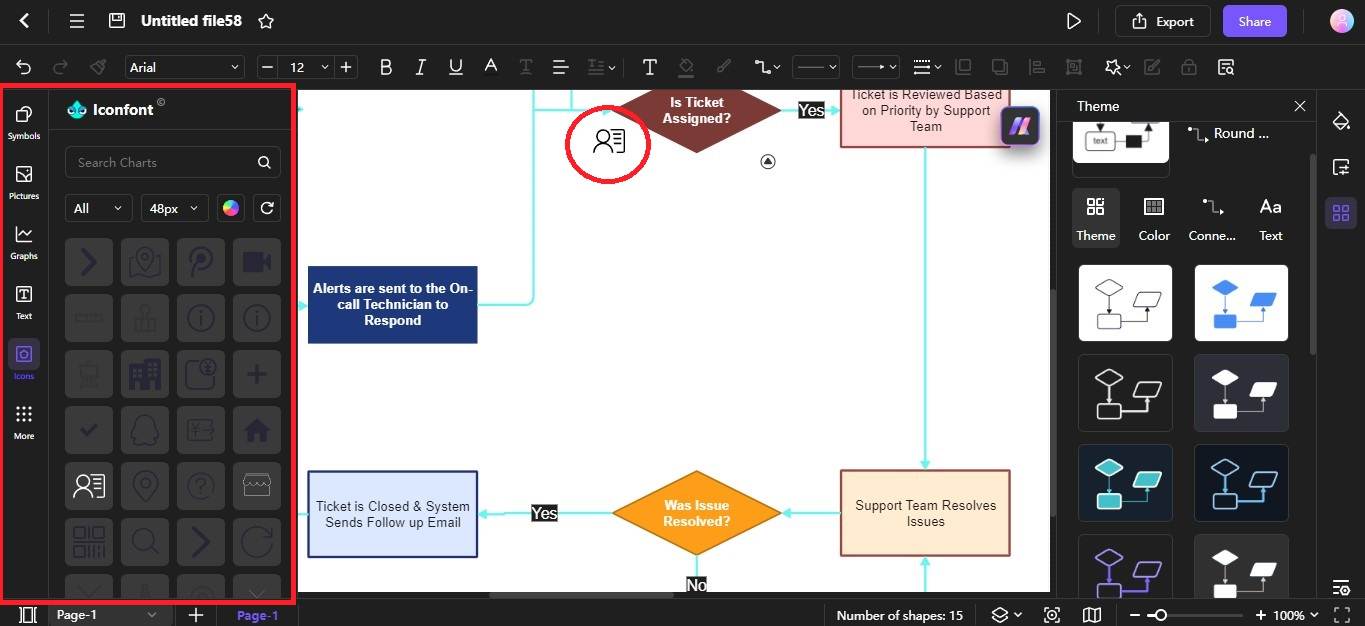
Click a shape and use the floating toolbar to adjust the font style, color, and other options. You can also add icons from the Icons section on the left panel.
Start Flowcharting With Edraw.AI
You’ve already explored how Google Slides can help with simple flowcharts, but if you’re looking for less hassle, let Edraw.AI tools do the work for you.
The drag-and-drop interface, unlimited canvas, and easy customization make creating impactful flowcharts easy and fast.
Focus on your content while Edraw.AI’s AI flowchart generator and built-in templates take care of the design. In just minutes, you can have a flowchart ready to impress your audience in any presentation or report.

Try Our Products
Now for Free

Make 210 types of diagrams: flowcharts, blueprints, UML, etc
AI Mind Map, AI PPT, real-time
collaborative brainstorming