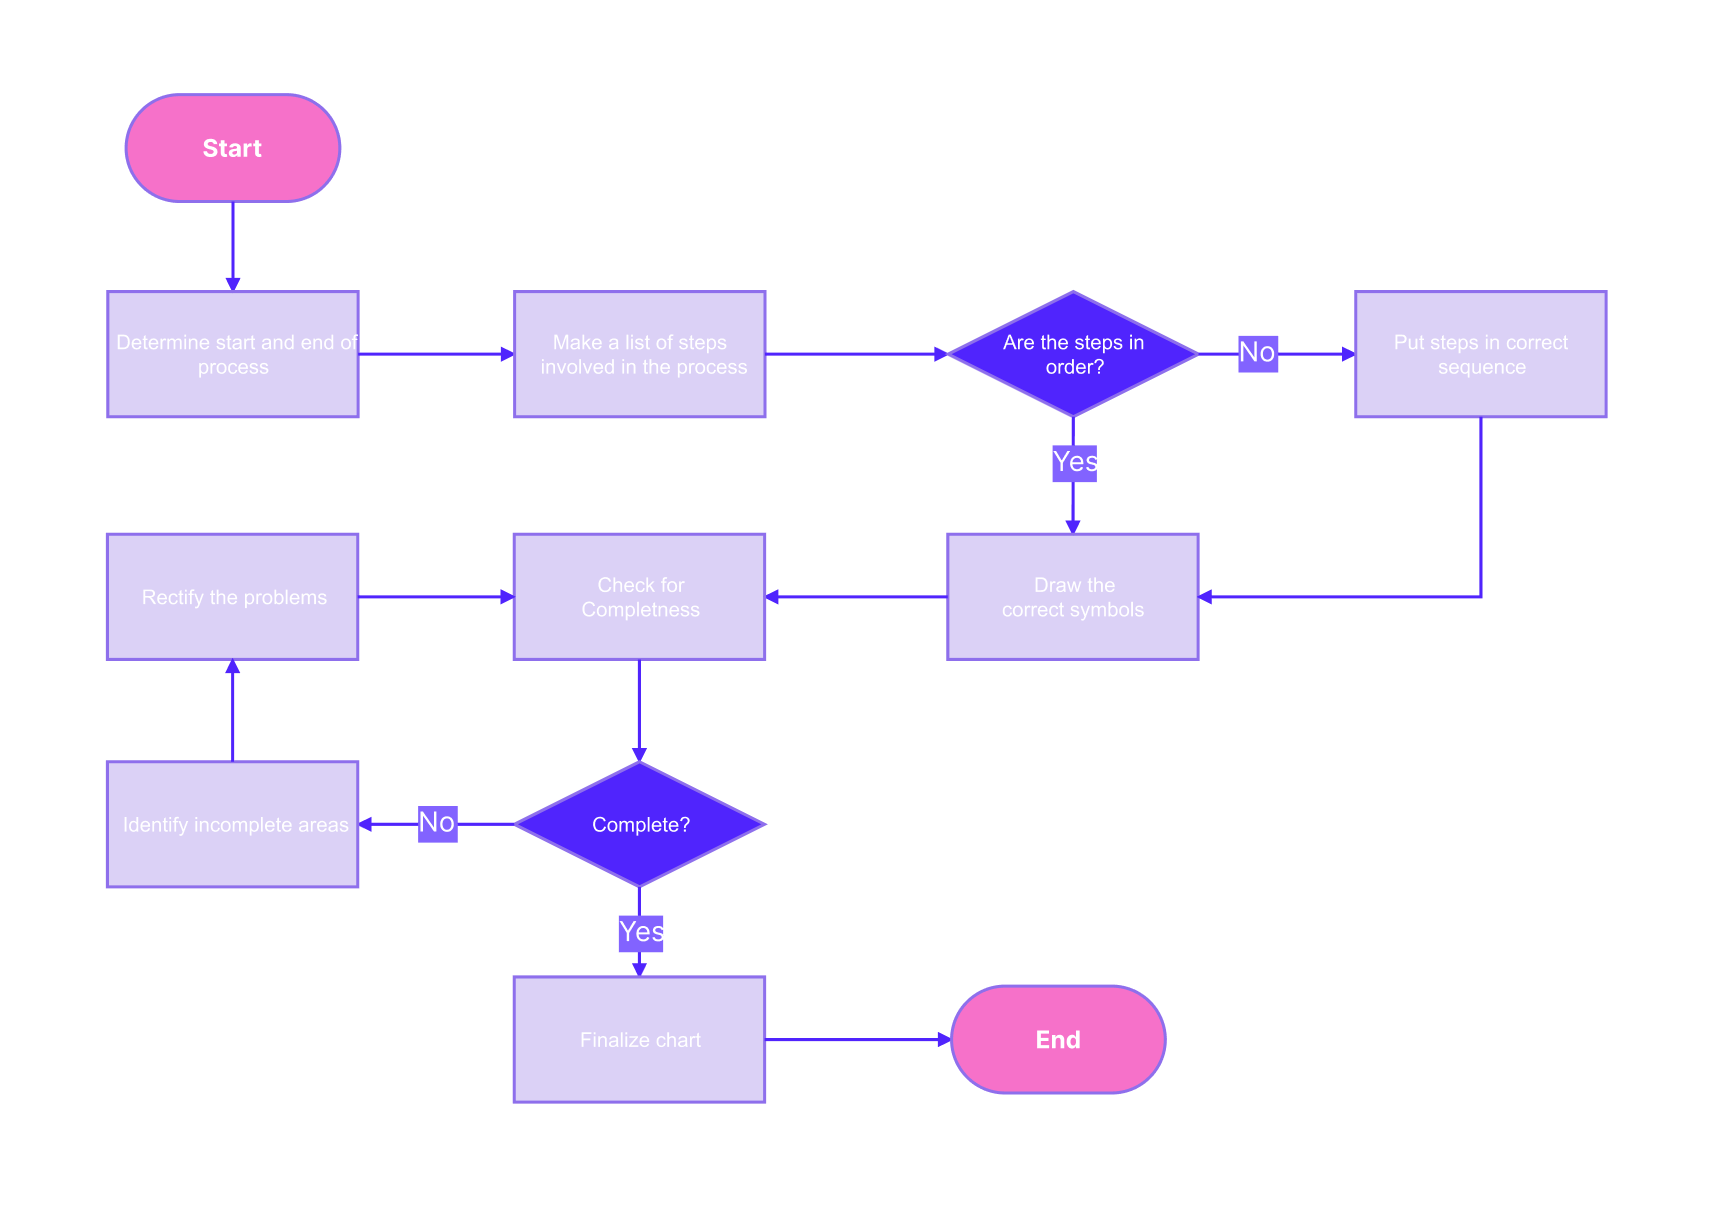
Choosing the right tool can be confusing when looking to create diagrams or flowcharts. However, one tool stands out among various brands: Google.
Google Drawings is Google’s version of a diagramming or flowcharting tool. It’s integrated within the Google Workspace and other Google apps like Docs, Sheets, and the like. You can access it from any of the apps you normally use.
Here, you’ll learn how to create flowcharts specifically. So, if you want to learn how to create flowcharts in Google Drawings, just read through. By the end of this article, you’ll be churning out flowcharts in no time.
In this article
Steps To Make a Flowchart in Google Drawings
As promised, the steps to create flowcharts in Google Drawings are in this section. It’s easy to do, and you can do the steps independently. Remember, though, that exploring a tool is the best way to master it and all that it offers.
You’ll be guided through the primary ways to create flowcharts, and there are relevant tips you may find useful. Load up Google Drawings on your browser to get started. Once you’re in, follow the steps provided below:
Step 1
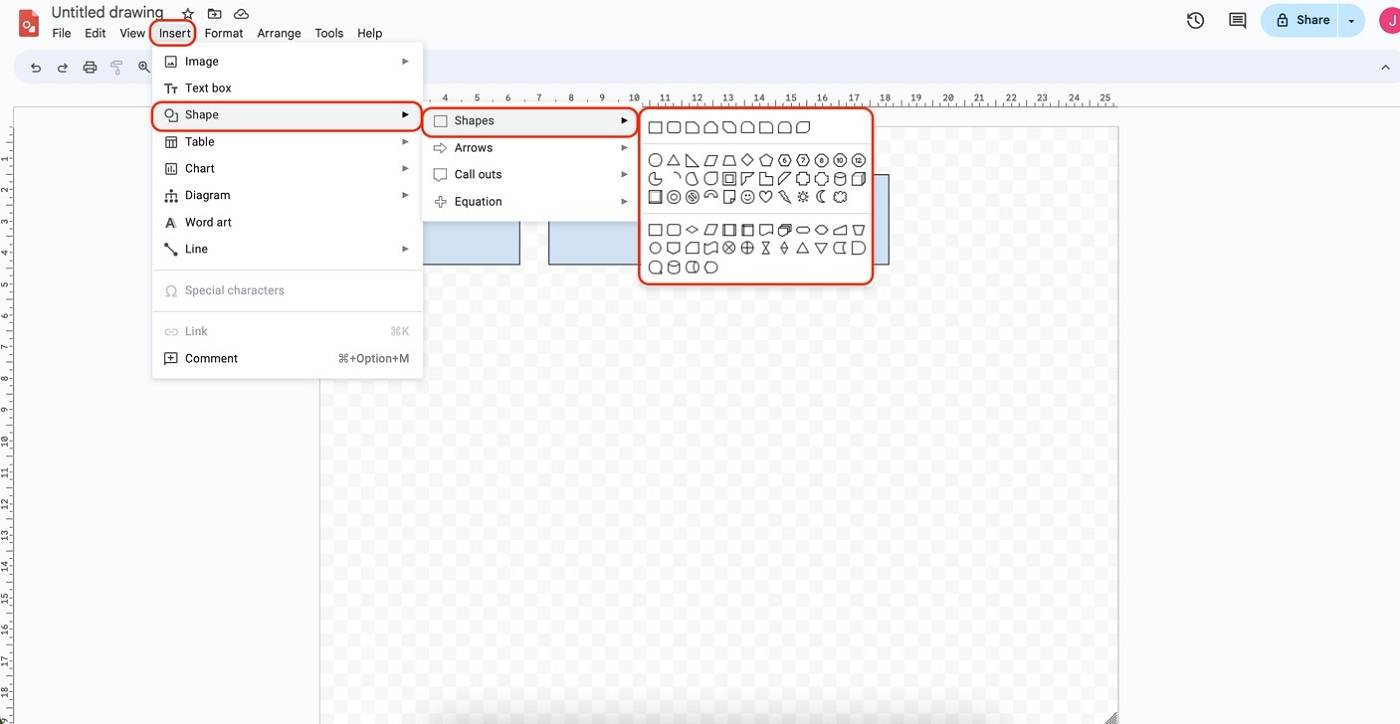
Start your flowchart by adding shapes. Do this by going to Insert > Shape > Shapes, then select a shape you want to add. Afterward, click and drag to add the shape to the canvas.
Step 2
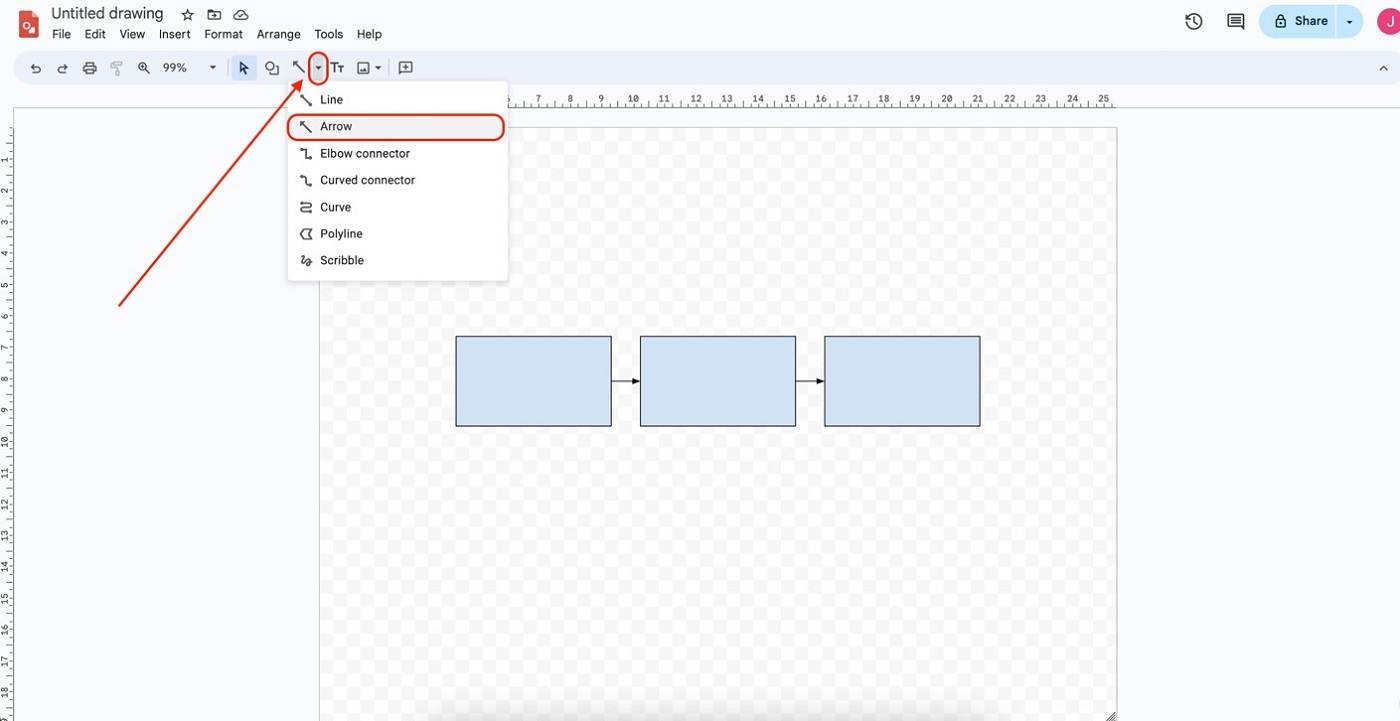
Connect your shapes with arrows. To do this, click Select Line > Arrow. Then, click and drag from the starting shape to the destination shape.
Step 3
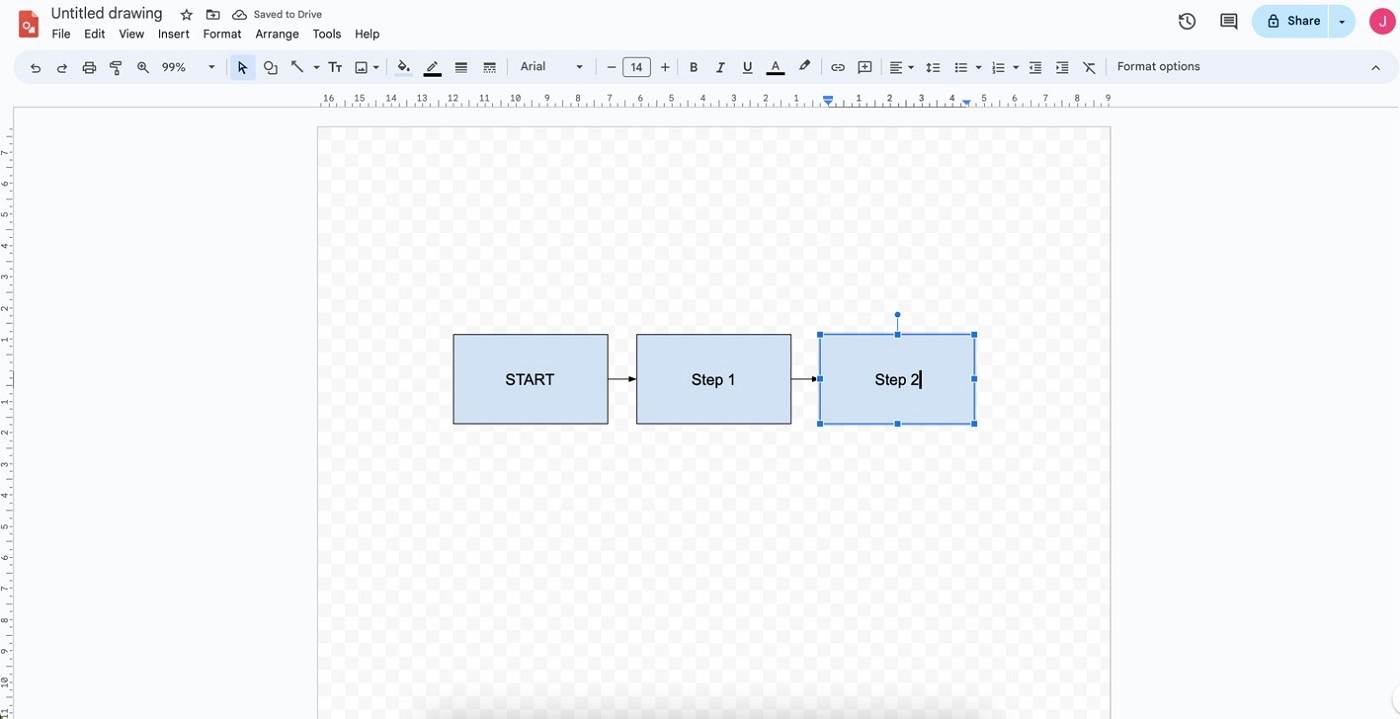
Start labeling the shapes. Double-click any element and type in their labels.
Step 4
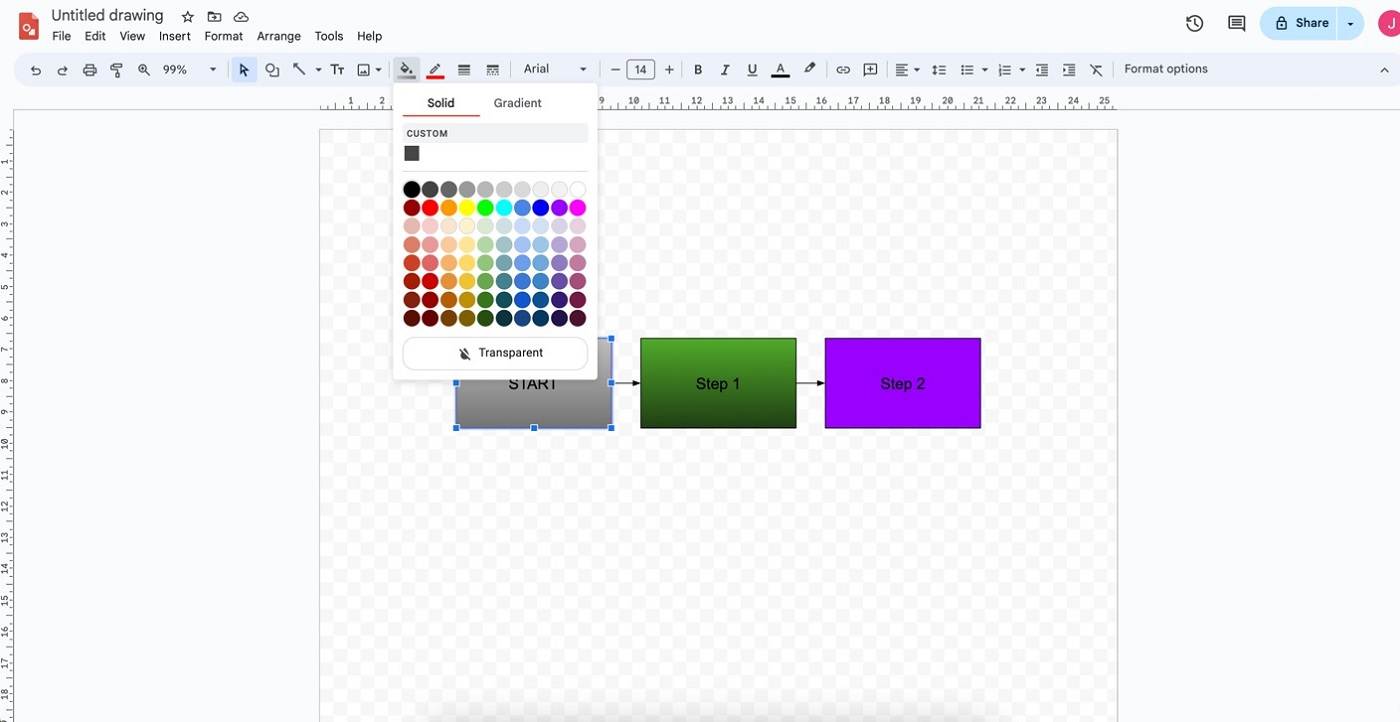
To change your flowchart’s colors/appearance, click the Fill icon, then use the color palettes under Solid or Gradient.
And there you have it; you know the simple steps to create Google Drawings flowcharts. More or less, what you saw in the steps are the functionalities and designs you can utilize to create flowcharts in the app. This is the limitation of Google Drawings. While there are templates, there are no more creative flowcharts available.
If you’re looking for more in-depth flowcharting capabilities and customization options, read through the next section; there’s a treat for you.
It’s Easier and Faster To Flowchart on Edraw.AI
While Google Drawings offers a quick and easy way to create flowcharts, as you’ve seen, the creative and technical options can be a bit limiting. You might have mastered the basics and still be looking for more. Thus, it’s time to try a new, more dedicated diagramming tool: Edraw.AI.
Edraw.AI is an online diagramming tool that focuses on expanding your charting capabilities with a powerful feature set. It does this by saving you time through templates and AI generation and providing you with deep customization possibilities.
This means you can get a jumpstart on your work by using pre-made flowcharts and then customize it to the extent of satisfaction. Using the tool can be a fun experience, especially with its real-time collaboration capabilities, which allow you to work on flowcharts simultaneously with teammates or friends.
Method 1: Use AI To Generate One
The first way to create flowcharts with Edraw.AI is with its AI Flowchart generator. It’s as easy as typing in a prompt and waiting for results. However, you’d better give it that much-needed human touch so your flowcharts are as informative as possible. To use the tool, follow the steps below:
Step 1
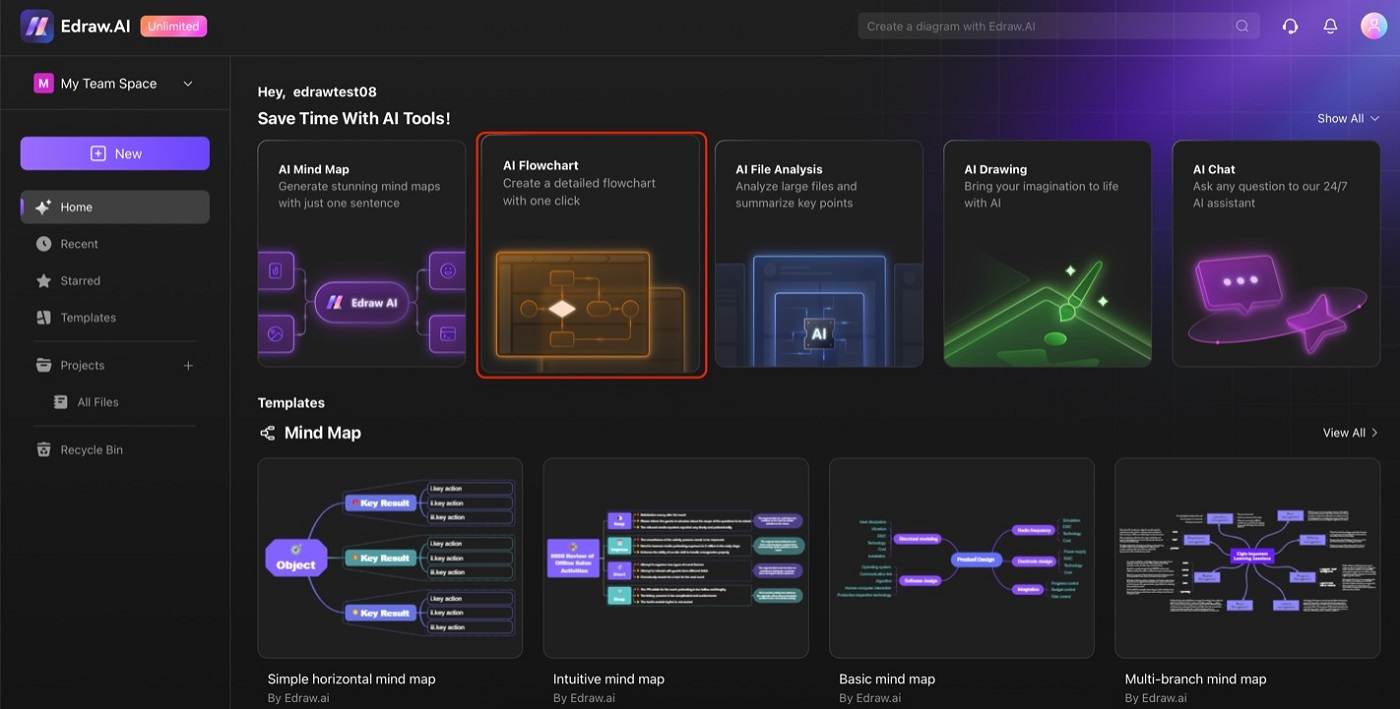
On the Home page, click AI Flowchart.
Step 2
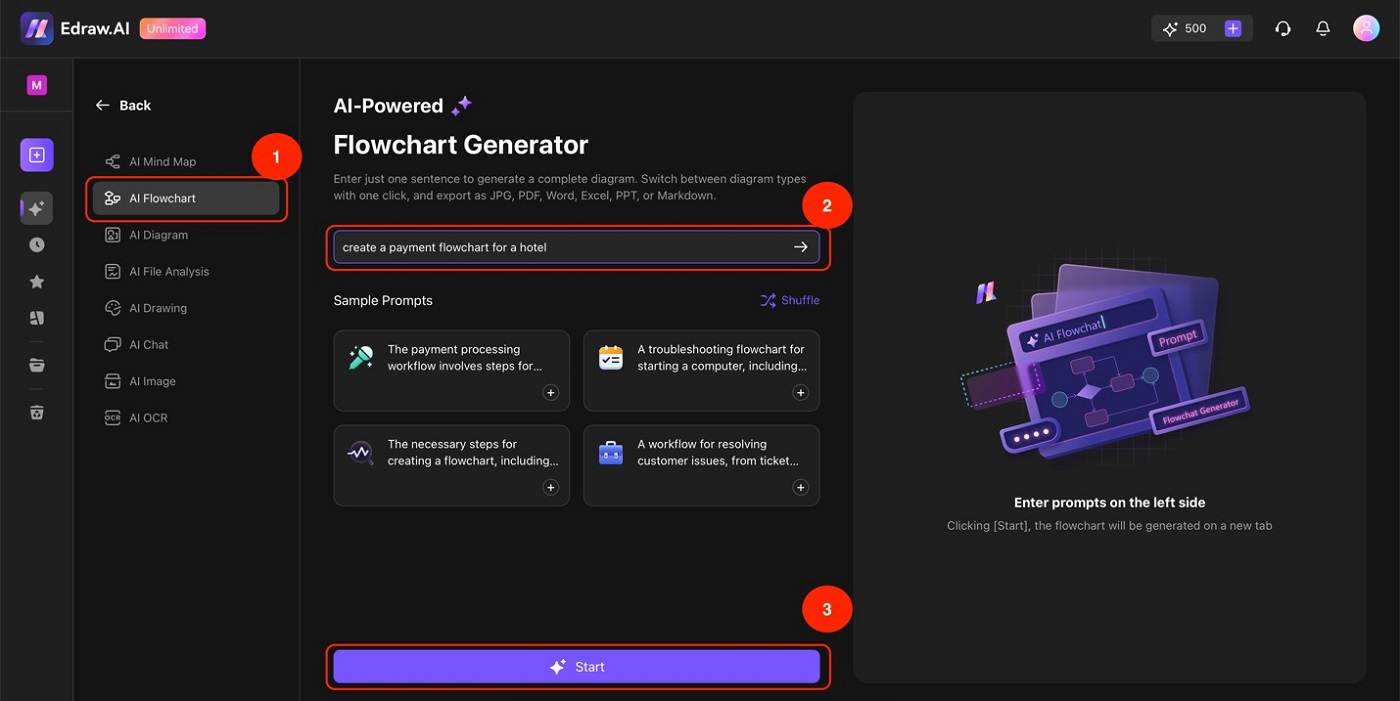
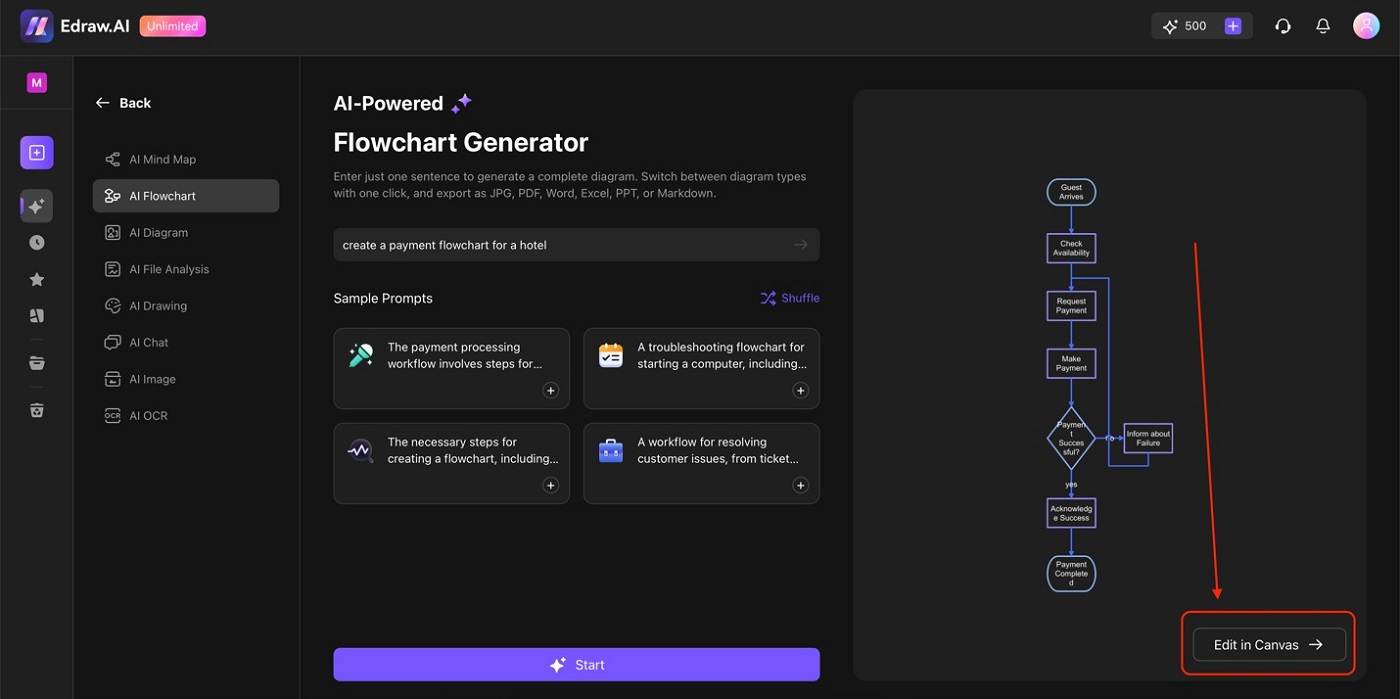
Then, in AI Flowchart, use the text box to type in your prompt. Click Start to begin the process.
Step 3
After the AI generates the flowchart, click Edit in Canvas.
Step 4
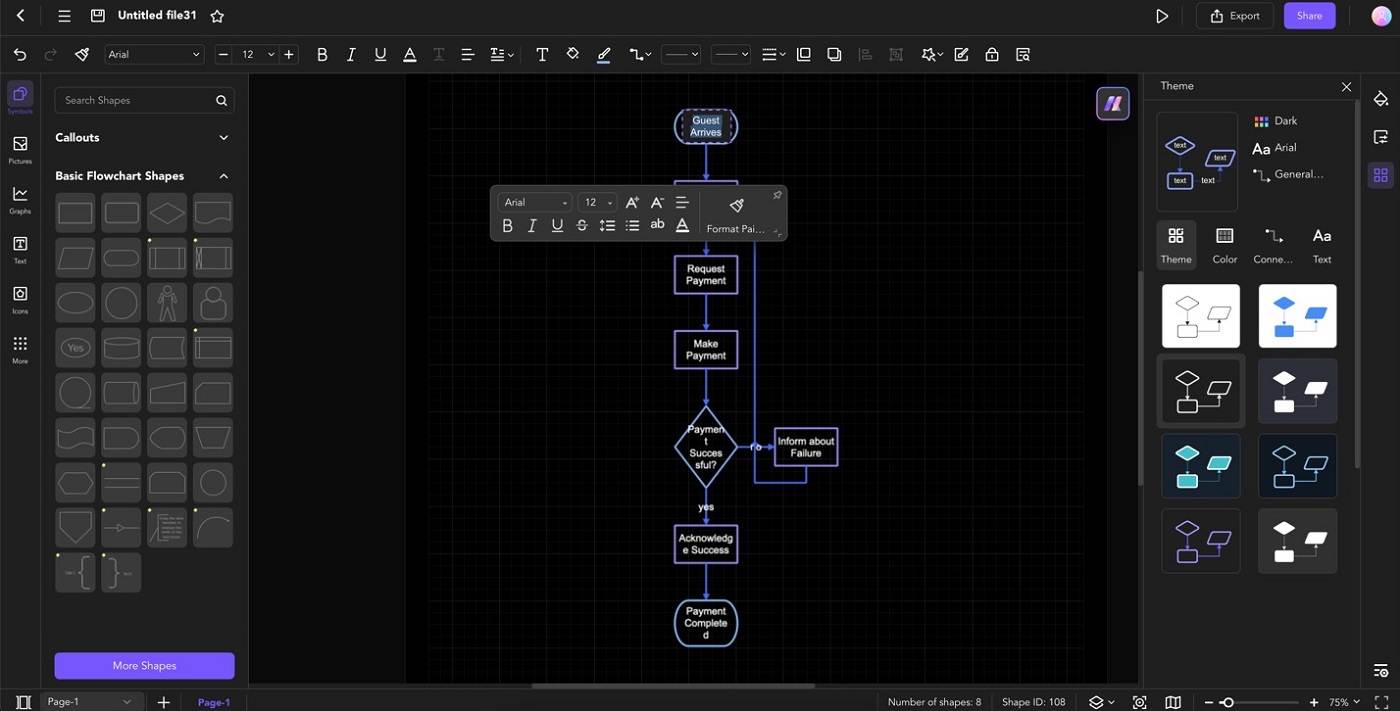
Double-click any shape/element to edit the text to your liking. To change font styles, sizes, or colors, use the appearing customization bar.
Step 5
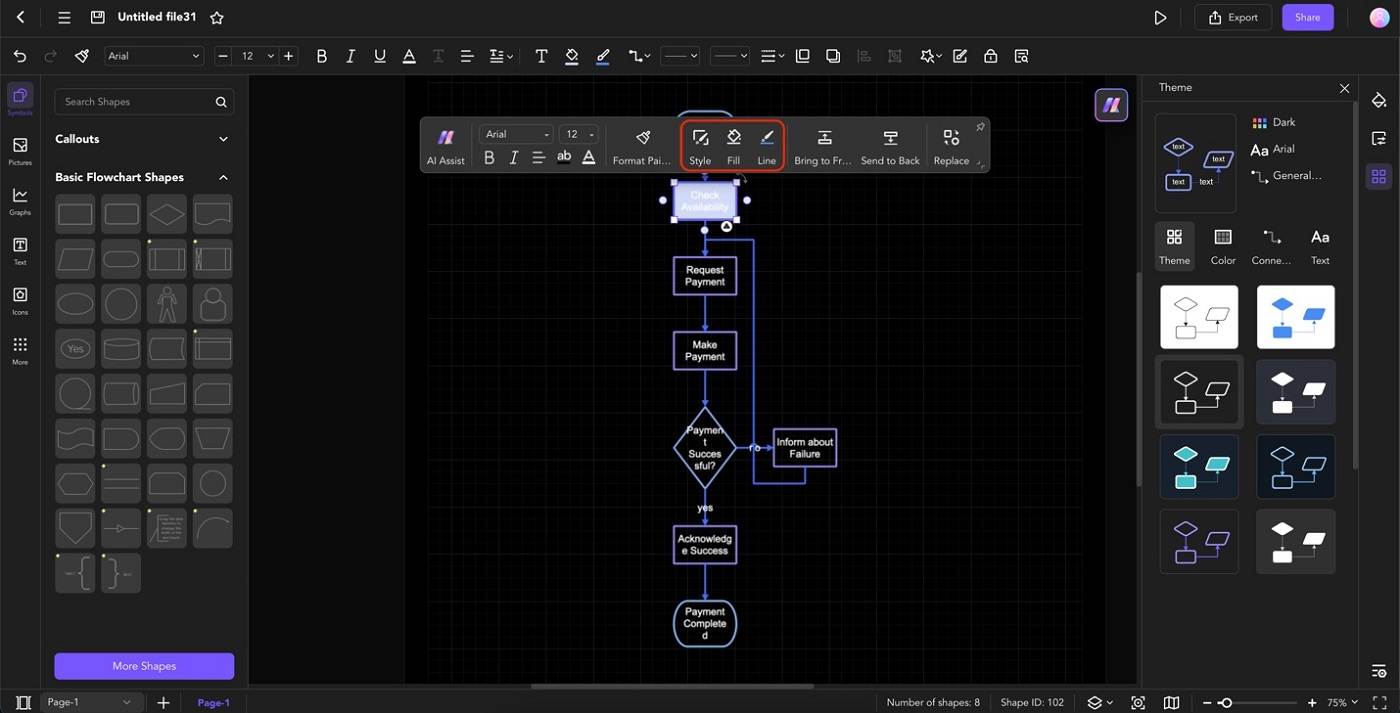
Click any element/shape and use the floating toolbar to customize them. Use the Style, Fill, or Line features. The Theme menu on the right panel is also a quick way to customize the flowchart.
Step 6
Add new shapes through the Symbols panel (drag-and-drop functionality). To delete shapes, just click them and hit Delete/Backspace on your keyboard.
Method 2: Use a Template
Another way to quickly start your flowcharts in Edraw.AI is with templates. Edraw.AI hosts a lot of platforms and user-made flowcharts from which you can choose. This eliminates the need to think about prompts or to create flowcharts from scratch. You can simply browse and choose what you want.
To access flowchart templates in Edraw.AI, follow the steps below:
Step 1
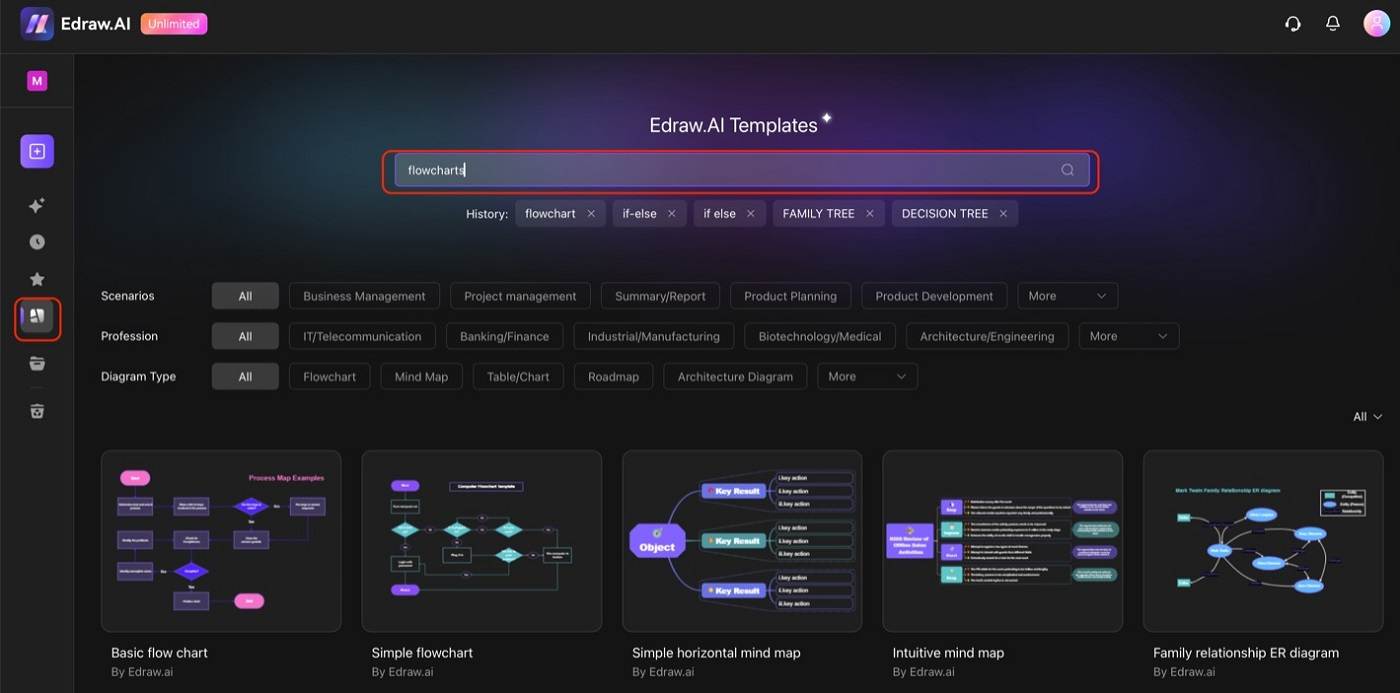
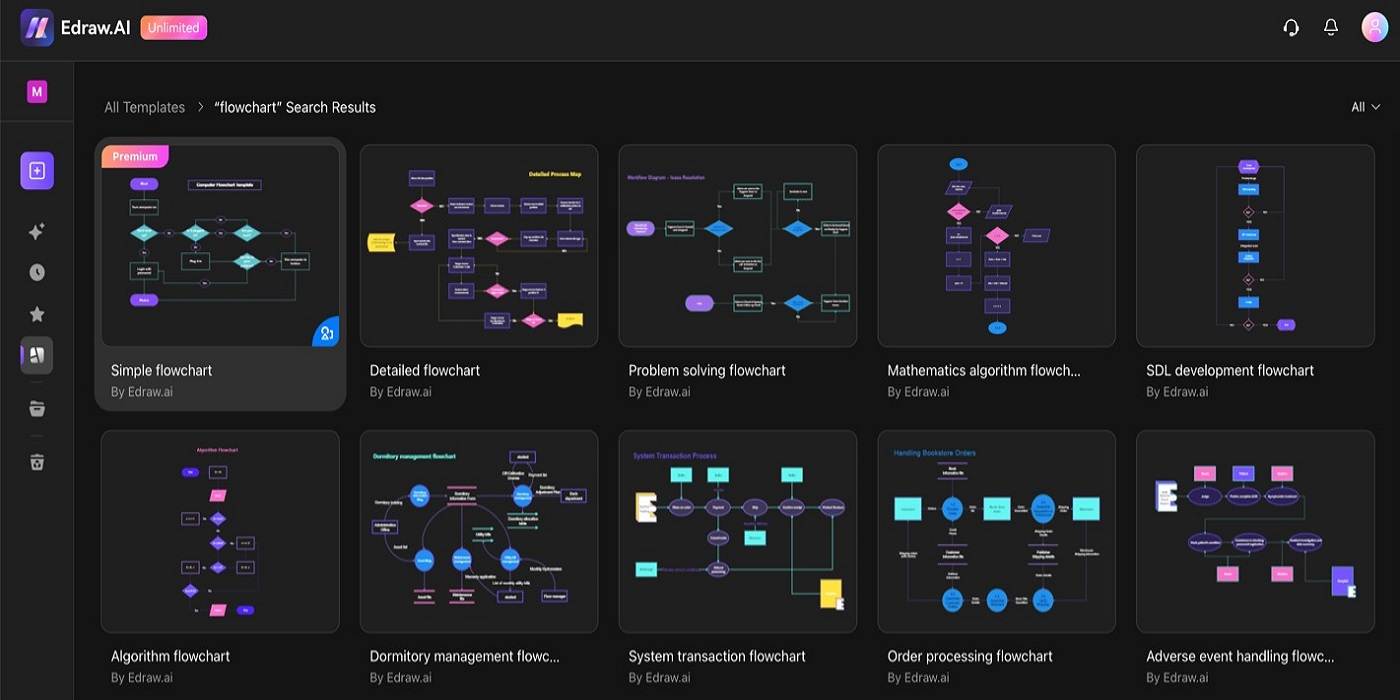
Click the Templates icon on the left-hand panel on the homepage. In the search bar, type in “flowchart” as the keyword.
Step 2
Click any template from the results.
Step 3
On the appearing window, click Create with template.
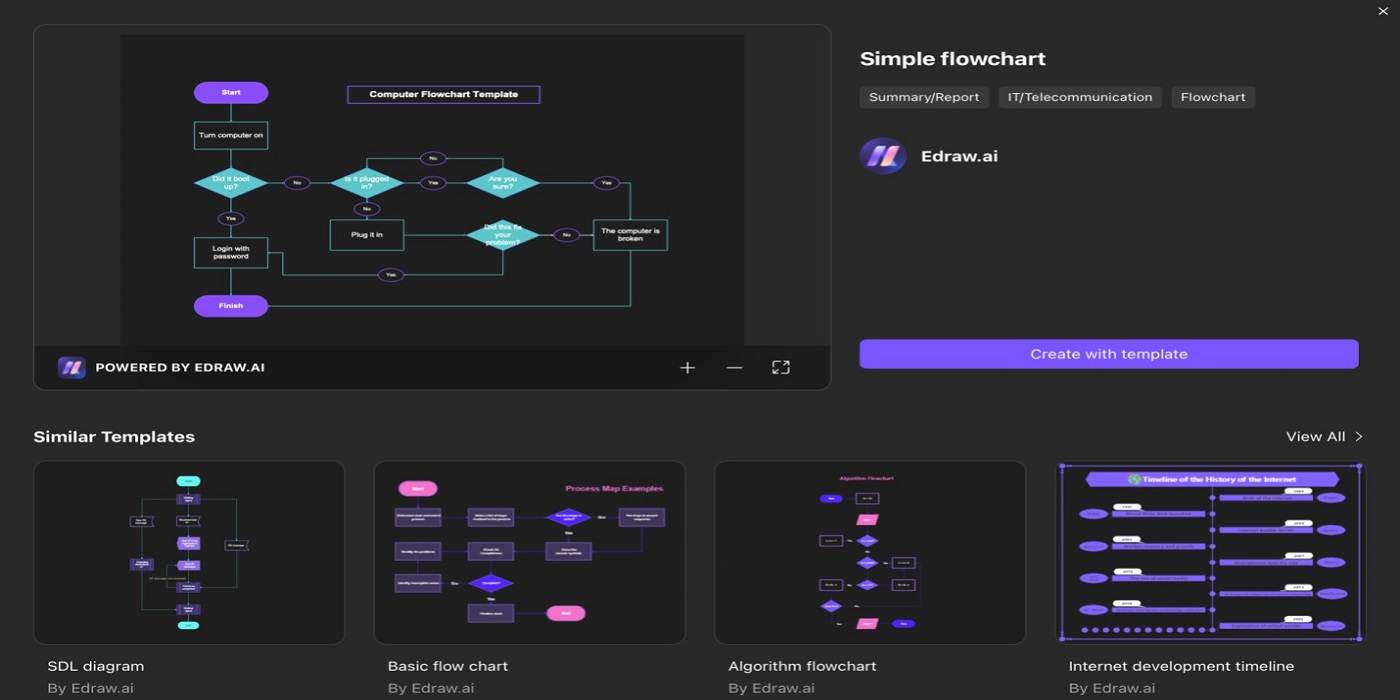
After opening the template in the canvas, follow Steps 4-6 in Method 1 to customize them.
Start Flowcharting With Edraw.AI
Now that you’ve seen the powerful features that Edraw.AI offers, it’s time to dive in and start creating. Whether you choose to create flowcharts with the AI’s capabilities or begin with a template, you’ll find the process easy to follow. Edraw.AI’s ease of use lets you focus your energy on the flowchart’s content rather than stressing out on how to access this or that.
Don’t hesitate to experiment with different templates, AI prompts, and customization options. As you become more familiar with the tool, you’ll discover new ways to bring your flowcharts to life. So why wait? Start presenting complex processes or steps into easy-to-follow and visually appealing flowcharts today.

