Are you tired of making floor plans using expensive tools on the Internet? Well, I was, too. Until I realized I could use Microsoft Excel to create a floor at a much more affordable price. However, creating a floor plan in Excel is not as easy as it seems.
In this article
If you are creative enough to make floor plan symbols using the Excel shape drawing feature, it might be the only tool you need. If that's confusing, we will get you through a step-by-step procedure to create a floor plan in Excel. Read till the end to learn the basics.
Steps to Create a Floor in Excel
I will guide you in creating a floor plan using different Excel features and functionality in five steps.
1.1 Set Up Excel Graph Paper & Grids
We know that Excel is not primarily developed for making floor plans. Therefore, it does not have a feature to display accurate dimensions. Thankfully, it has graph paper with rows and columns of the same size, which makes it easier to create a floor plan.
By default, the row's height and column width will not be the same. Thus, we will first standardize their sizes in pixels or inches. Please note that 1 inch is equal to 96 pixels.
We will select all columns and rows by clicking the small arrow once. It will automatically all the rows and columns for you and save you a few minutes.
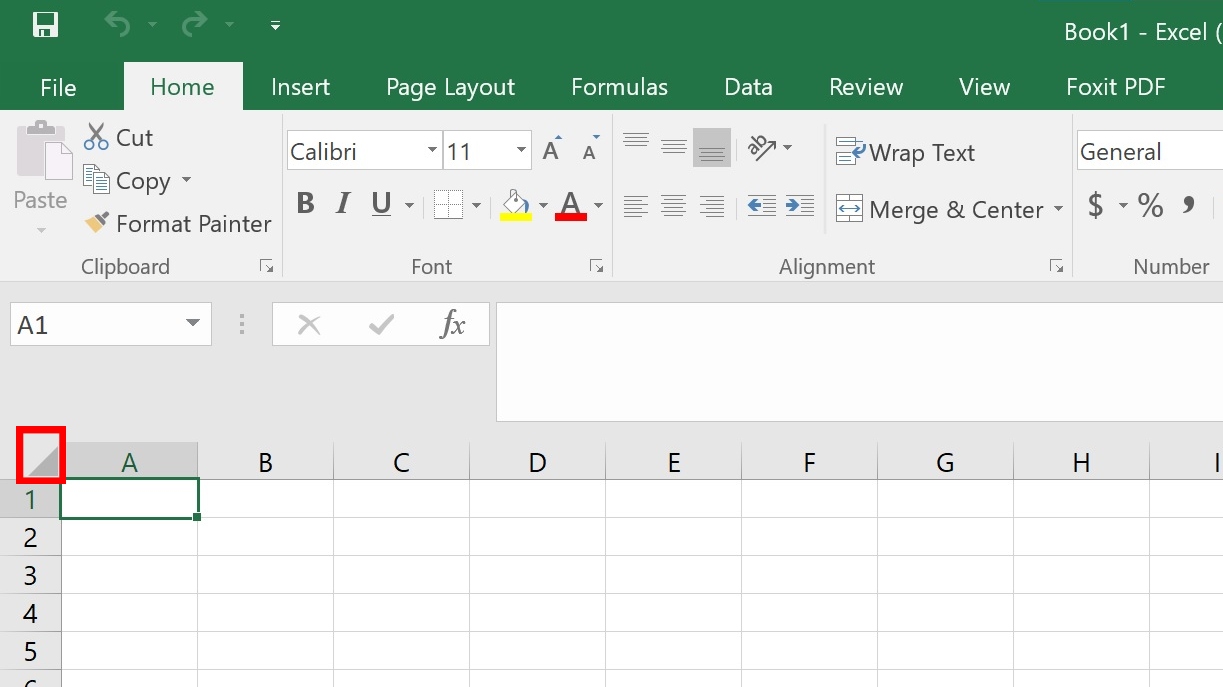
After selecting all the columns and rows, adjust the width and height to 1 inch or 96 pixels. You can easily do this by dragging your mouse between columns A and B and increasing the width to 1 inch (96 pixels). Similarly, drag the mouse.
The primary goal is to make your Excel grid into squares to have accurate dimensions for your floor plan.
In addition, you can also adjust the width and column by clicking Format>Row Height and Column Width.
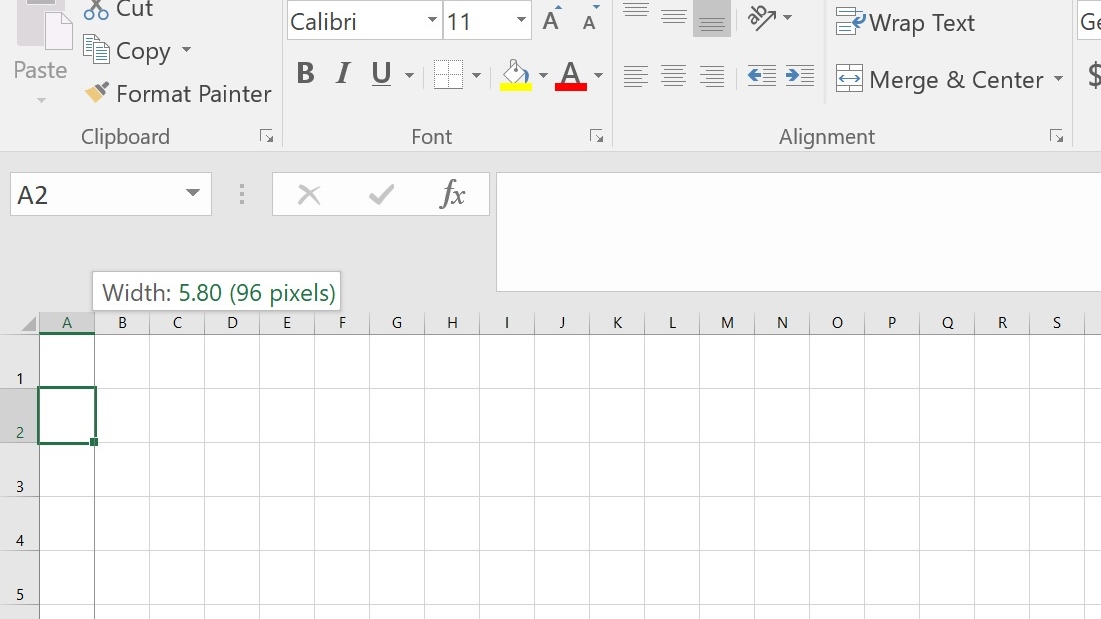
Once you resize all the columns and rows, you will get an Excel graph paper of the same width and height. Assume 1 square = 1 inch to avoid confusion. After setting up the Excel graph paper, it is time to create floor plan rooms.

1.2 Create Floor Plan Rooms
The primary step is to create rooms for a floor plan. Draw rooms using Excel rectangular shapes. The average size of a small bedroom in America is seven ft. by 10 ft. We have assumed one inch= 1 square, and mathematically, 12 inches equals 1 ft. Therefore, you must draw the shape into 7 squares x 10 squares.
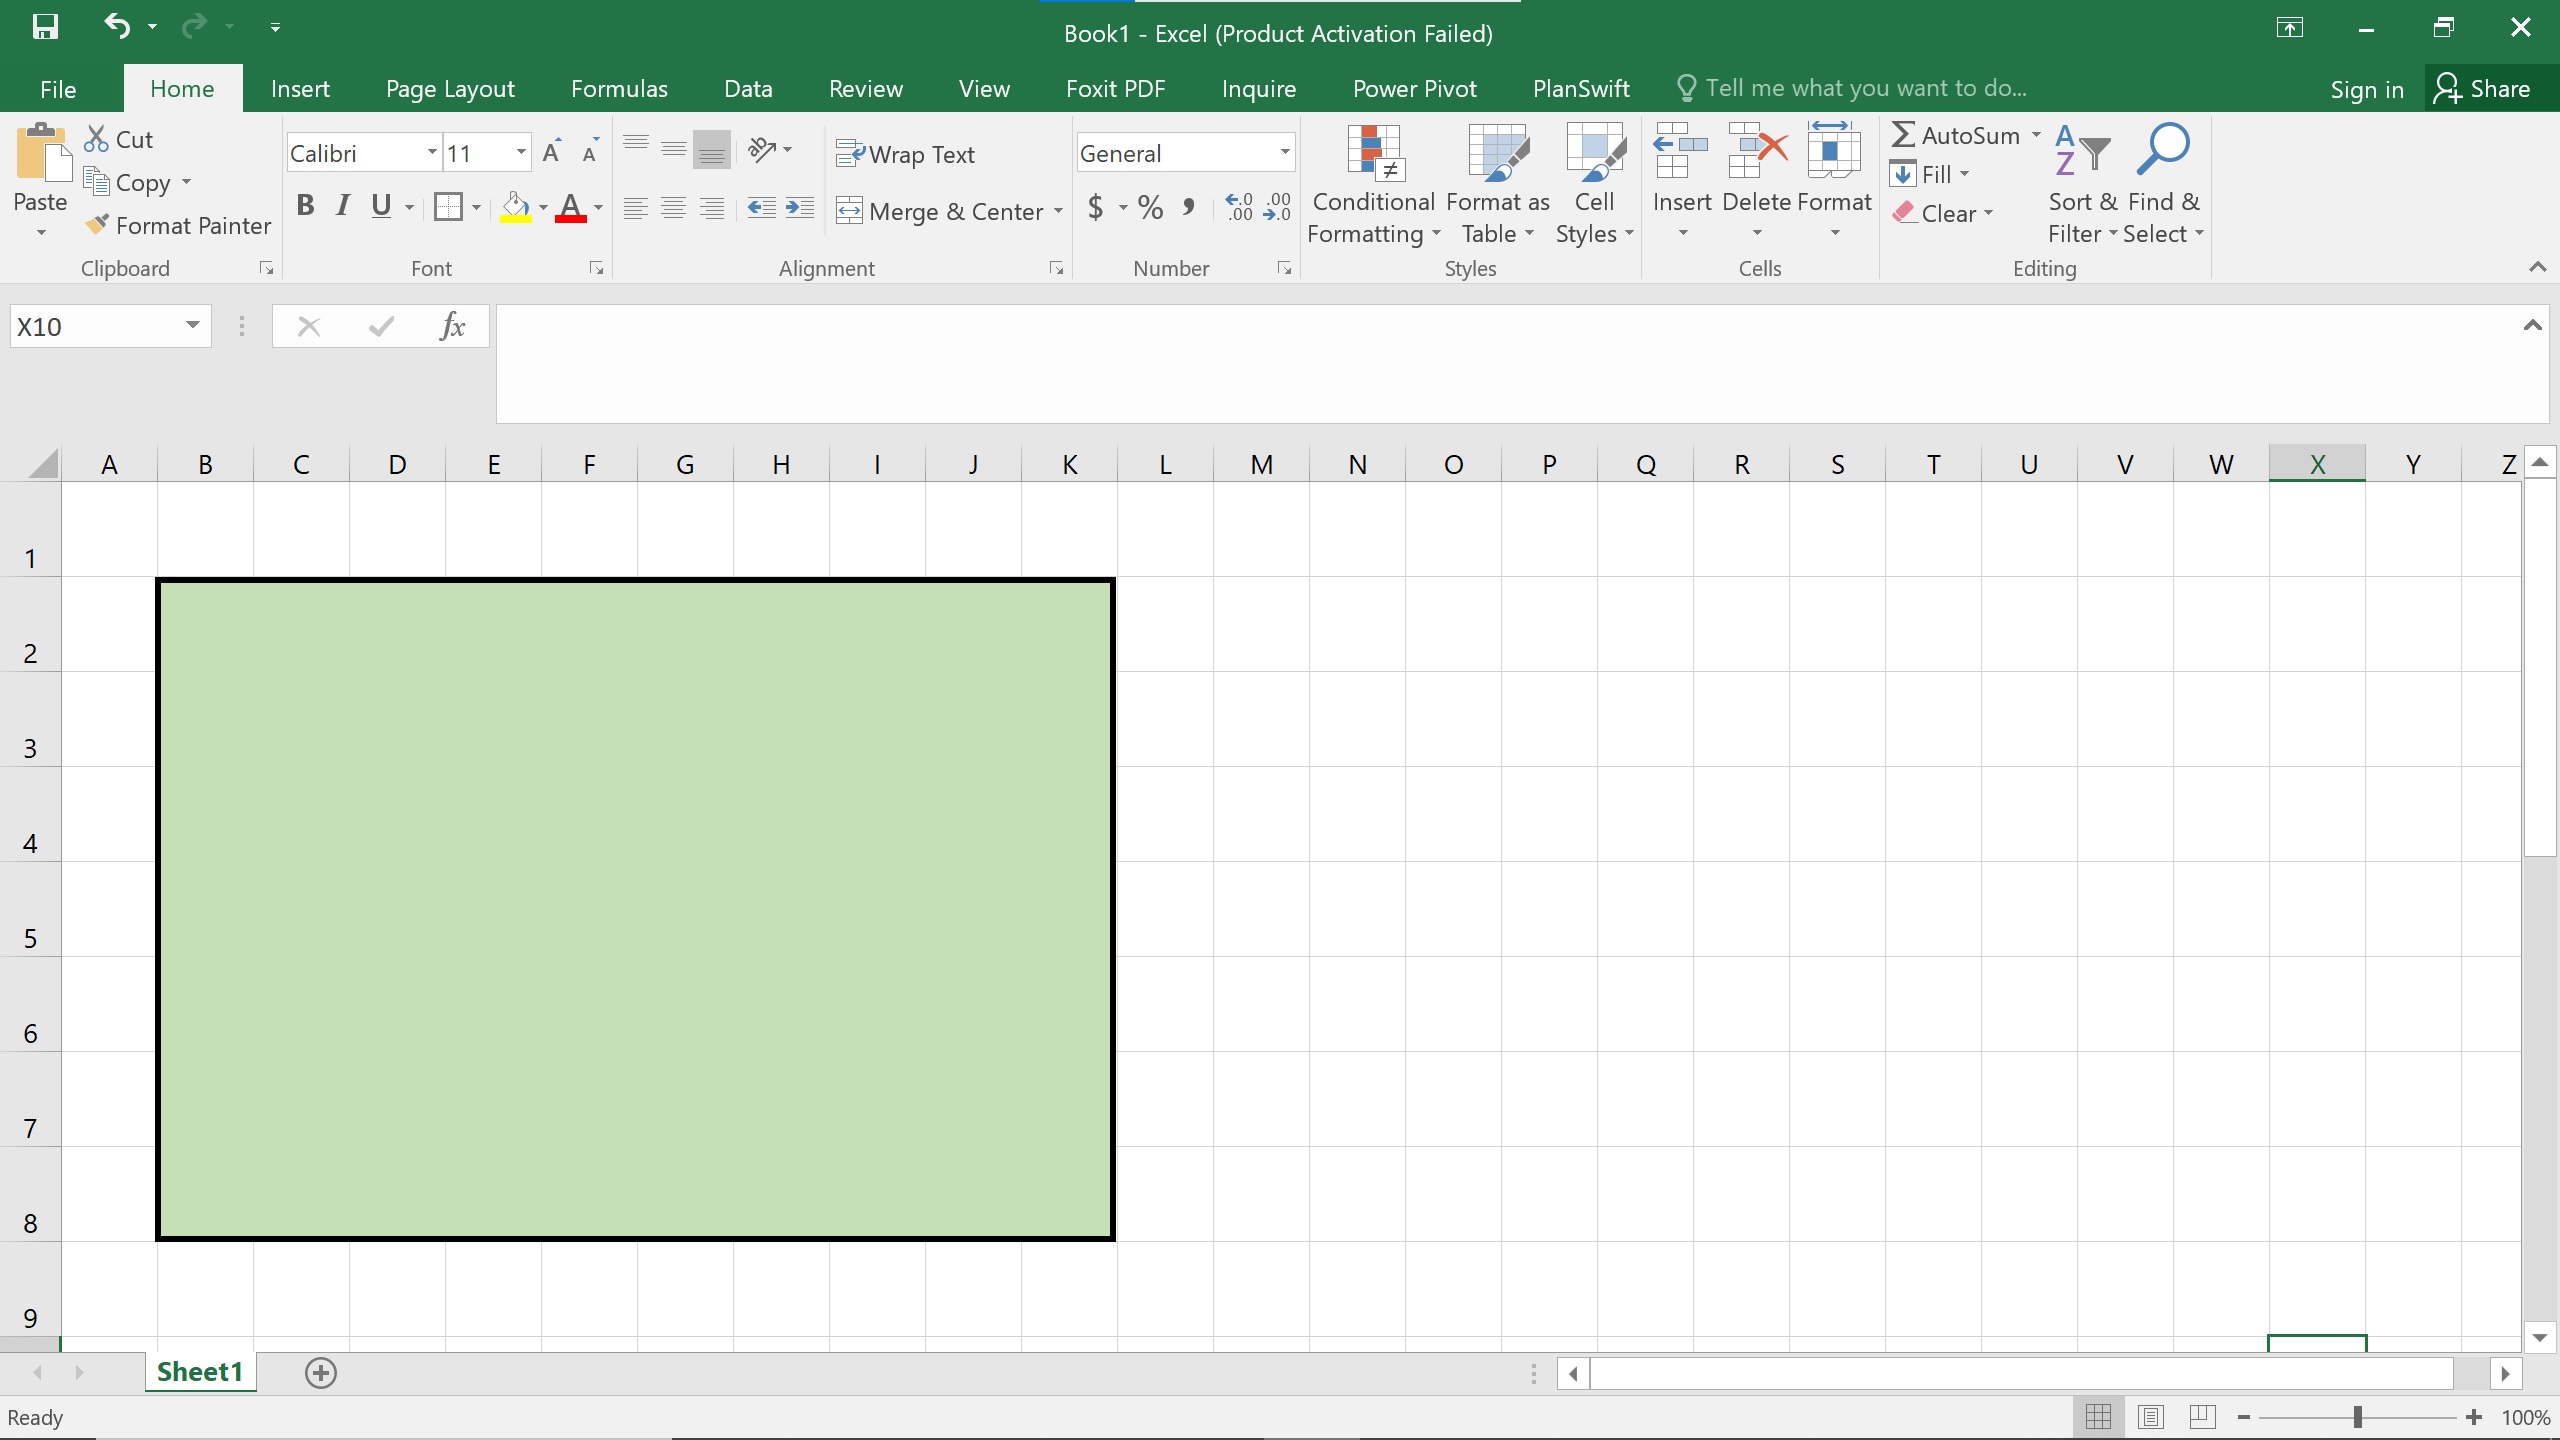
You can mix different colors into the shapes you desire. Increasing the weight of the shape will make it more visible. To do it, right-click on the shape and click on Outline> Weight. I prefer 2¼ PT weight.

Follow the same steps to create other rooms such as bathroom, kitchen, living room, and entrance. You can highlight them with different colors and patterns. As for the bathroom, I’ve chosen a different pattern to highlight it.
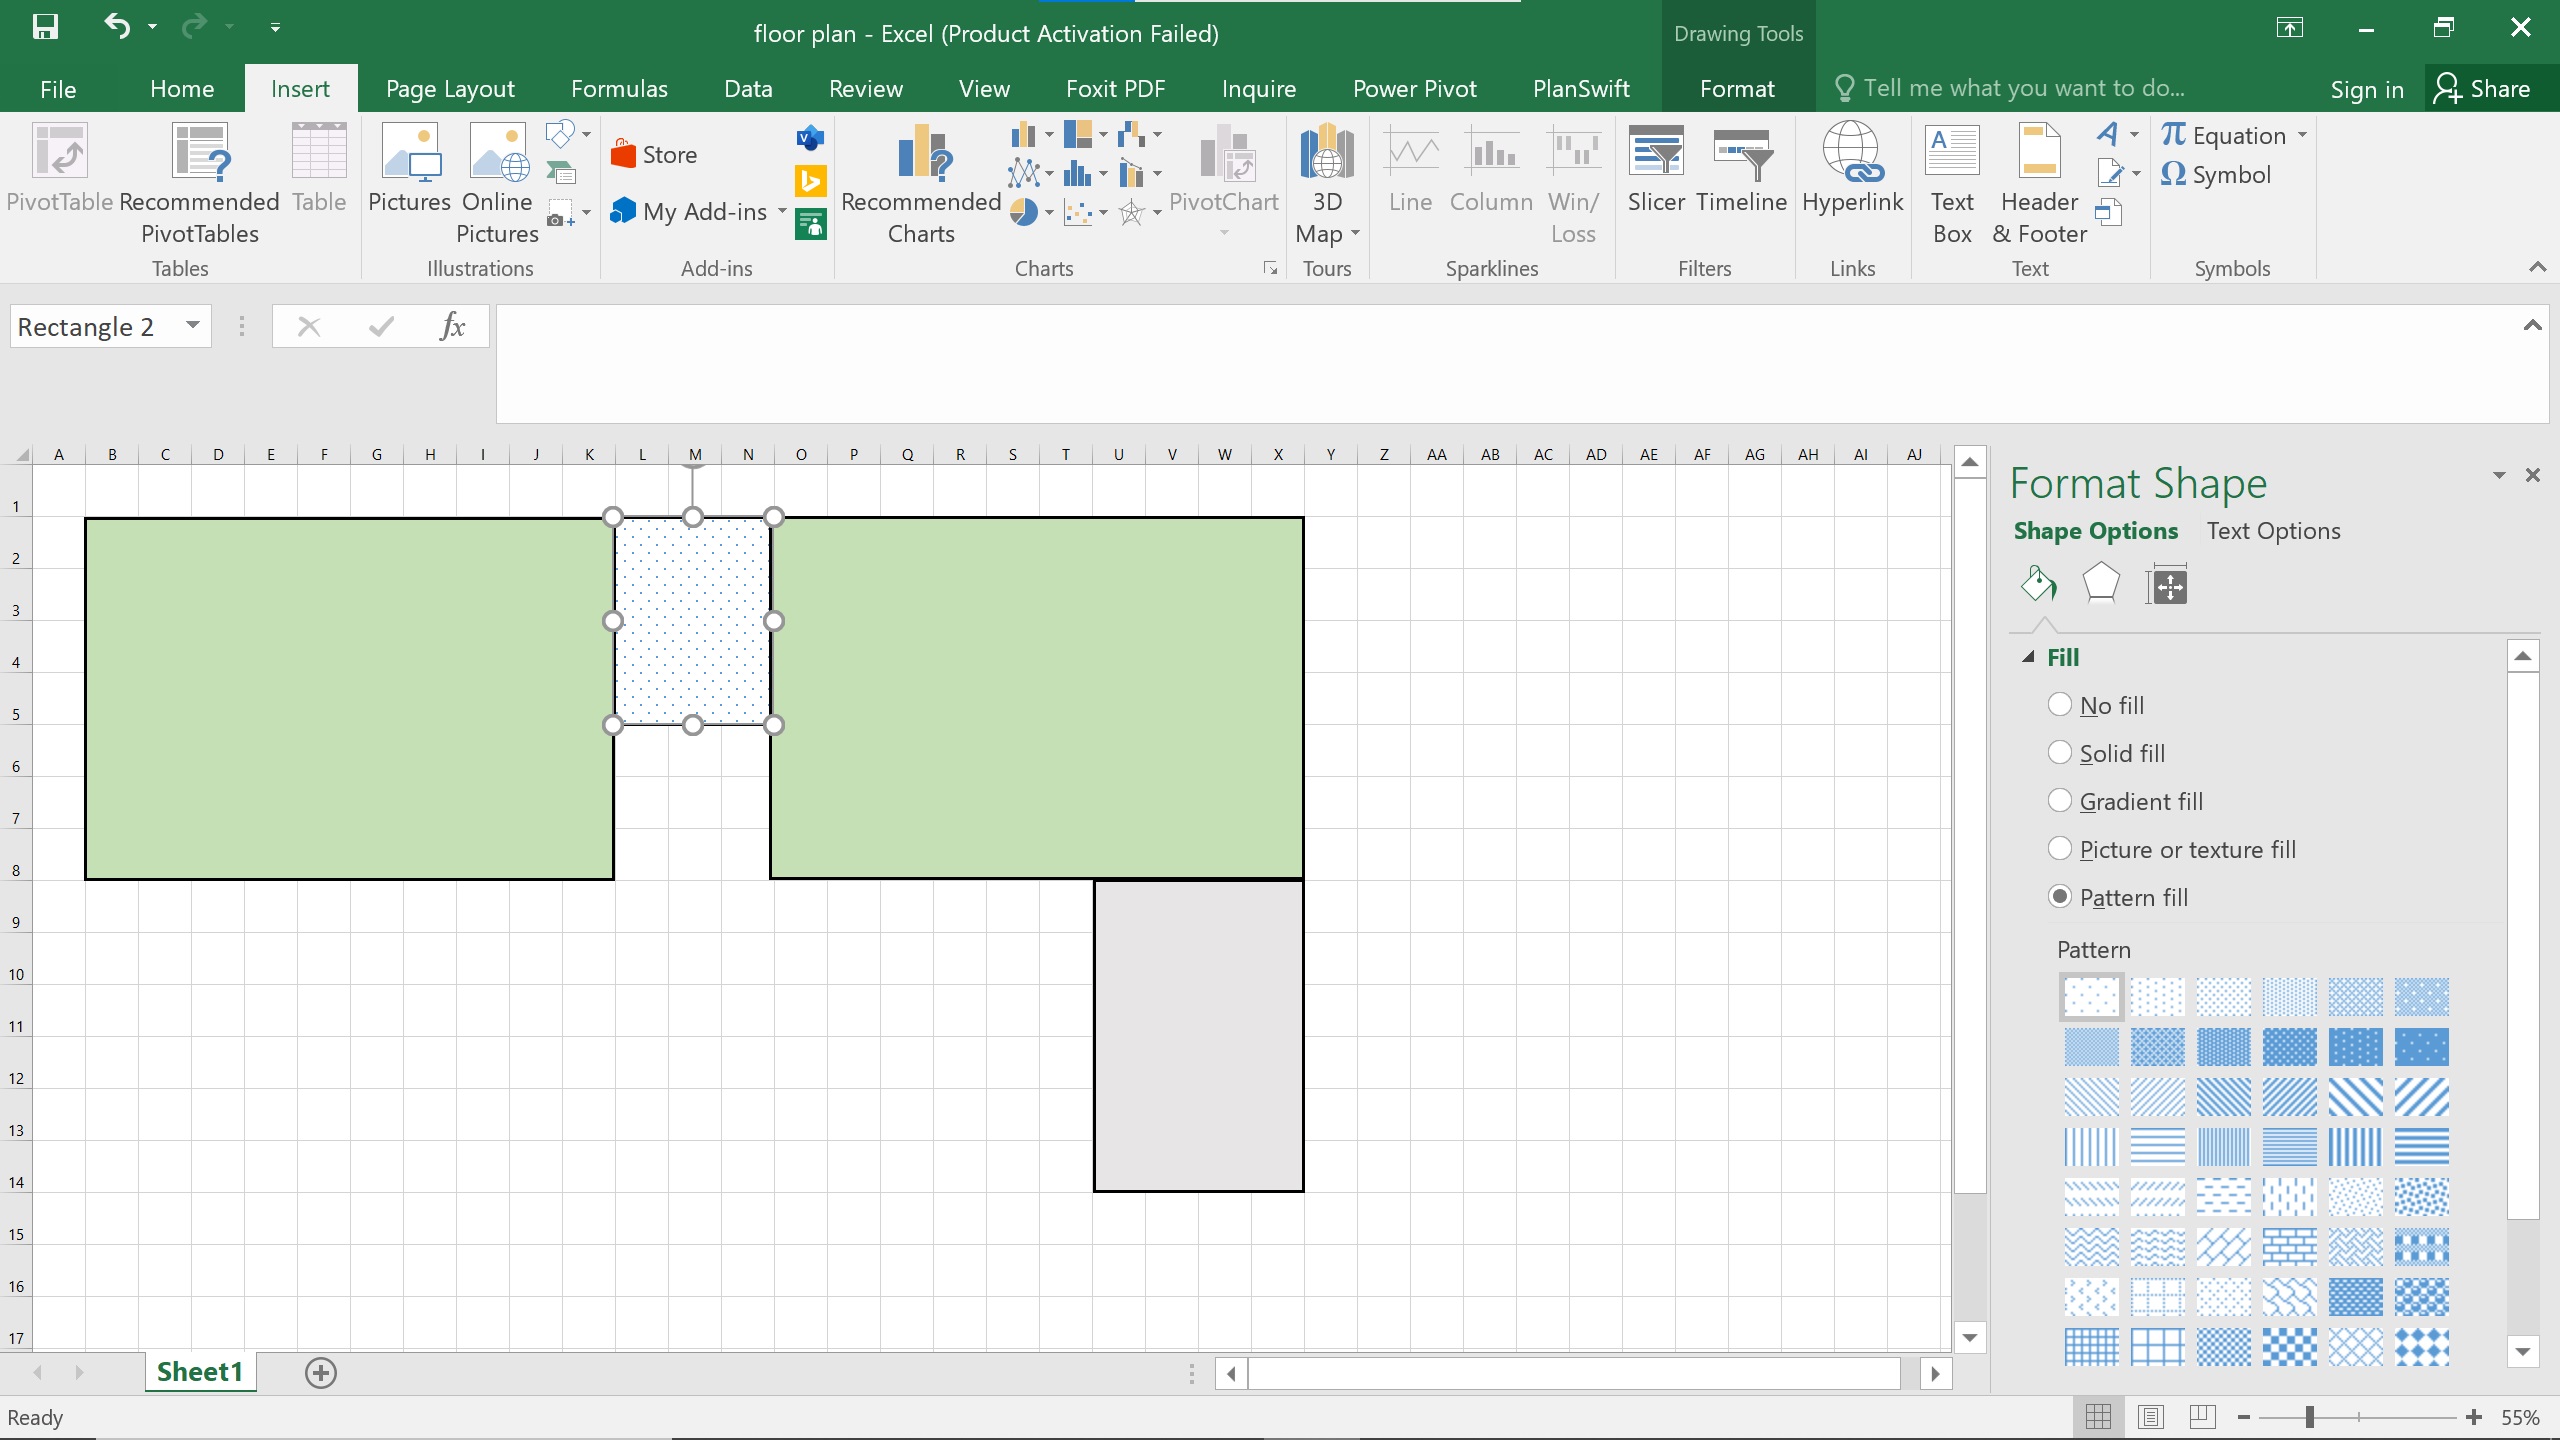
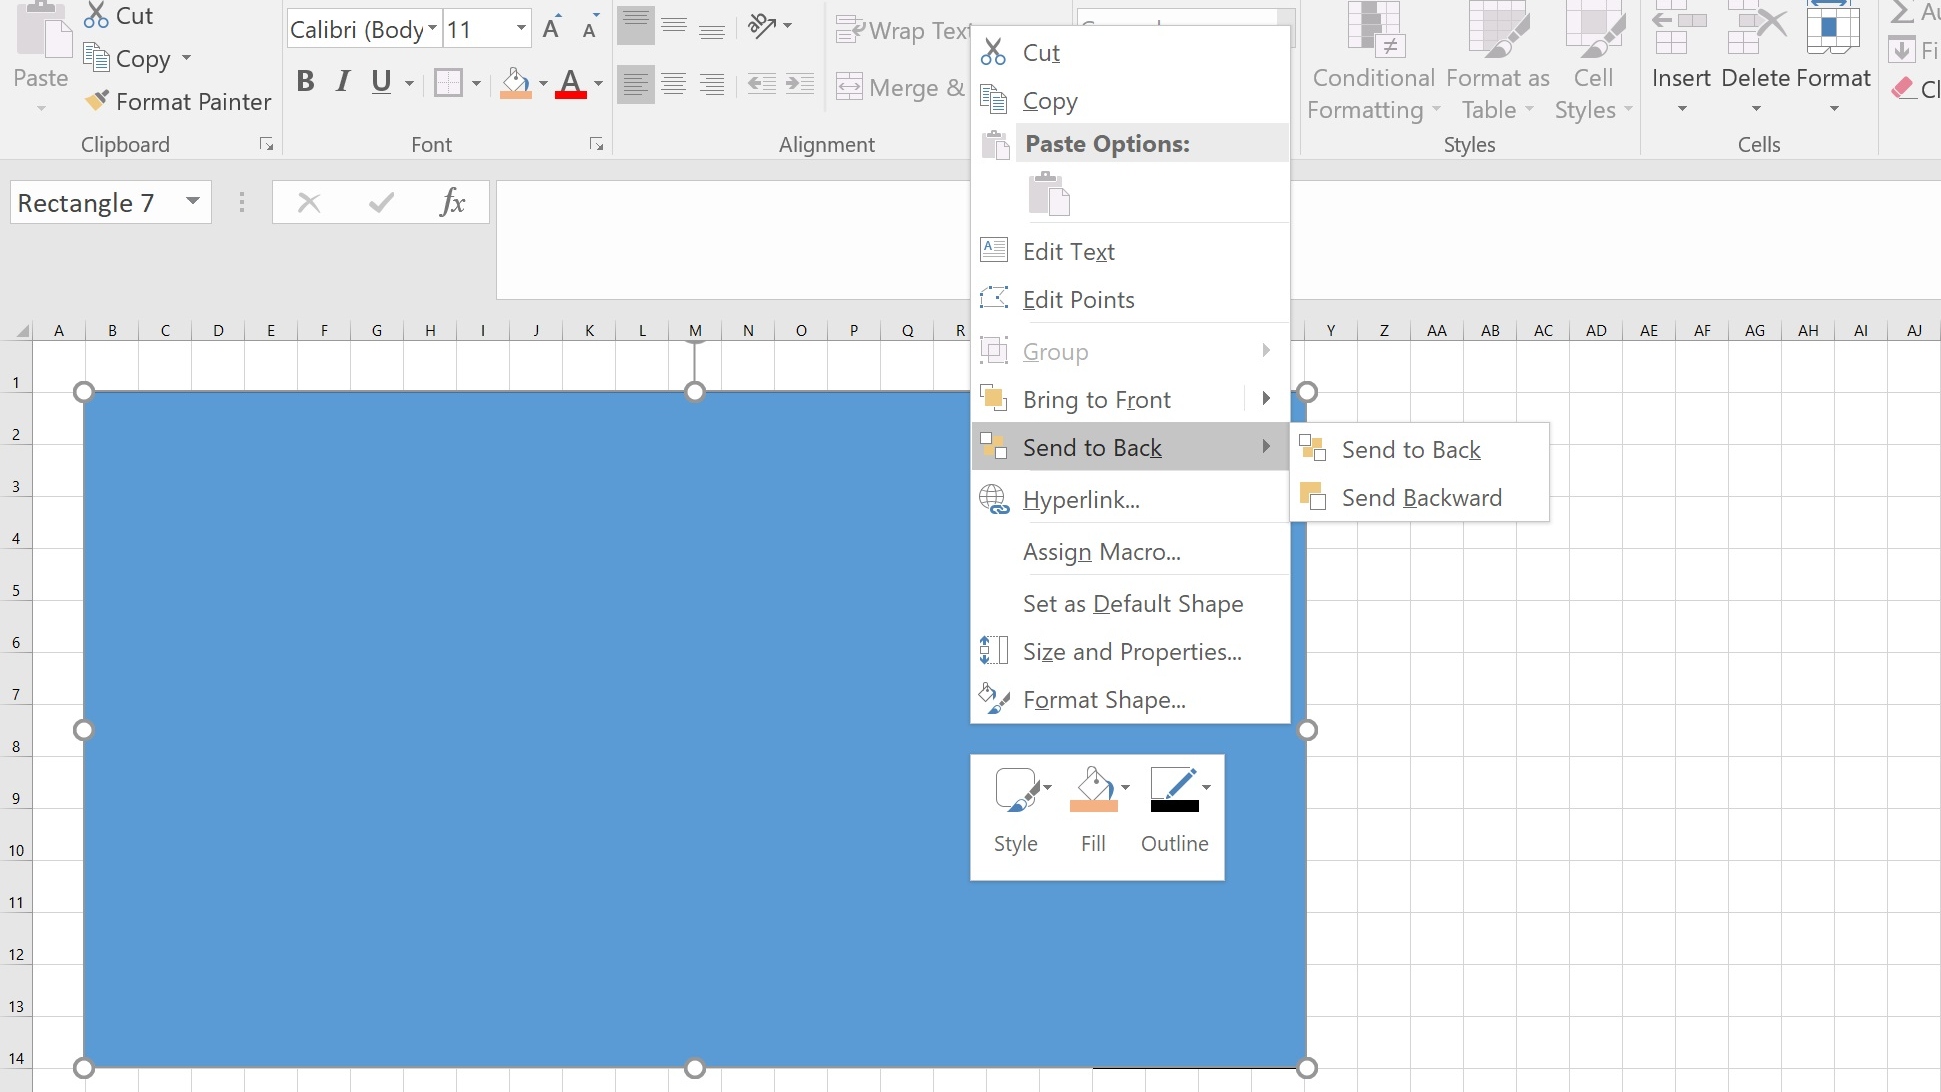
Create a rectangle in a different color for the exterior wall to cover up the rooms and create a space for a hallway, TV lounge, living, and dining area. Draw the rectangle from the first room to the kitchen to cover up all the space.

Now, right-click the rectangle and select "Send to back."
1.3. Create Hinged Doors and Windows in Excel
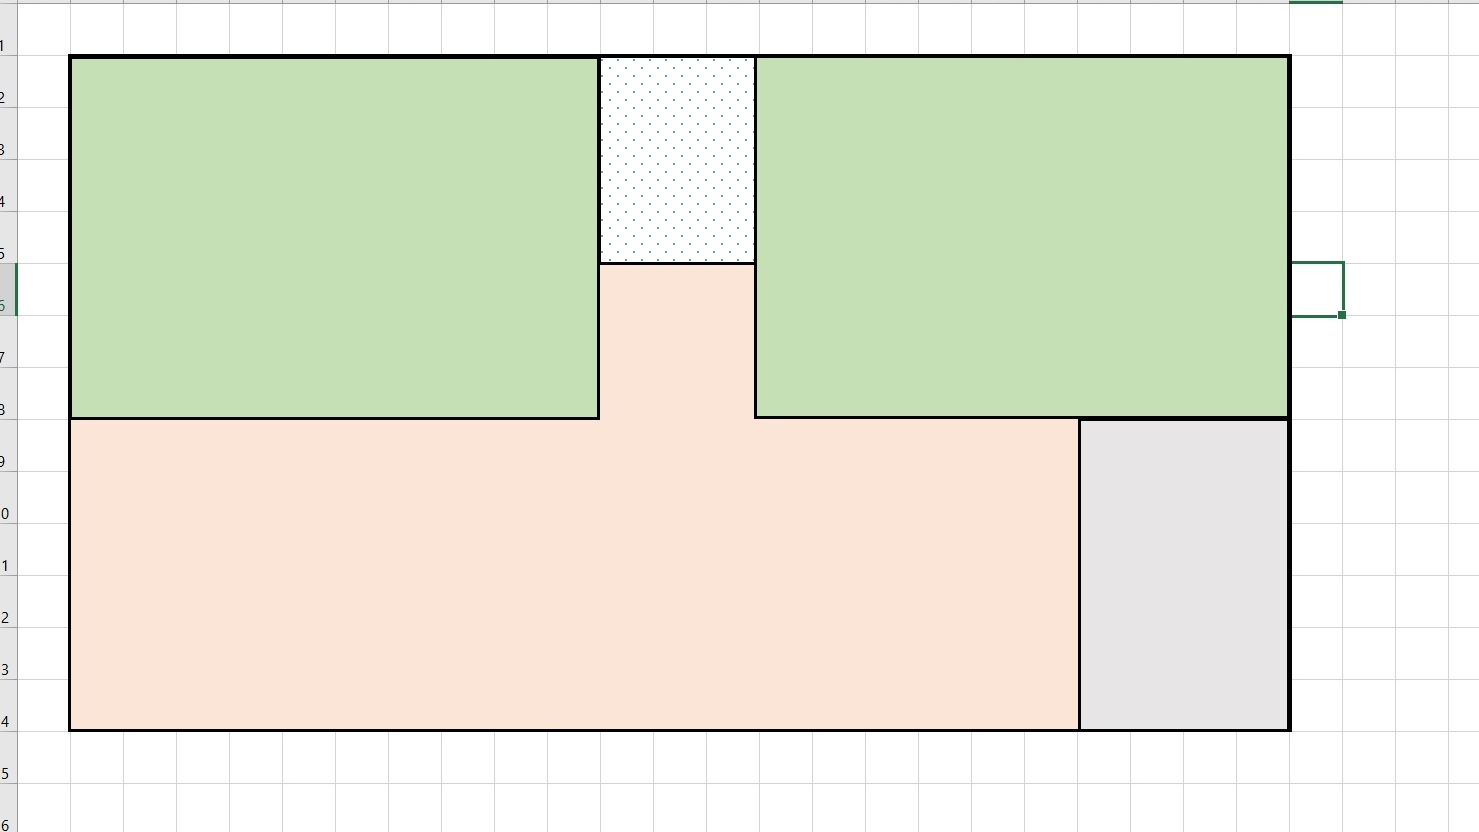
Once you have this result, it's time to create the most common fixtures in a floor plan: doors and windows. Windows are essential for proper ventilation in the house. To make a window in Excel, draw a rectangle with three straight lines in it and group them.
You can zoom in to focus more with the CTRL+ mouse wheel or use the "Display Magnification" option on the right end side of your screen.

After adding the windows in rooms, kitchen, and hallway, create hinged doors. Select a partial circle shape in the Excel shape menu and combine it with a rectangle.

To shape it like a hinged door, drag the yellow point handle while holding the shift key with the left mouse button to make it 1 / 4 circle. Fill the shape with white color, combine it with a rectangle, and group them.
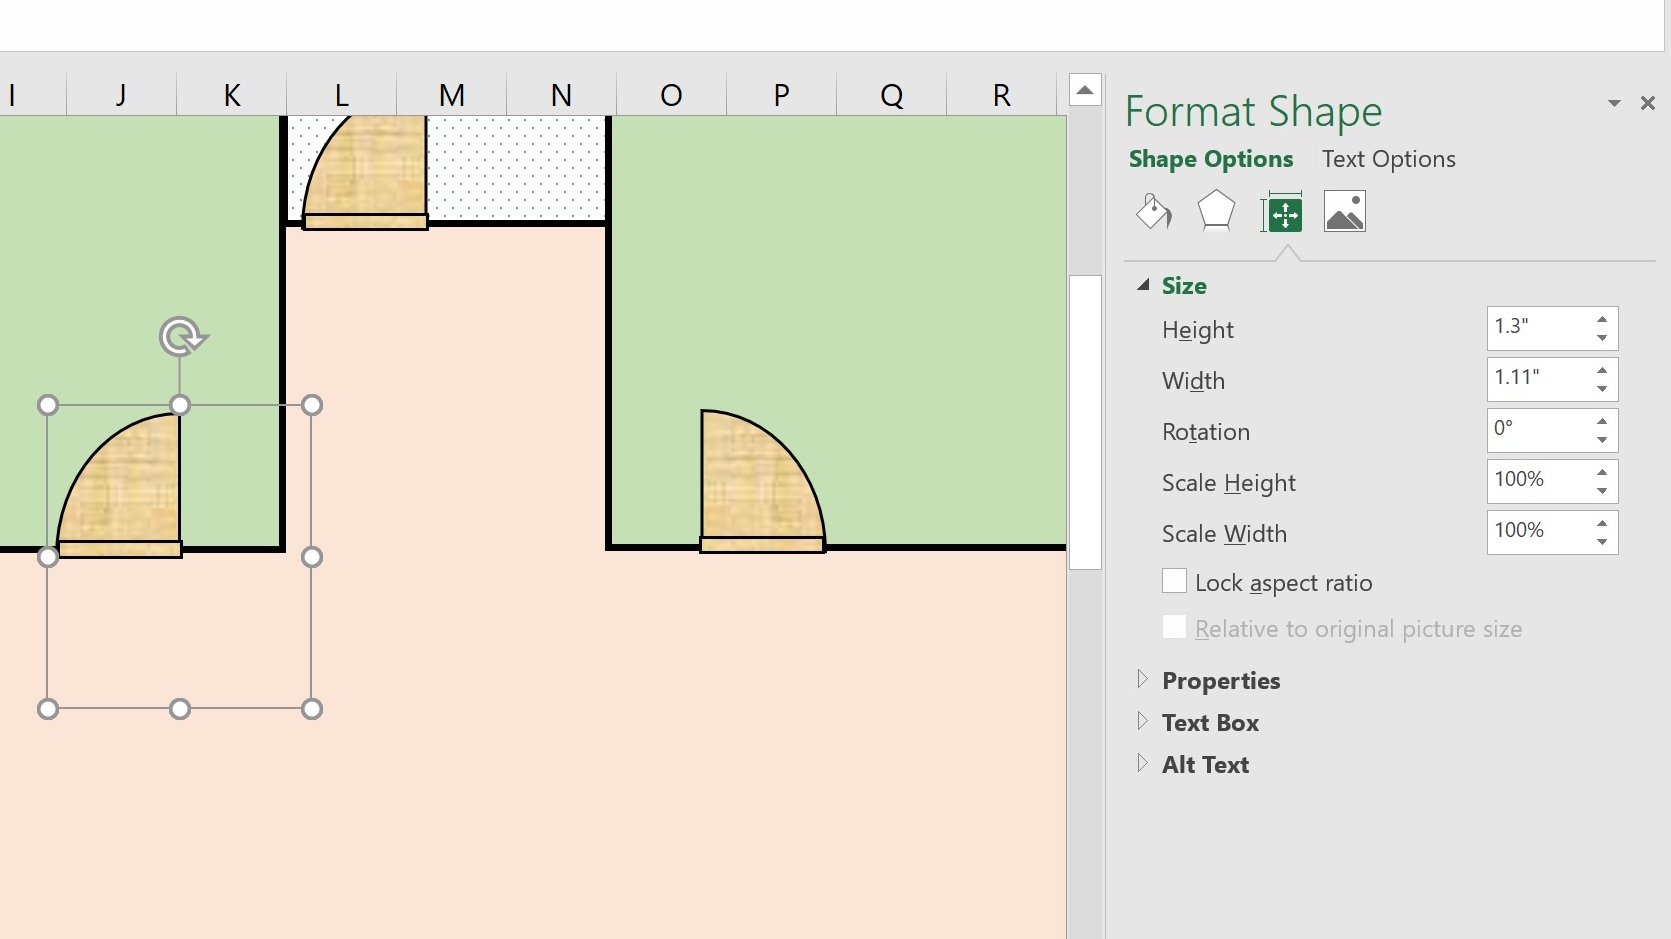
Place the doors in the respective room, kitchen, and bathroom. You can easily rotate and fill the door with Format Shape > Size Properties. In addition, fill it with pictures or textures to give an aesthetic look.
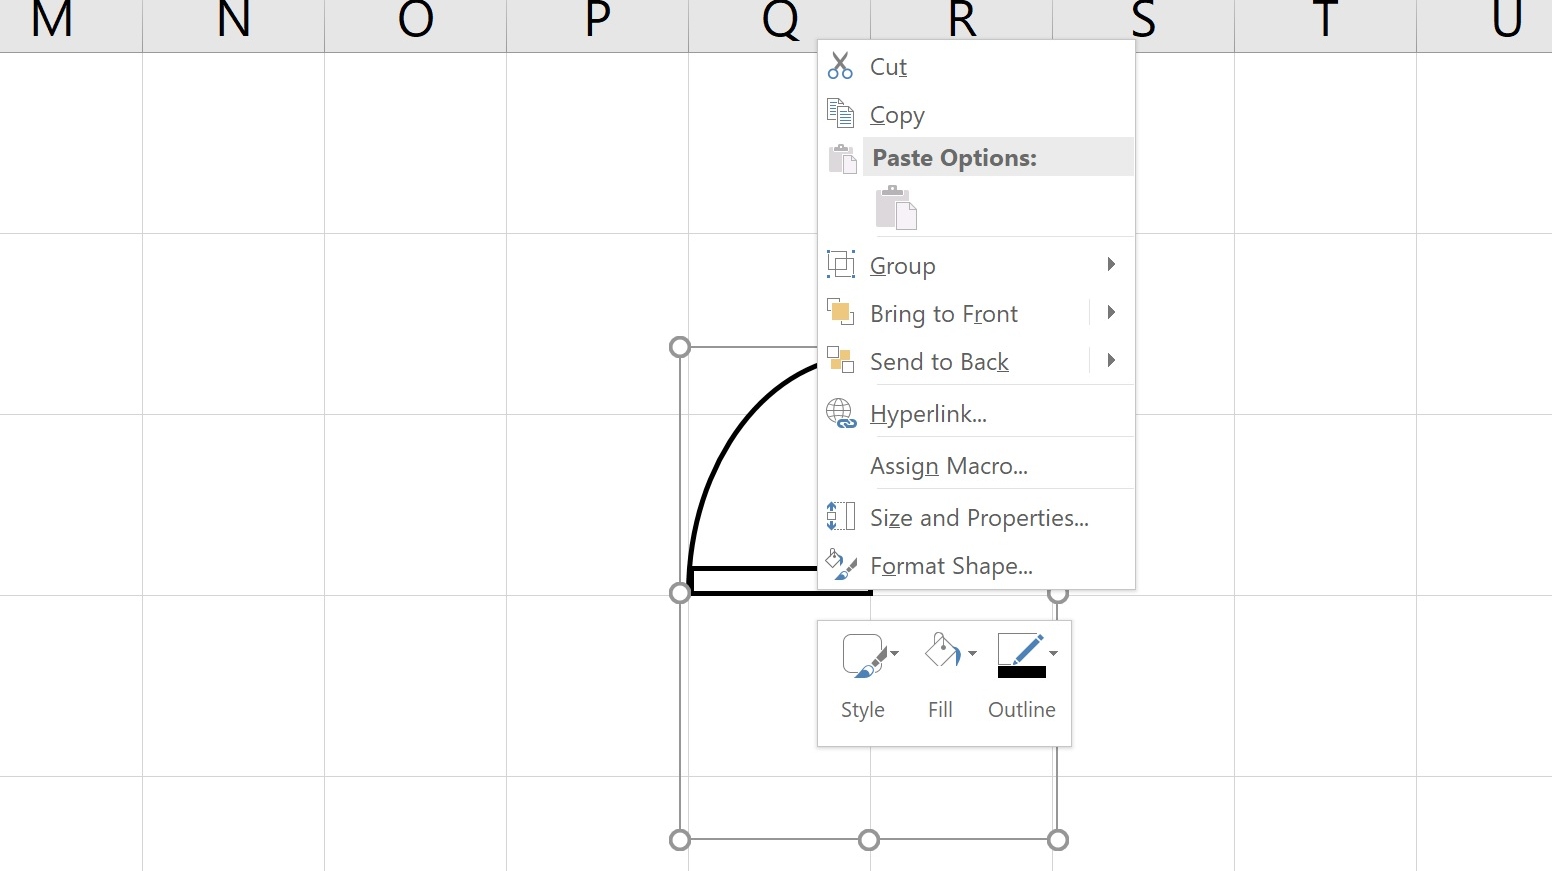
Now, it is time to draw an entry gate for your floor plan. To do this, draw a curve line from the shape library and adjust the weight to 2 ¼ to make it more visible.
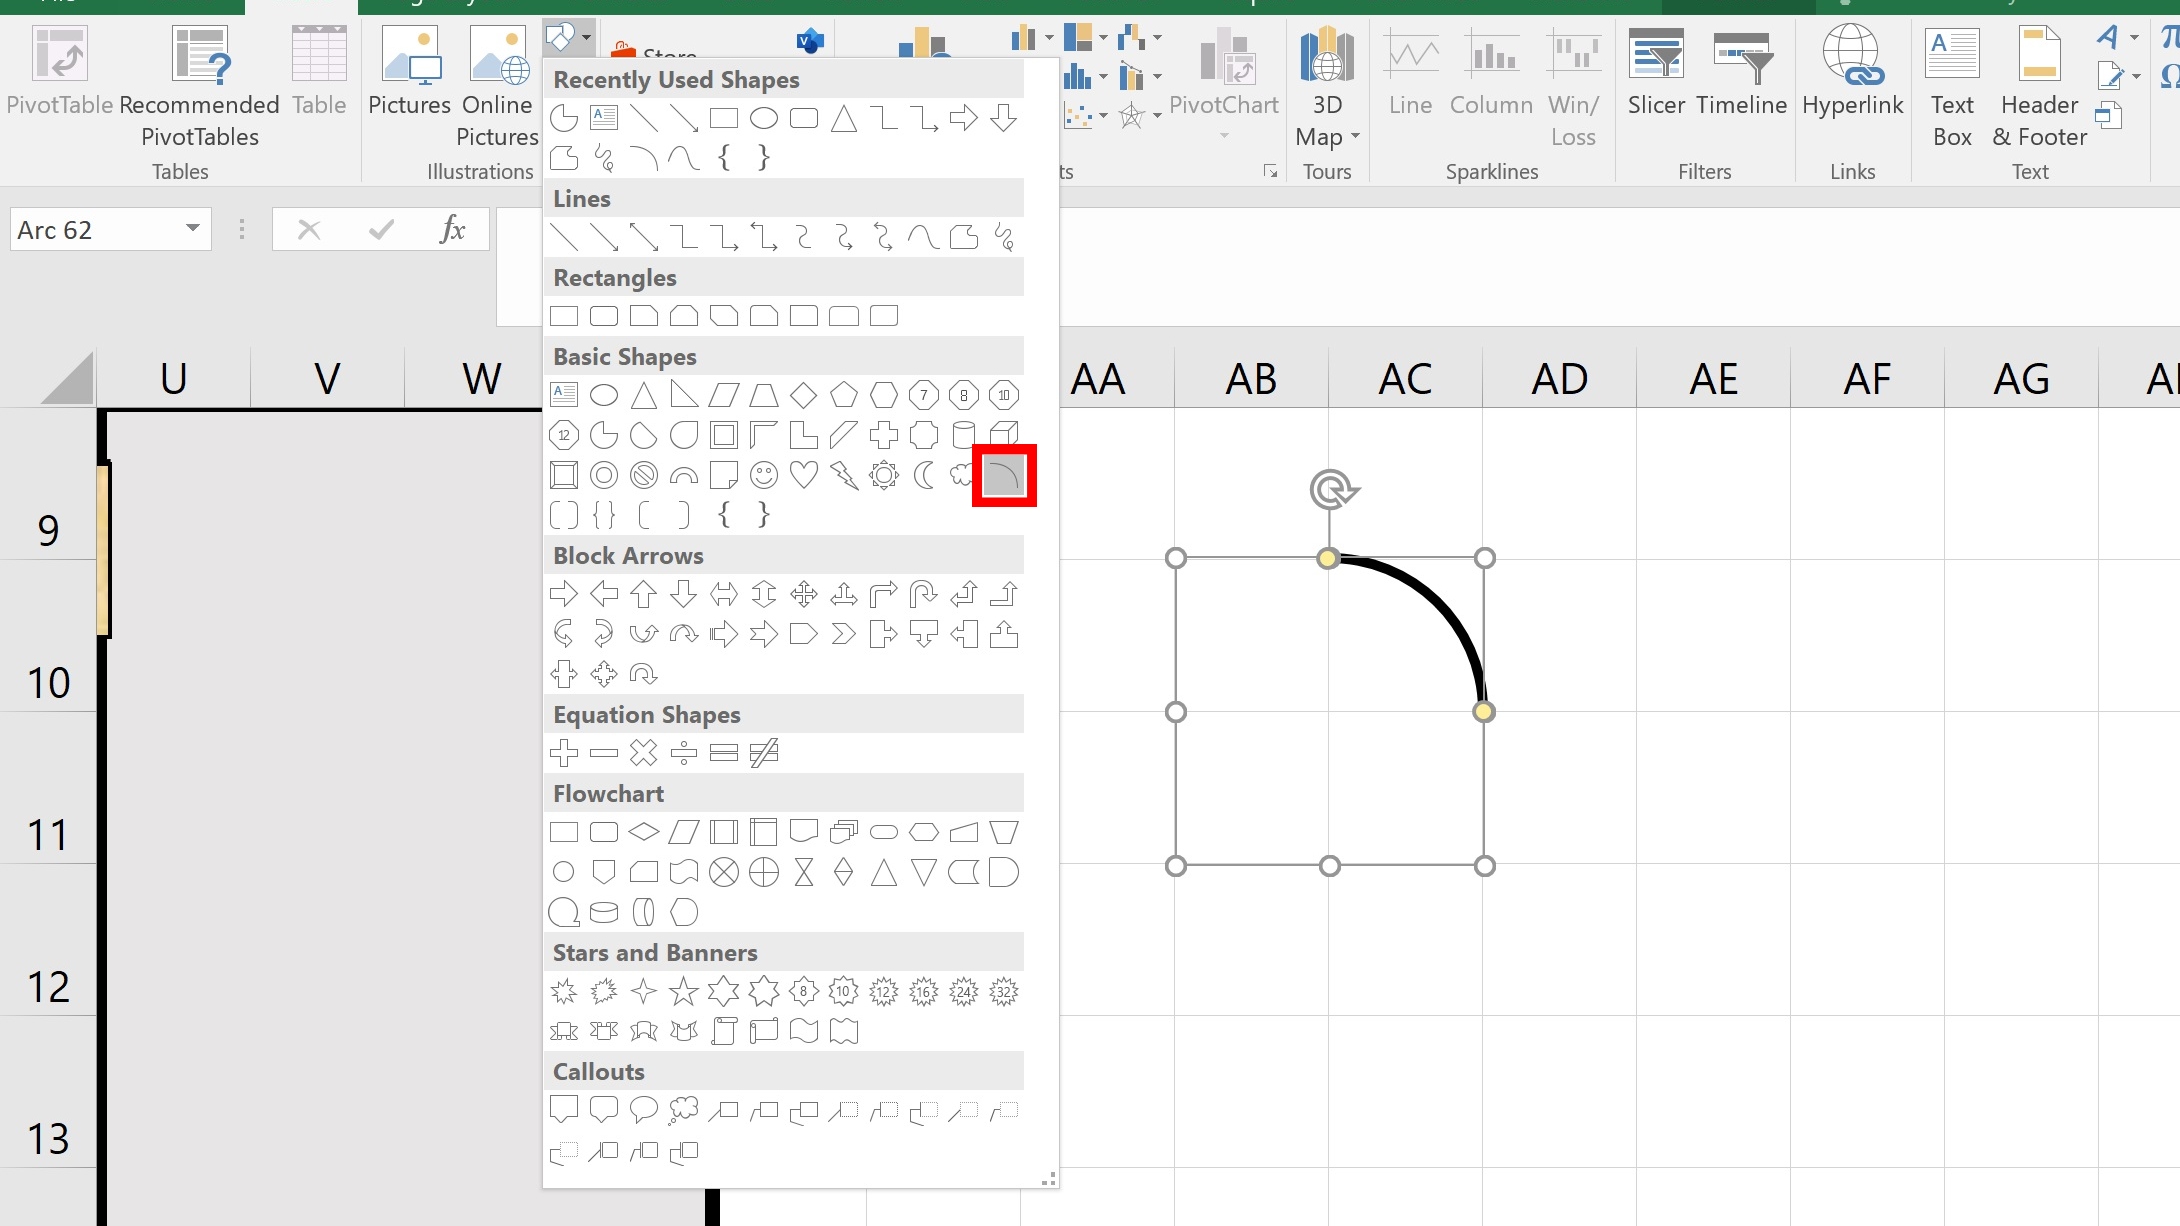
Flip the shape and mirror to make the other side of the entry gate. Copy the shape with CTRL+C and paste it. Right-click the shape > Format Shape > Size & Properties and enter -90 ®
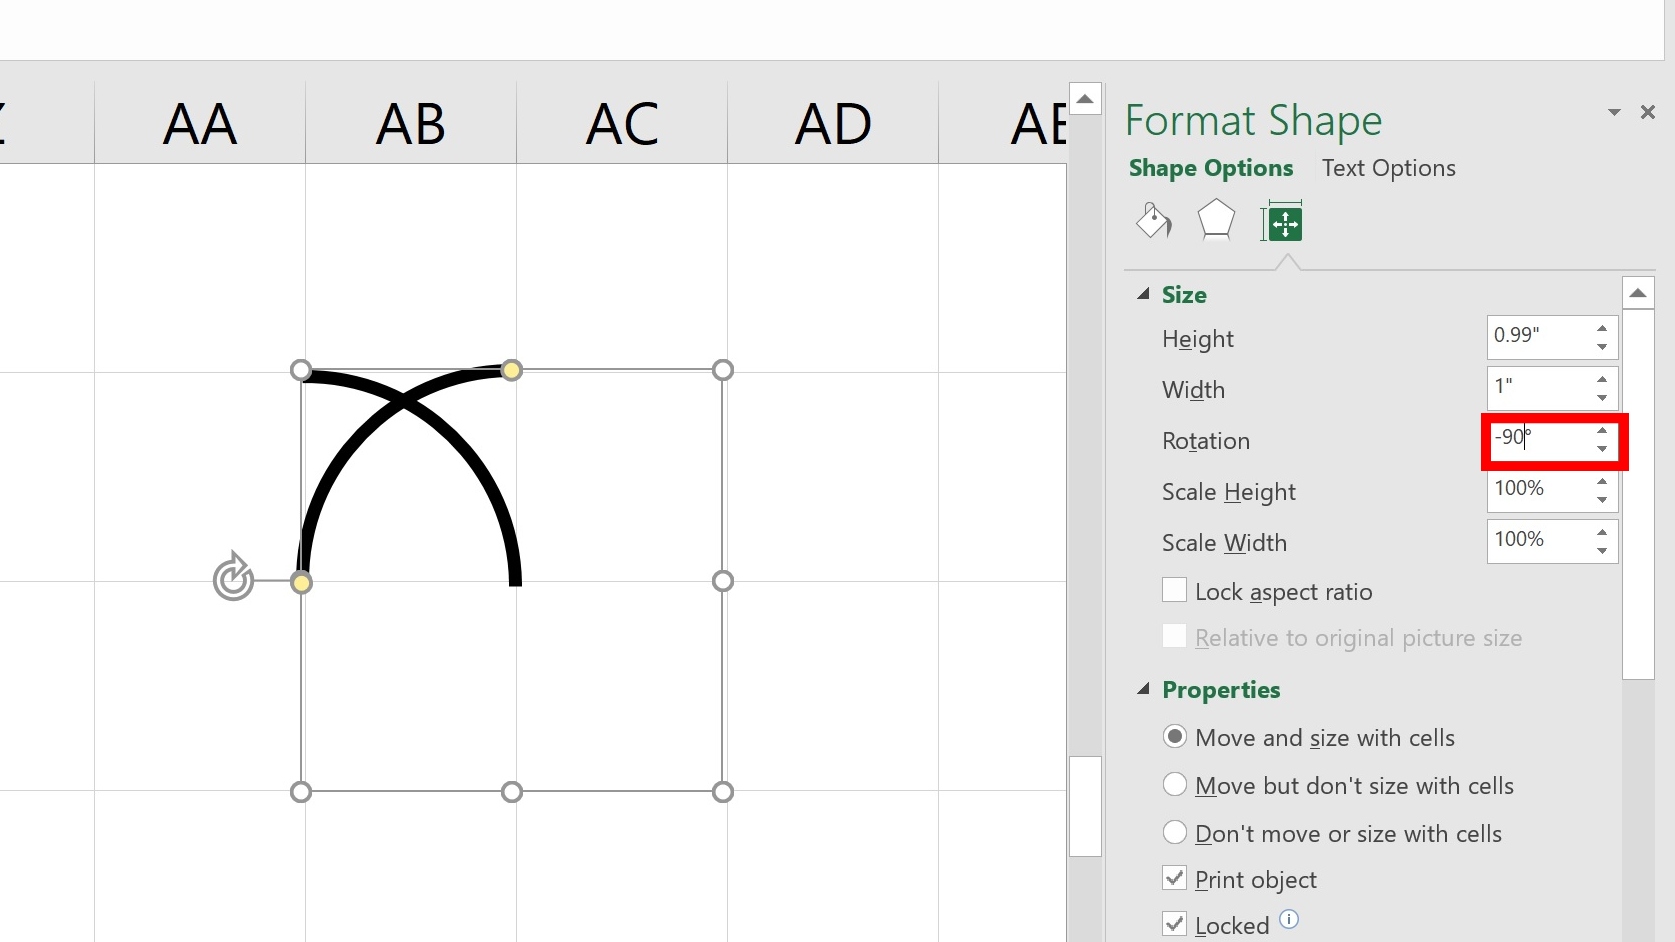
Drag the shape on the other square and adjust it as the lower yellow handle connects with the first shape's lower handle.

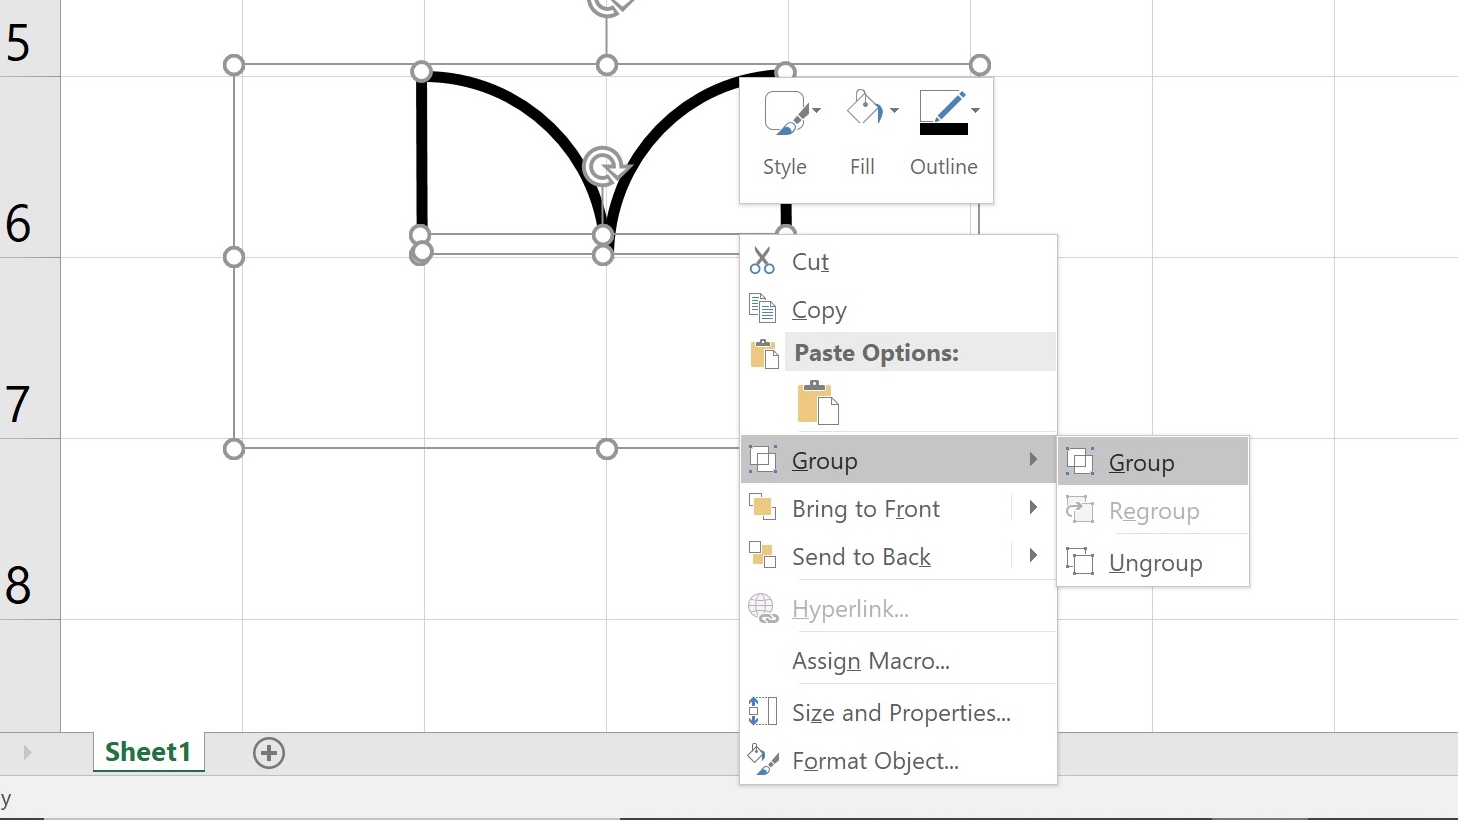
Now, draw straight lines with a weight of 2 ¼ on each side of the door and place a horizontal rectangle at the end of the door filled with white color. Select all and group them.
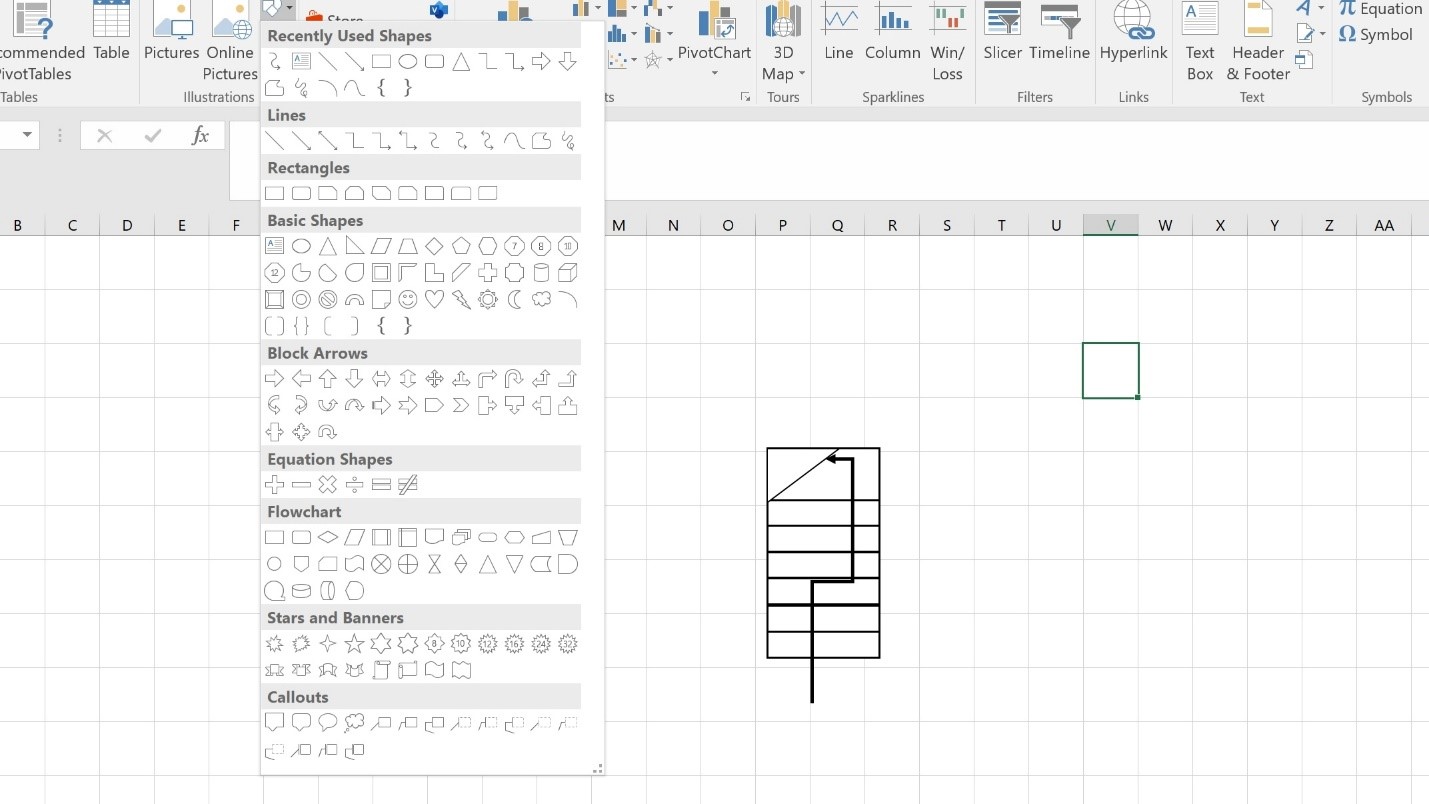
1.4. Create a Staircase in Excel

Once you have placed all the fixtures at their locations, it is time to draw a staircase. American houses usually have a two-floor floor plan design. Thus, we will draw stairs on the left side of the entry. For multi-story homes, locating the staircase right after entry is convenient for bringing in items or accommodating people who frequently move between floors.
As before, we'll create the stairs using a combination of white-filled squares or rectangles and right-angled triangles.
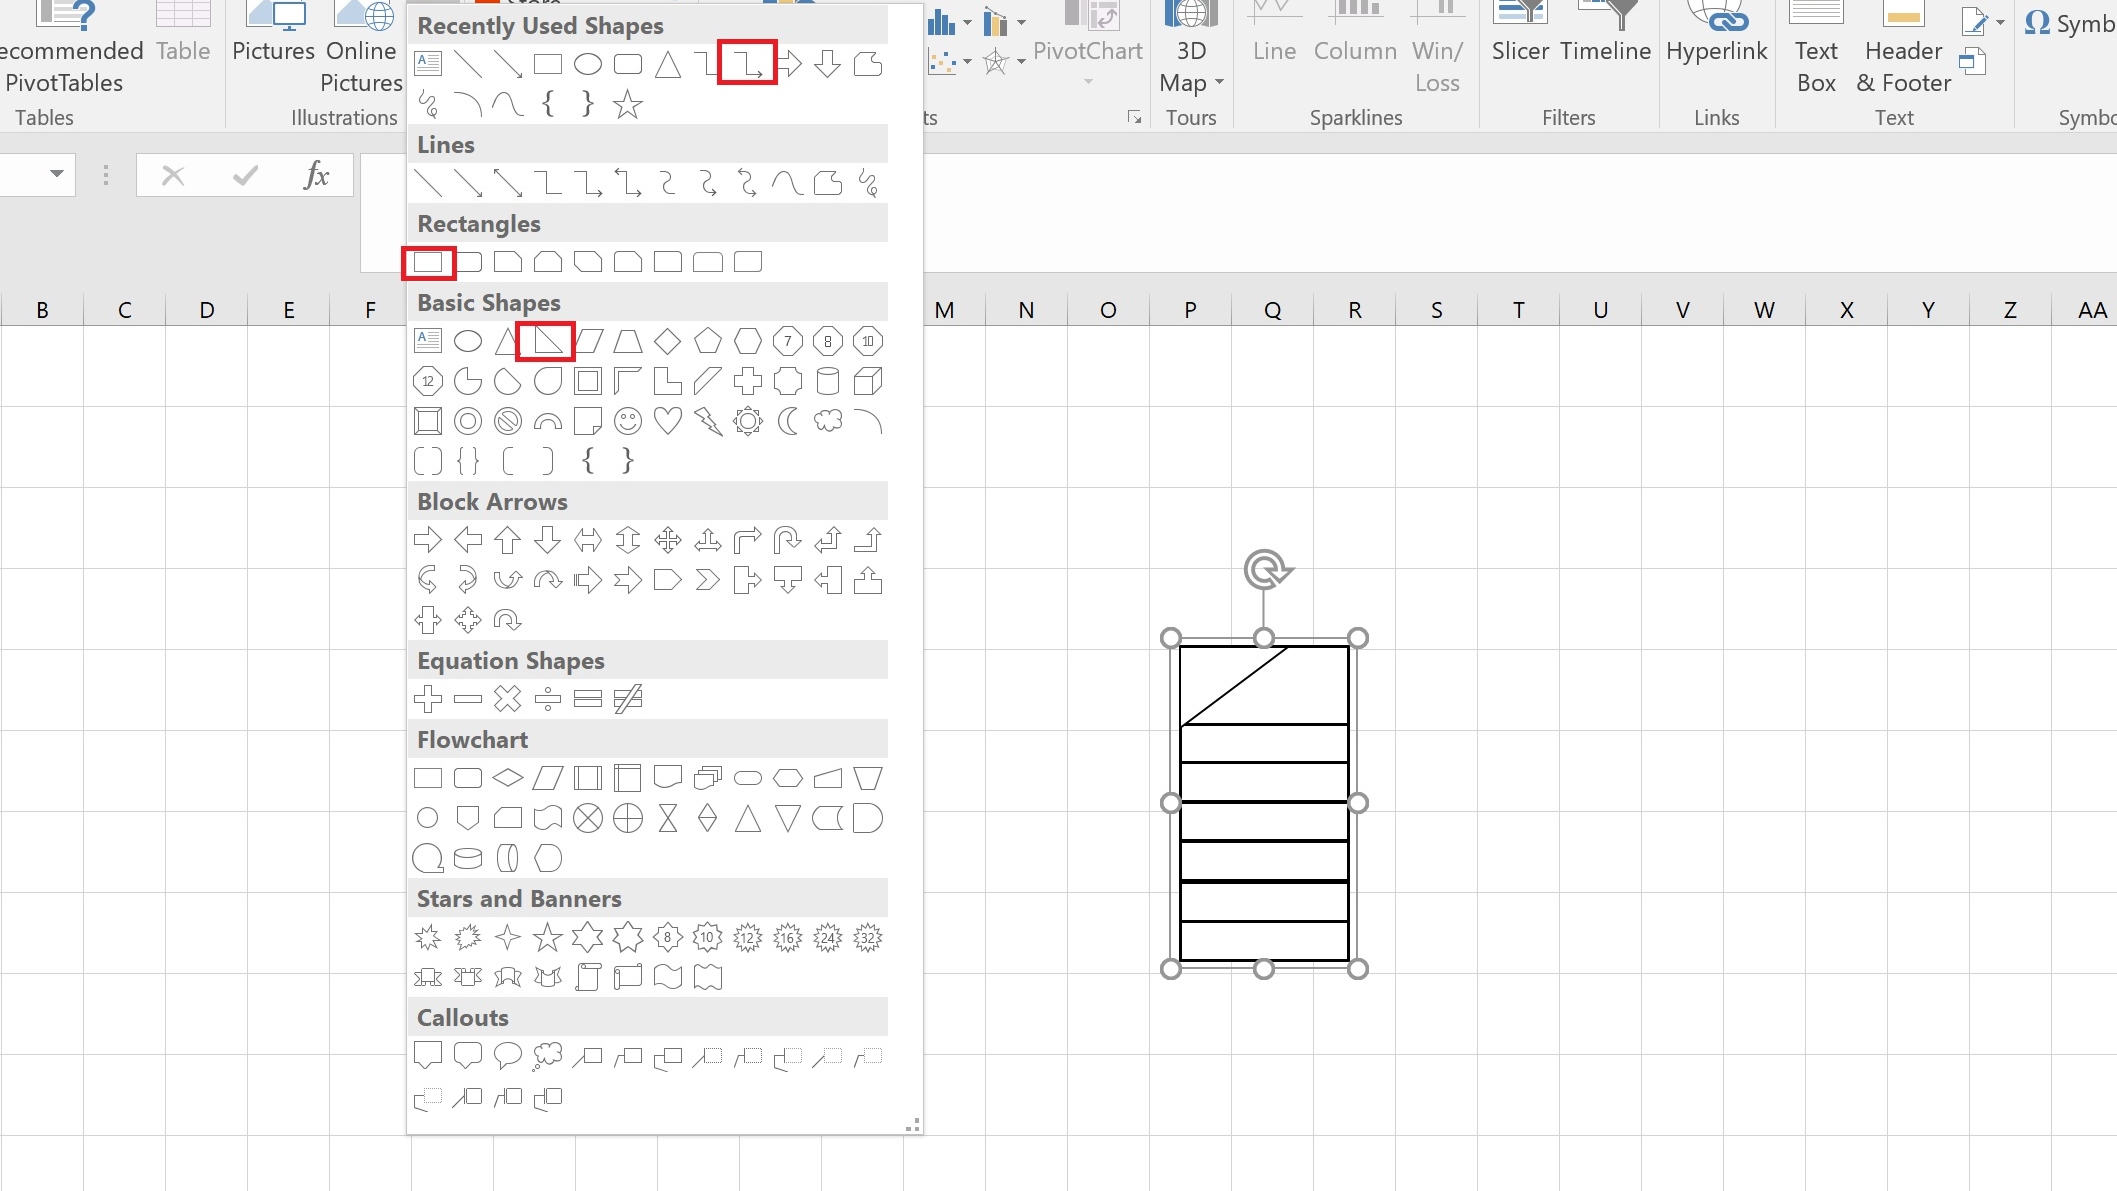
After completing the stairs, select the "Arrow" tool to draw an upward arrow pointing to the second floor. Adjust the shape by dragging the yellow circle handle. Position it on the floor plan, then add a straight line from the top to create a wall.
1.5. Add other Decorations/Fixtures in Excel
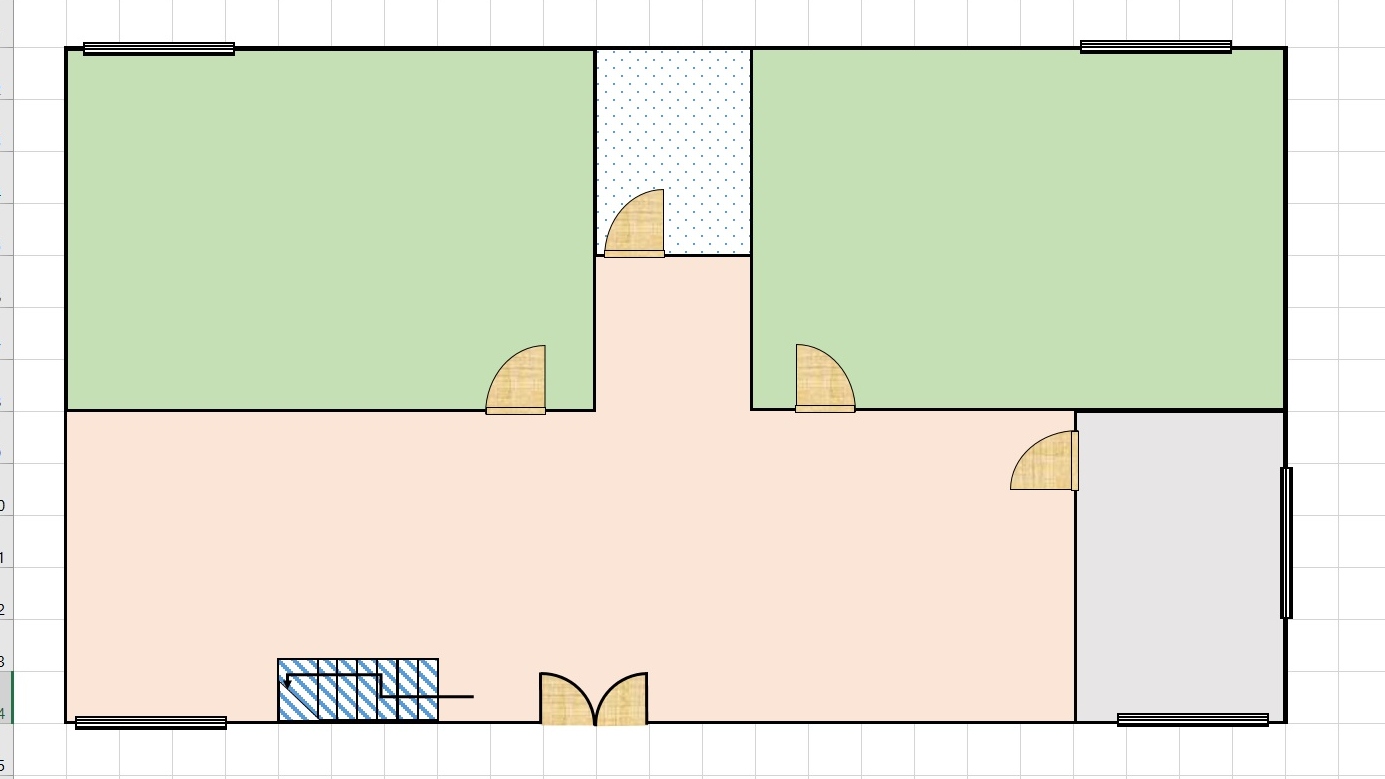
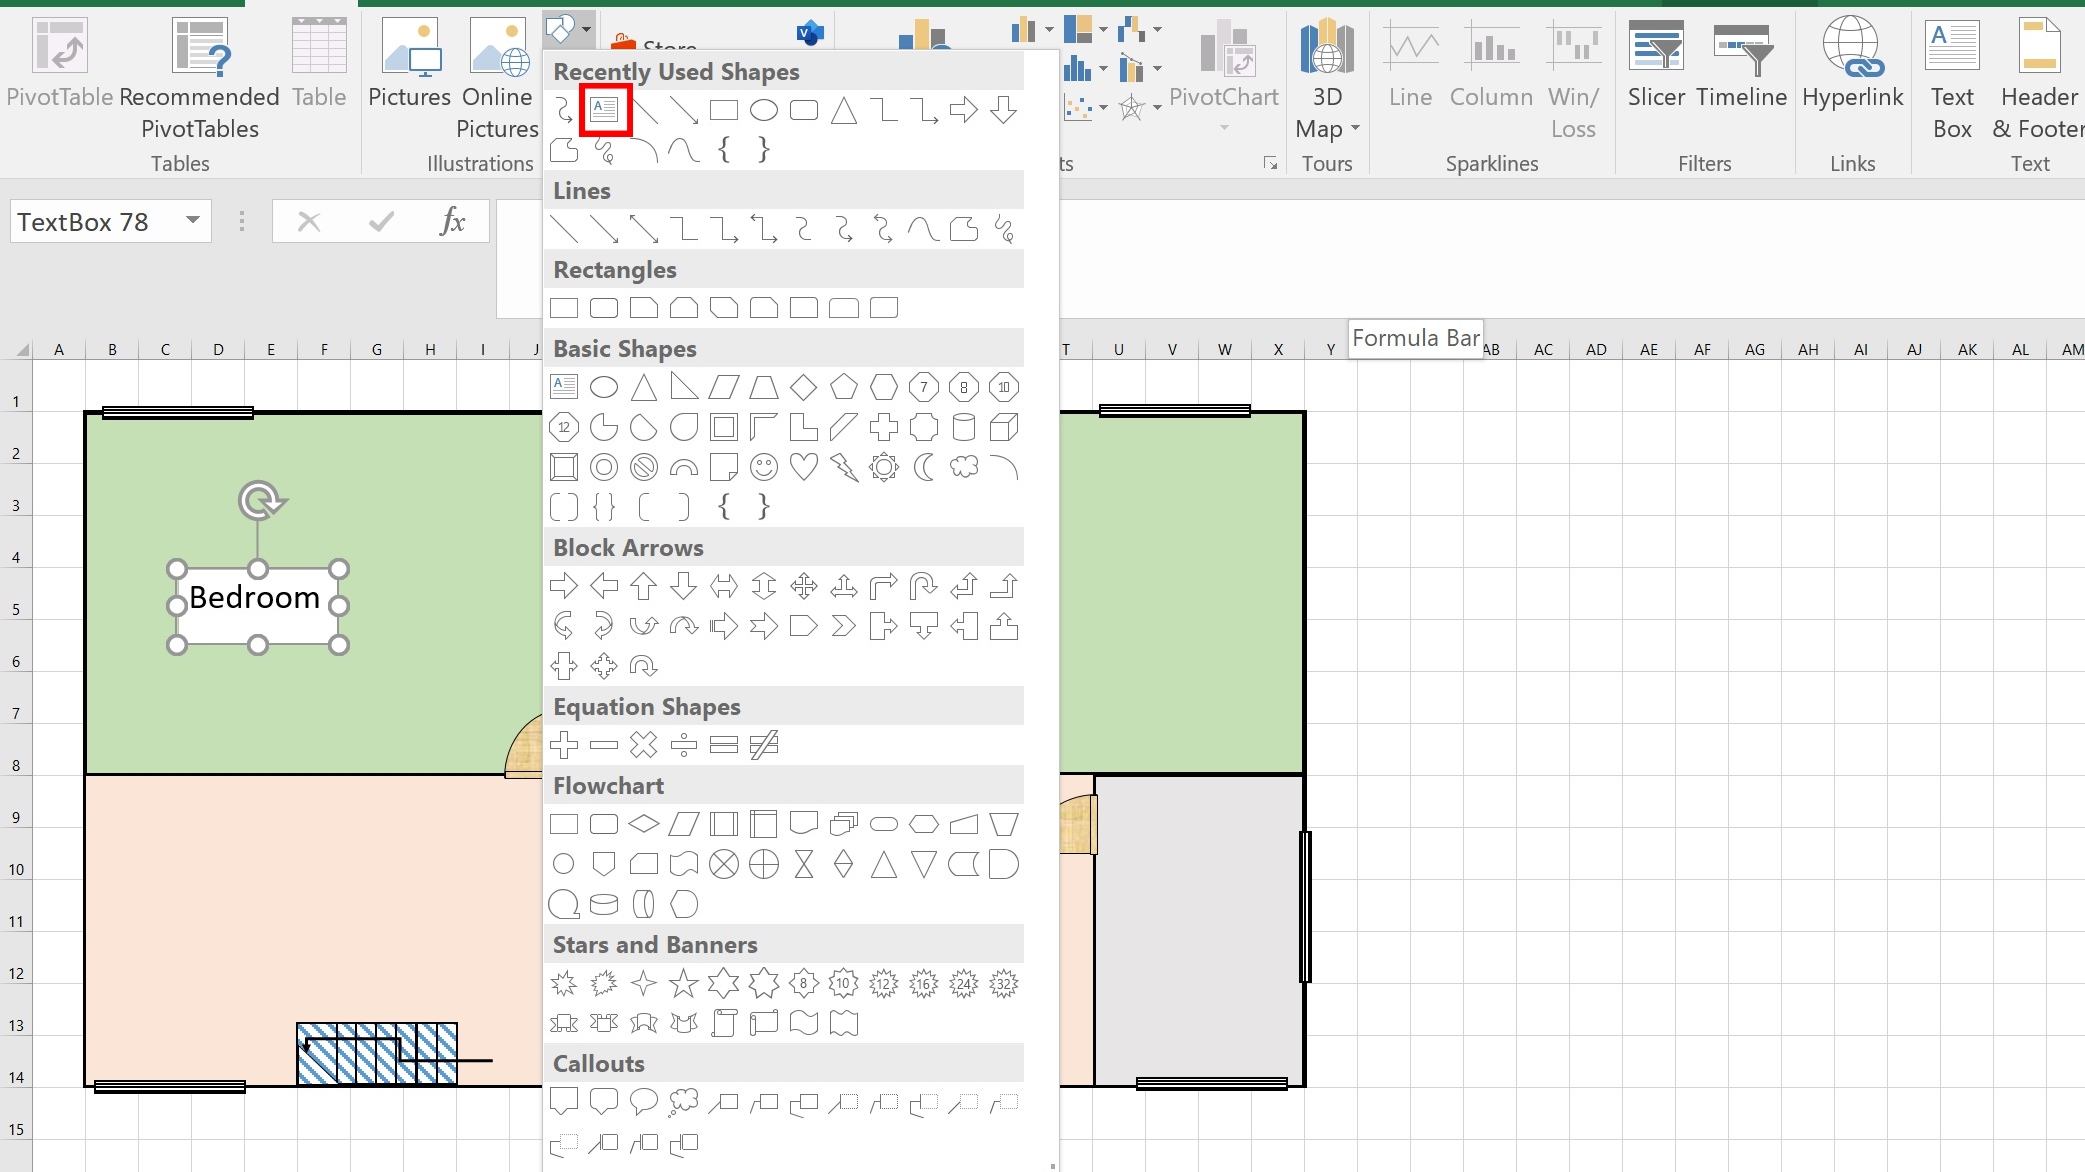
The basic layout design for a floor plan is ready. However, we still can't recognize the rooms. Therefore, add labels to provide more information about your floor plan and make it helpful for others. Go to Insert > Shapes > Text Box to add labels to your floor plan.
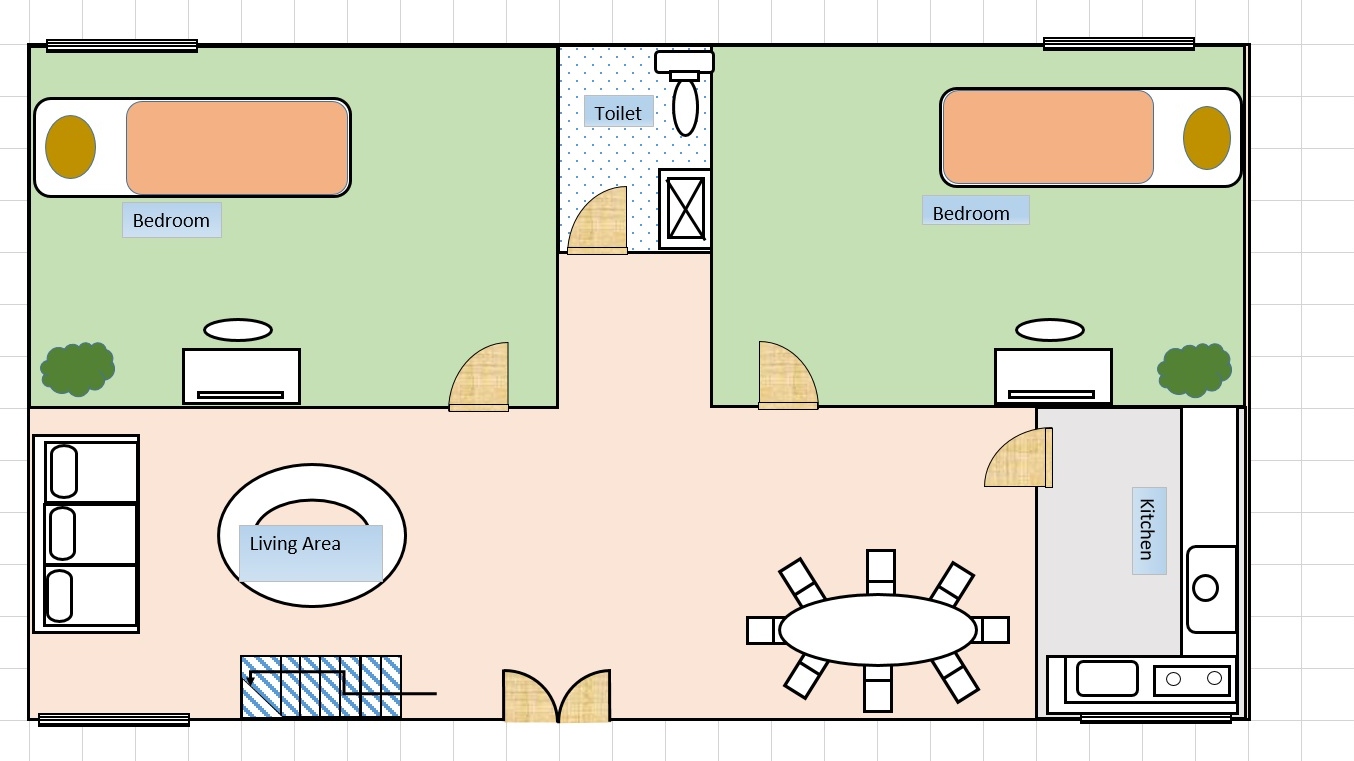
Once you add labels, draw other labels, such as sofas, beds, kitchen sinks, bathroom toilets, and dining tables, using steps similar to those we did above.
More Robust and Efficient Than Excel – Edraw.AI

Edraw.AI is an artificial intelligence tool where you can create flowcharts, diagrams, network charts, and floor plans. There are hundreds of templates available to create a floor plan on Edraw.ai.
2.1 Select Template
Create an account on Edraw.ai and sign up for a 7-day trial to start using the tool. After signing up, Select Templates > Search Floor Plans. You can also select templates by scrolling down on the homepage of Edraw.Ai.

2.2 Start Customizing
After selecting a template, click the Create With Template button to start customizing.

2.3 Drag and Drop Symbols
You can quickly move and place floor plan elements and symbols by clicking the icon. Customize the shapes with different styles and colors according to your preference.
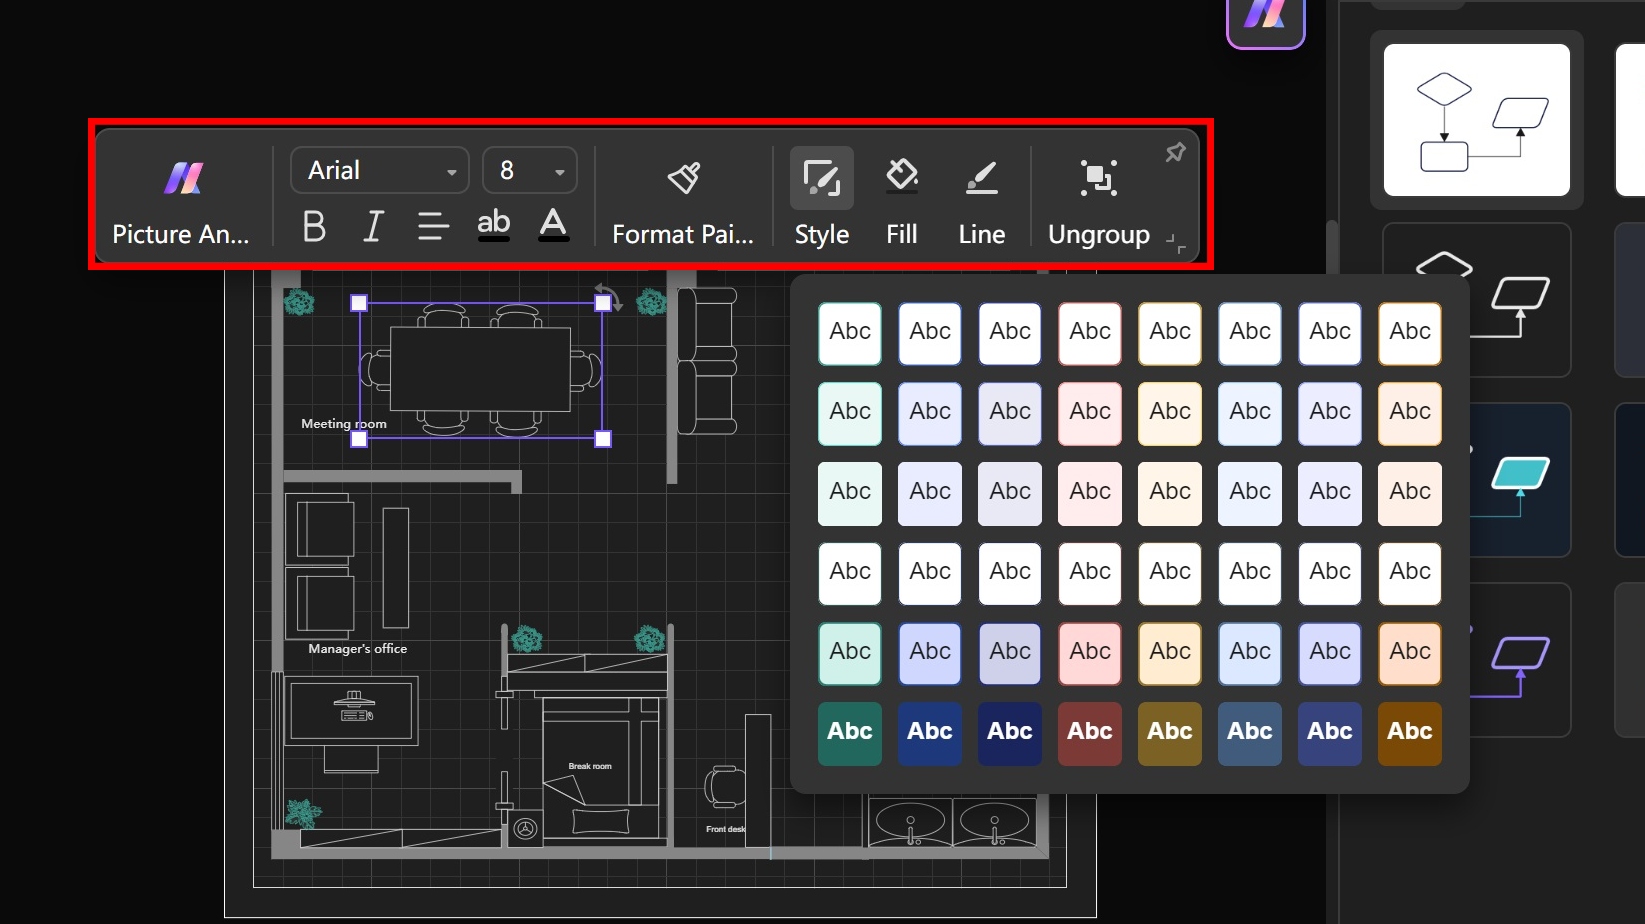
2.4 Edit with Symbols
Add different symbols from the right bar and customize the template. You can add different kitchen appliances, sofas, bedrooms, walls, and cabinets.

You can add background images by selecting the Pictures option below the symbol option. All pictures are copyright-free from PixalBay.

2.5 Export
Export the customized template in PDF, Visio, Excel, Word, SVG, and Eddx formats.
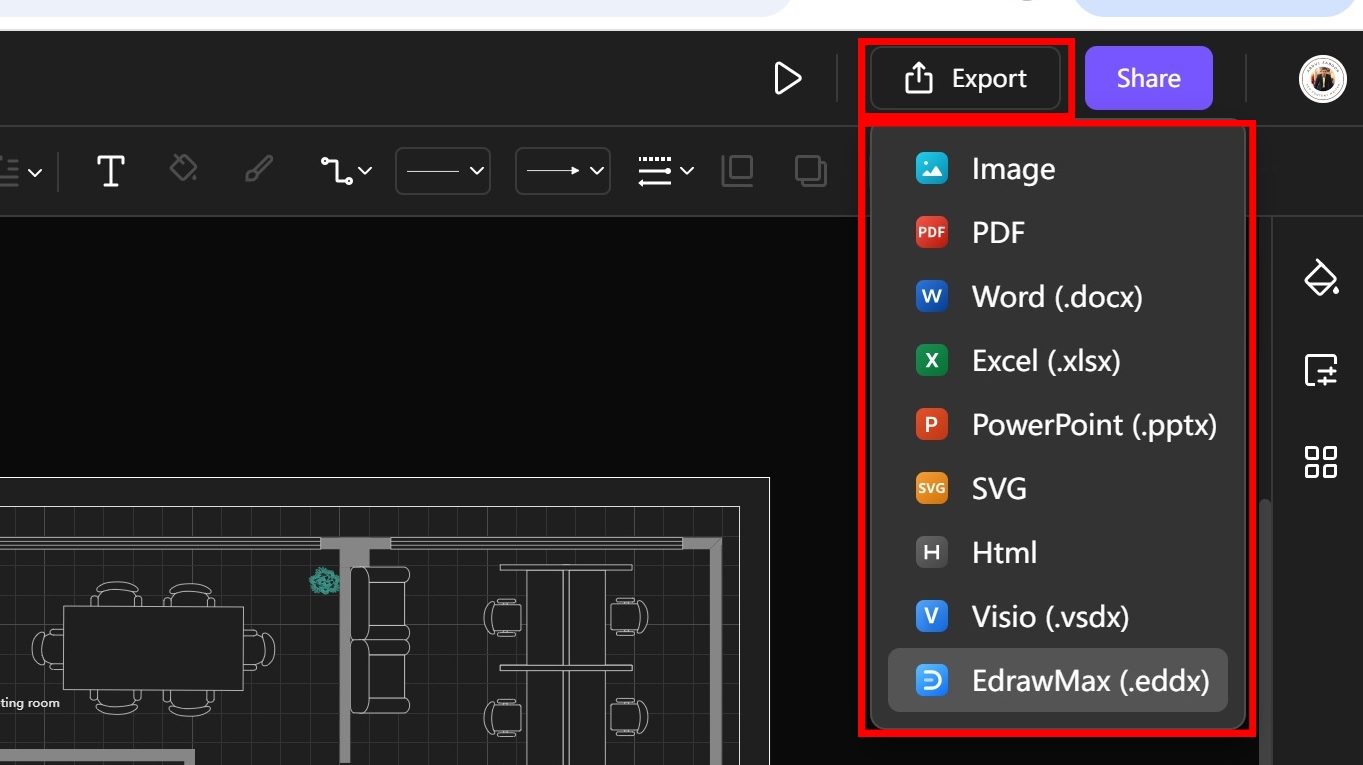
In addition, you can invite your team members by sharing the link. Click the Share icon to invite.

Edraw.AI vs. Excel Comparison
Edraw.AI and Excel are both great tools for creating floor plans. Here are some major comparisons:
- Excel lacks floor plan symbols. It requires add-ons to add floor plan symbols, which is time-consuming. Conversely, Edraw.AI has hundreds of symbols available for floor plans. Users can easily add symbols related to their requirements in a floor plan.
- Edraw.AI has different templates that you can customize to save time. However, there are no floor plan templates available in Excel.
- Edraw.AI has a user-friendly interface with an easy-to-follow workspace for creating floor plans. However, Excel does not have any that are primarily related to floor plans.
As a result, Edraw.AI is a much better tool as compared to Microsoft Excel. It has elements, functionalities, symbols, and templates.
Conclusion
Microsoft Excel is a good tool for creating a floor plan, but only if you want something ordinary. It comes with an affordable price plan but lacks many features required to make a floor plan.
That's where Edraw.AI stands as a prominent tool in creating a floor plan and other diagrams. It offers different floor plan templates, symbols, elements, and AI tools to improve your work.


