In many work-related functions, flowcharts play a big role. This is especially true in areas like logistics, decision-making, and software engineering. After all, these charts help engineers or workers understand the way specific processes are made. One of the popular types of flowcharts is the if-else flowchart.
If you’re a beginner programmer or someone who’d like to learn more about if-else flowcharts, the following will help you learn more about them, what they contain, and how to make them in three different ways. After reading this article, you’ll definitely be more comfortable creating these on your own.
Make sure to ready your desktop to begin charting if-else flowcharts and take down some notes, too.
In this article
What Is an If-Else Flowchart
First, you’ll know what an if-else flowchart is defined. This is essential so that you understand what you’ll be making. After all, creating flowcharts can get a bit overwhelming. While their function is to simplify things, creating them is a different story.
An if-else flowchart is a diagram that shows you the decision-making process in programming or other similar, logical workflows. A flowchart like this represents whether a condition is true or false and what actions should be taken respectively. It can be summarized in this simple sentence: “If it is true, then do this; else, do something else.” This is essentially what an if-else flowchart represents.
With this information, you can now understand what workflows or situations you should add to your flowchart. Now, here are the basic yet important symbols in an if-else flowchart so that your flowcharts will be up to the standards or common practices:
- Decision diamond symbol. This contains the condition to be evaluated.

- Two lines stemming from the decision diamond symbol. These lines represent the line of decisions that you can take and are usually labeled with “Yes/True” or “No/False.” This can be considered as the results from the flowchart’s if statements.

- Process symbols (rectangles). This shows the actions to be taken after something is deemed true or false.
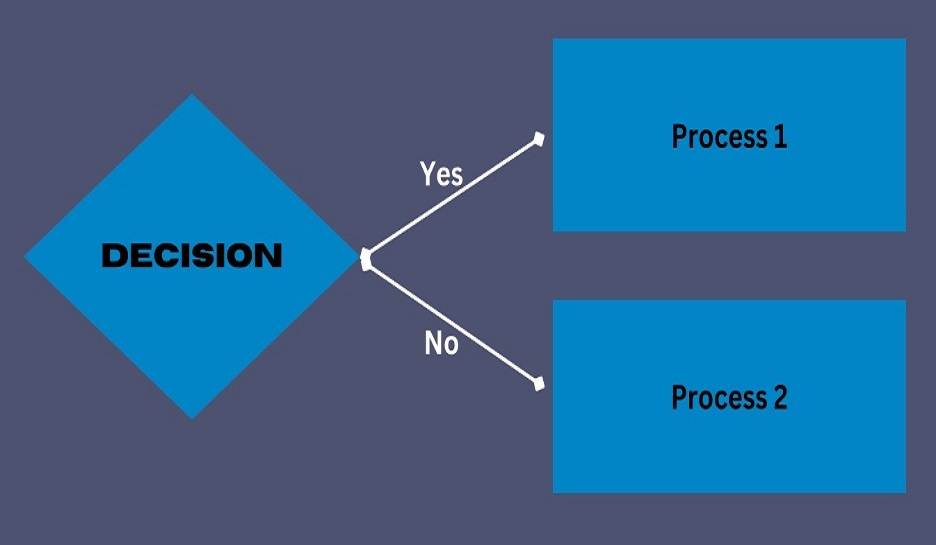
- Arrows. Of course, using arrows is essential in any flowchart. This shows the direction the reader or program must follow when dealing with the workflow.
Examples of If-Else Flowcharts
Now that you understand an if-else flow chart, it’s time to see some examples. This will further augment your understanding and help you visualize what you understand so far before getting your feet wet and making them. This is the second-to-the-last part of your learning journey, so come on in and look at some examples.
Login System If-Else Flowchart
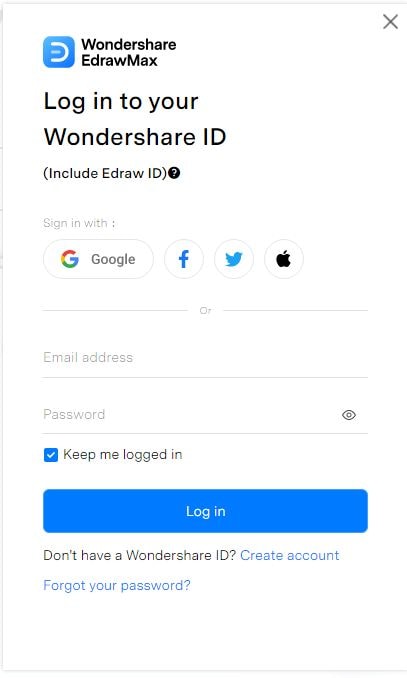
This login system if-else flowchart shows you the process of a user logging in to an app. The if-else statement in the flowchart is found in the “Set Password” decision symbol. If the user wants to set a password, it will ask them to input their username. Else, it will cancel the transaction. This is a great example of visualizing how these flowcharts work.

General Condition Flowchart
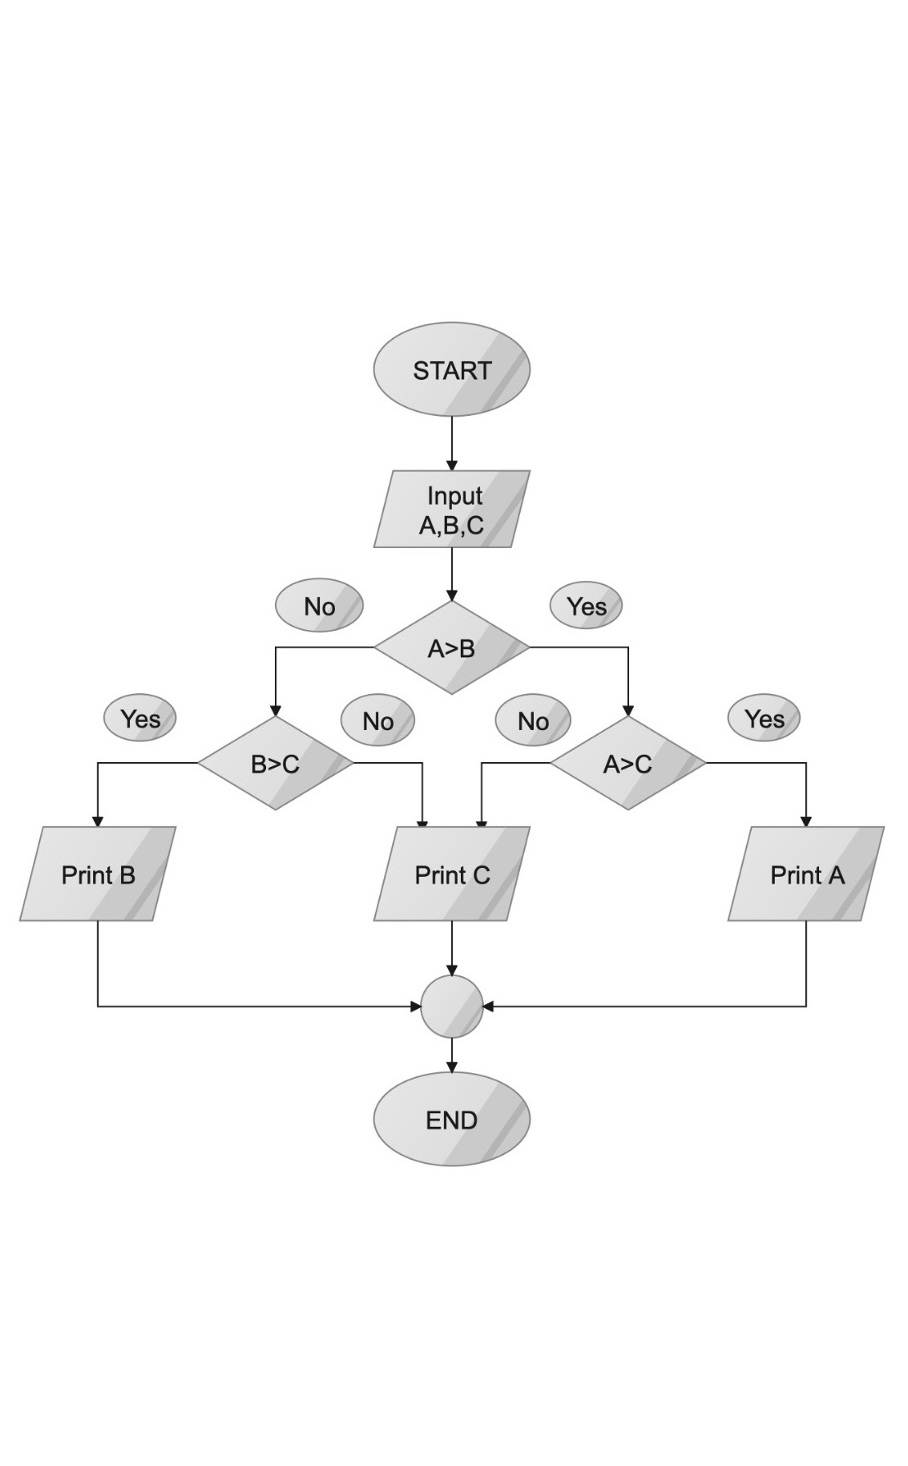
This general condition flowchart is another example. This one serves more as a template rather than an example. However, you can see that it employs several instances of the if-else statement when placed in a flowchart. For example, if “A>B,” then the program should understand that “A>C.” Otherwise, it should understand that “B>C”. You can follow this example on how to make a more complicated if-else flowchart.
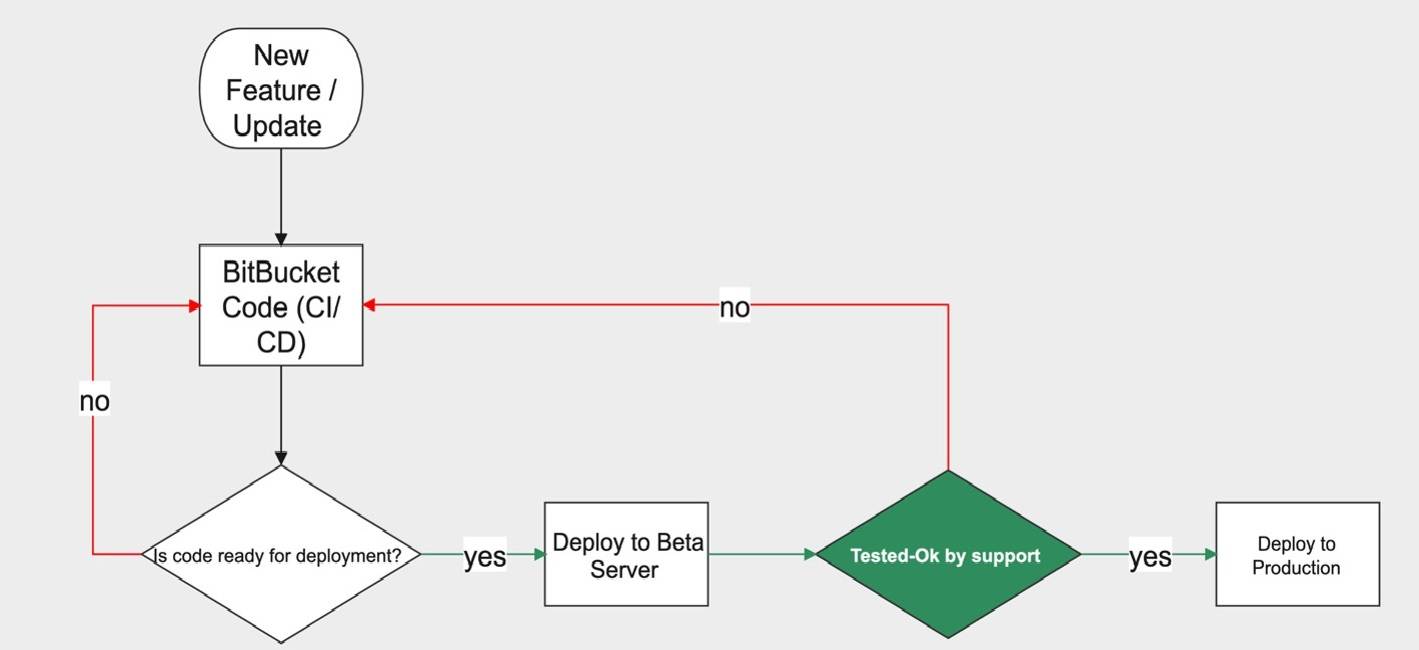
Program Release Flowchart
Lastly, this is a program release flowchart that’s also a great example to follow. In this case, you can see that it follows how to deploy a new feature or update in an app. In the decision symbol “Is code ready for deployment?”, the if-else statement is found. So, if the code is ready for deployment, the feature must be deployed to the beta server. Else, it will go back to the BitBucket coding process.
3 Ways To Make an If-Else Flowchart in a Minute
After all that introduction to if-else flowcharts, you must want to create your own. Don’t worry. You’ll explore the process in this section. You’ll find three different methods here: from Edraw.AI, from PowerPoint, and from Draw.io. These three methods are all viable ways of making if-else flowcharts.
Learning this variety of tools can make you flexible when it comes to any situation where you need to create flowcharts, especially since each tool has pros and cons. Now, ready up your desktop and start learning the steps below. Remember, you’ll still have to explore each tool to maximize them and expand your creative horizons in flowcharting.
Generate an If-Else Flowchart From Text on Edraw.AI
First off is Edraw.AI. It’s a dedicated, web-based tool for all things diagramming or flowcharting. Of course, this means that you can create flow charts for if-else statements through this tool. Equipped with basic and advanced tools for creating charts, you can create professional and beautiful-looking diagrams with no problem.
Here are some of the reasons why you should try out this excellent software from Wondershare:
- AI generation: Edraw.AI comes with a dedicated AI assistant/diagram or flowchart generator. This means that you can ask it to create an if-else flowchart or other diagrams, for that matter. The AI tool also includes time-saving abilities like AI copywriting, summary, and file analysis.
- Templates: Ever had a hard time starting a project? Edraw.AI also has a user-powered template library that you can use to jumpstart your projects. This includes different flowcharts that you can customize according to your needs.
- Free and online: It can be troubling to look for free yet reliable tools online. Well, Edraw.AI is dedicated to providing you with all the diagramming and flowcharting tools you need without cost. While there is a Pro version, the functionalities offered in the free version are sufficient for basic and professional projects.
Well, enough introductions. Here are the steps on how to generate your if-else flowcharts with Edraw.AI:
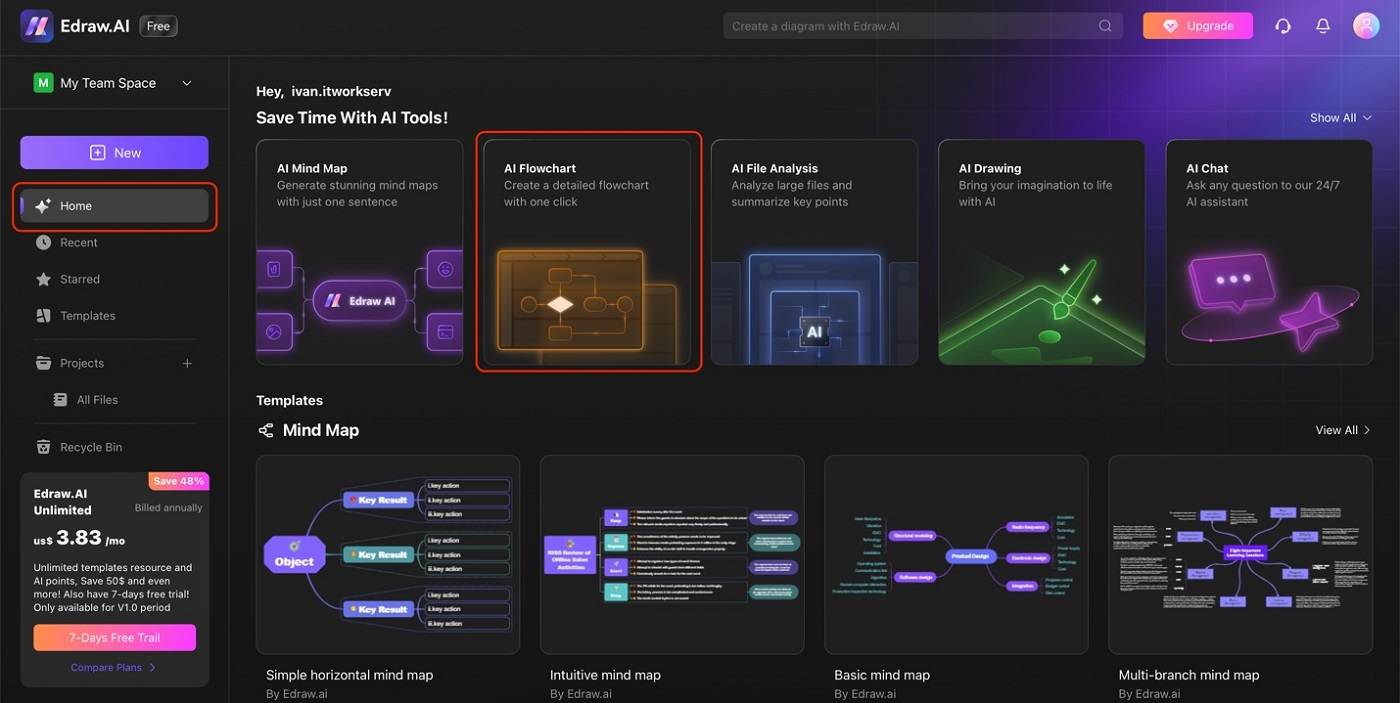
Step 1
Under Home, click AI Flowchart.
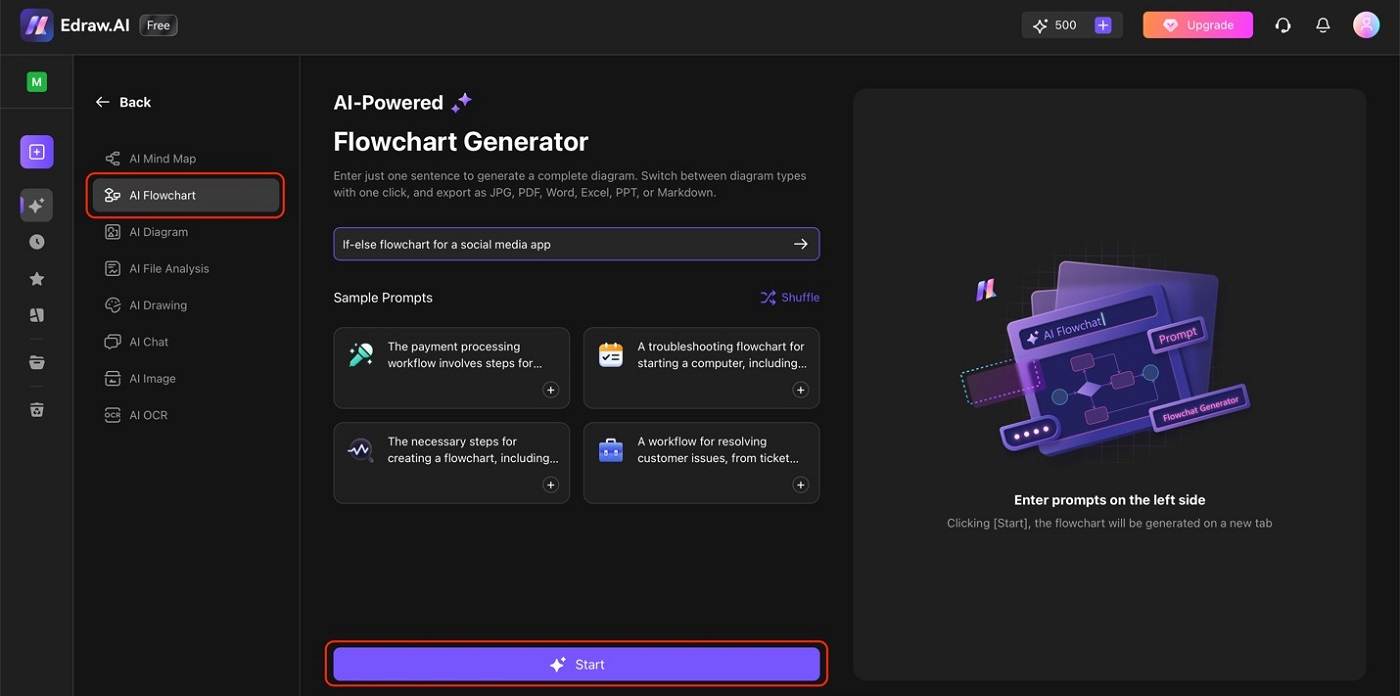
Step 2
Under AI Flowchart, type in your prompt in the text box. Then, hit Start.
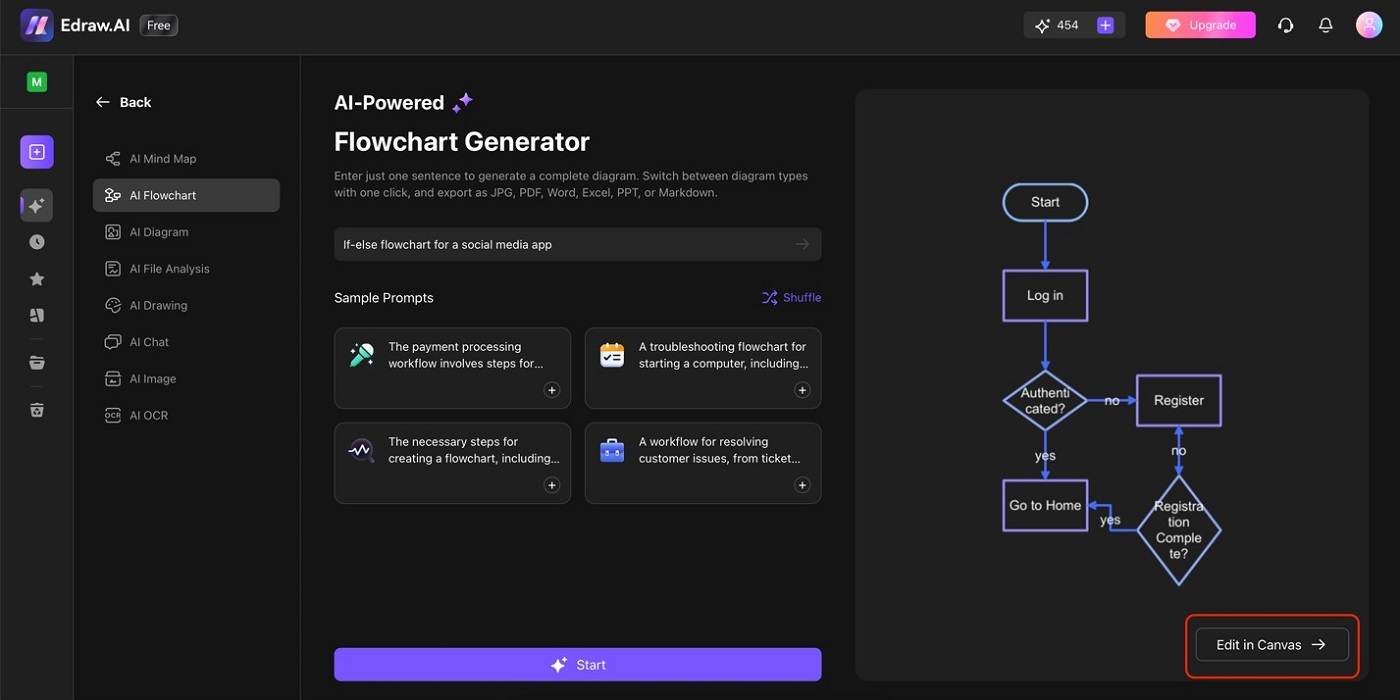
Step 3
After the flowchart is generated, click Edit in Canvas.
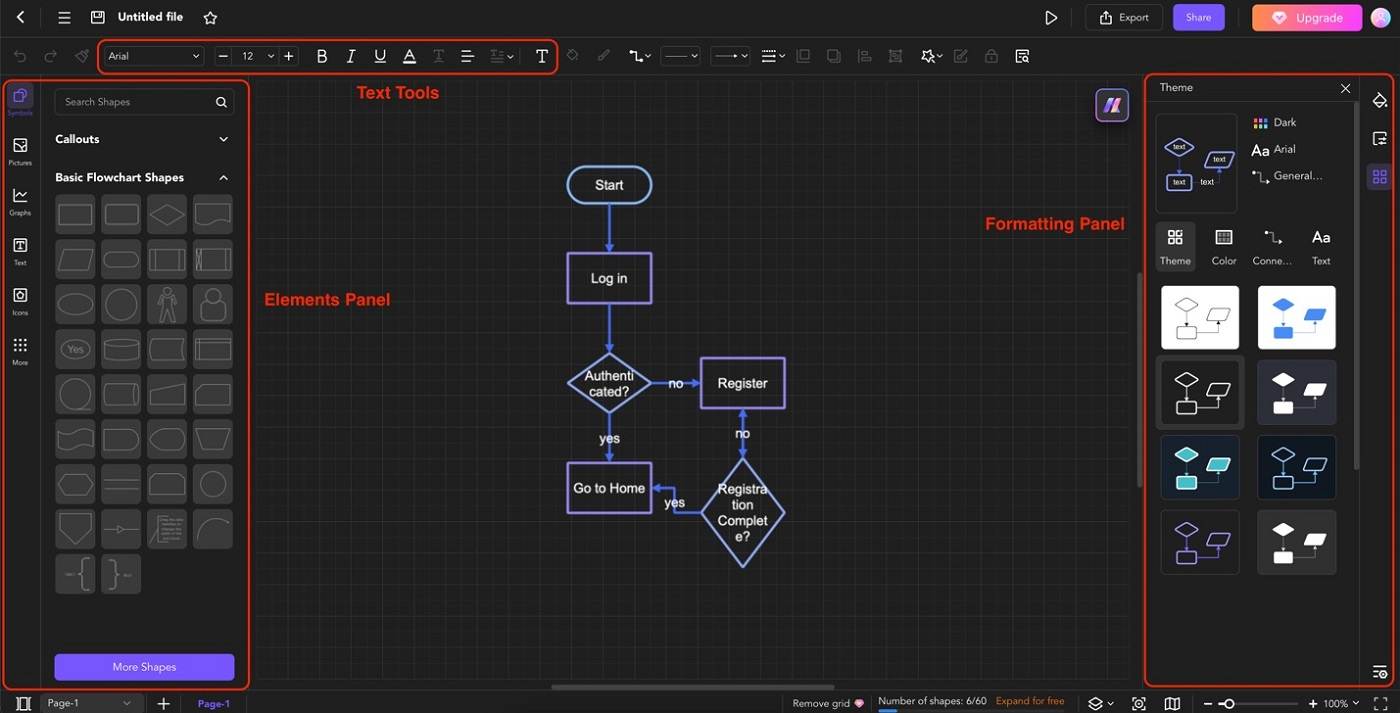
Step 4
Proceed to customize the generated flowchart. Use the Text Tools to adjust fonts, styles, or colors. Use the Elements Panel to add shapes, stickers, or media. Lastly, use the Formatting Panel to change the style of shapes, the layout of the flowchart, and other related formatting tools.
Make a Basic If-Else Flowchart on PowerPoint
Another option for making if-else flowcharts or other diagrams is PowerPoint. While it may not seem like an obvious choice, the secret of making flowcharts here lies with Office’s SmartArt feature. This tool has pre-built layouts and allows you to add shapes and other elements for charts.
To start making your flowcharts in PowerPoint, follow the steps below:
Step 1
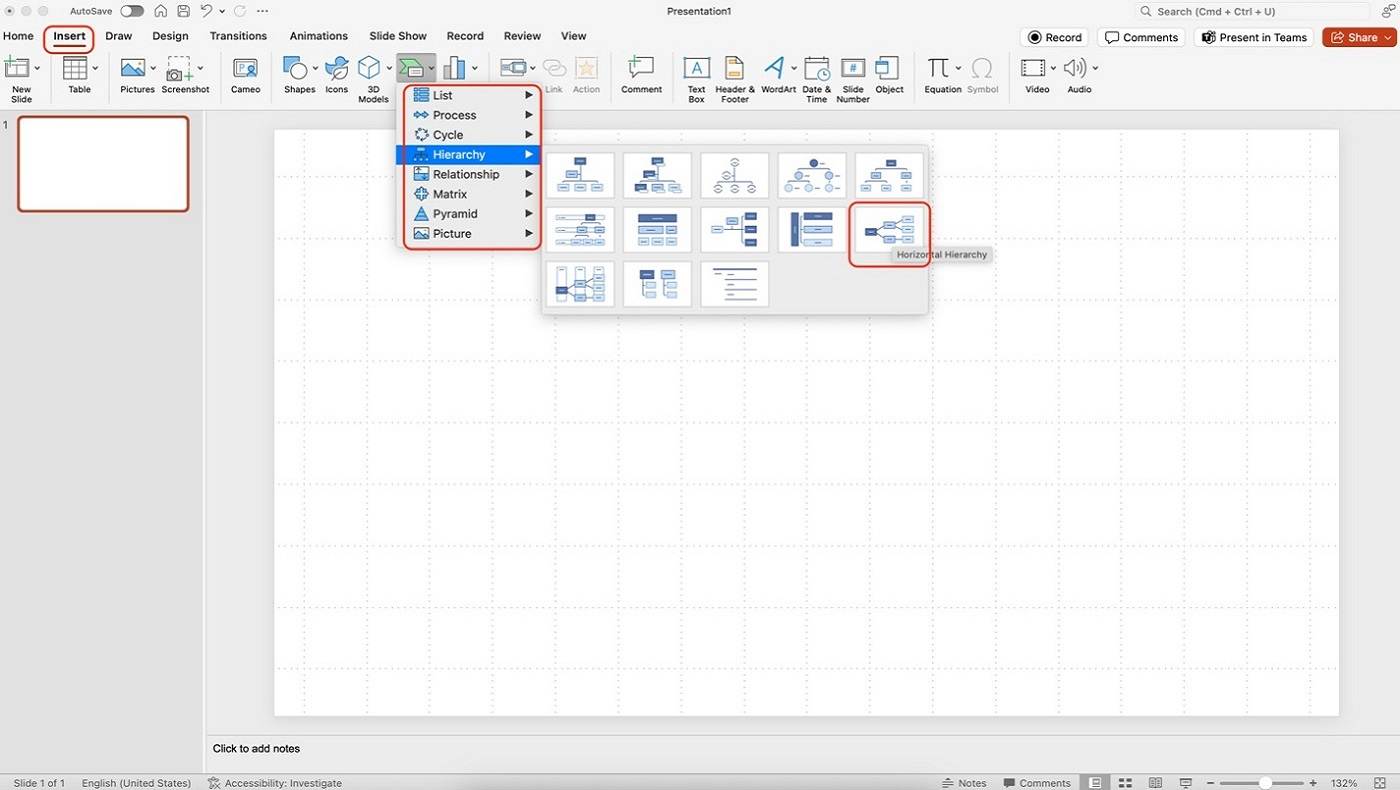
Go to Insert > SmartArt > Hierarchy. Select a template you like, but Horizontal Hierarchy is recommended for if-else flowcharts.
Step 2
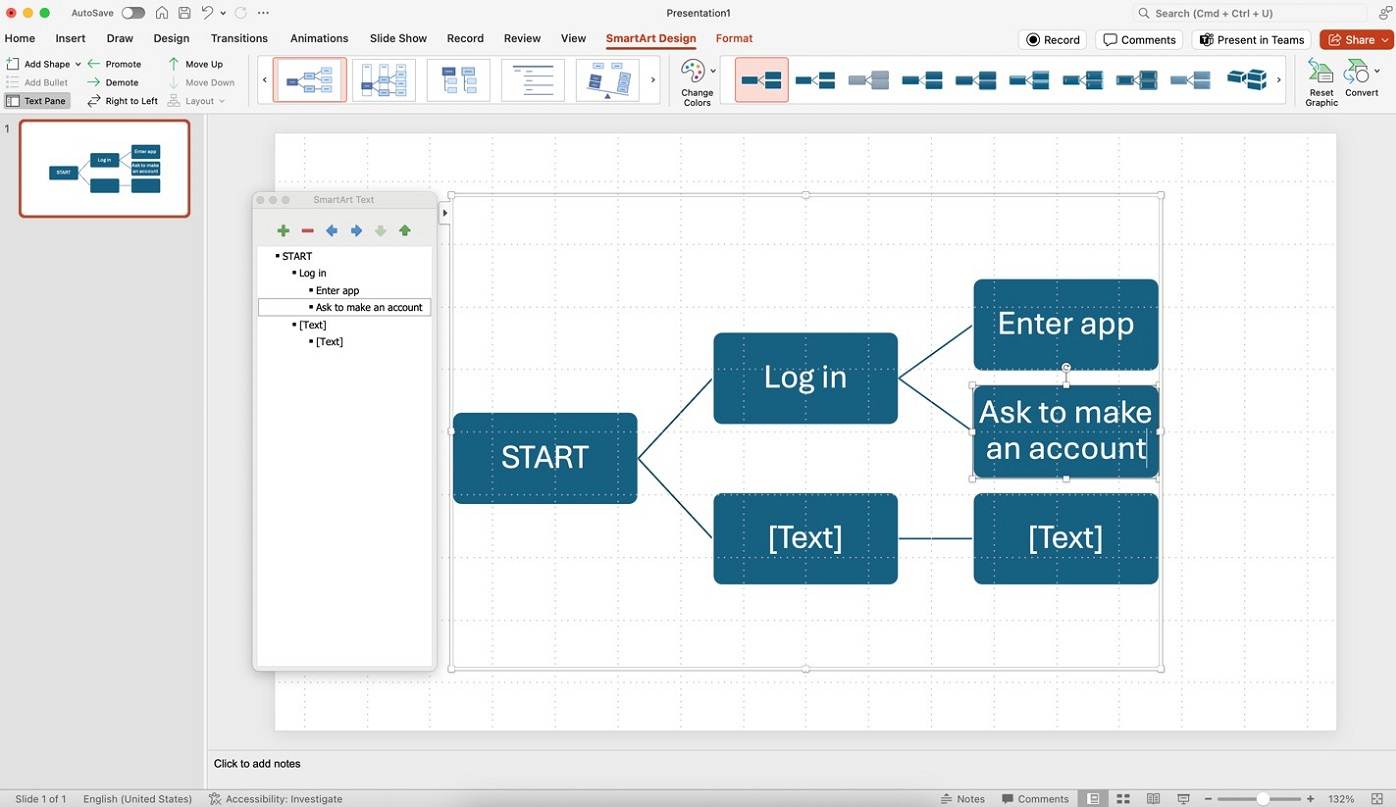
Edit the placeholder by double-clicking it or using the SmartArt Text pane.
Step 3
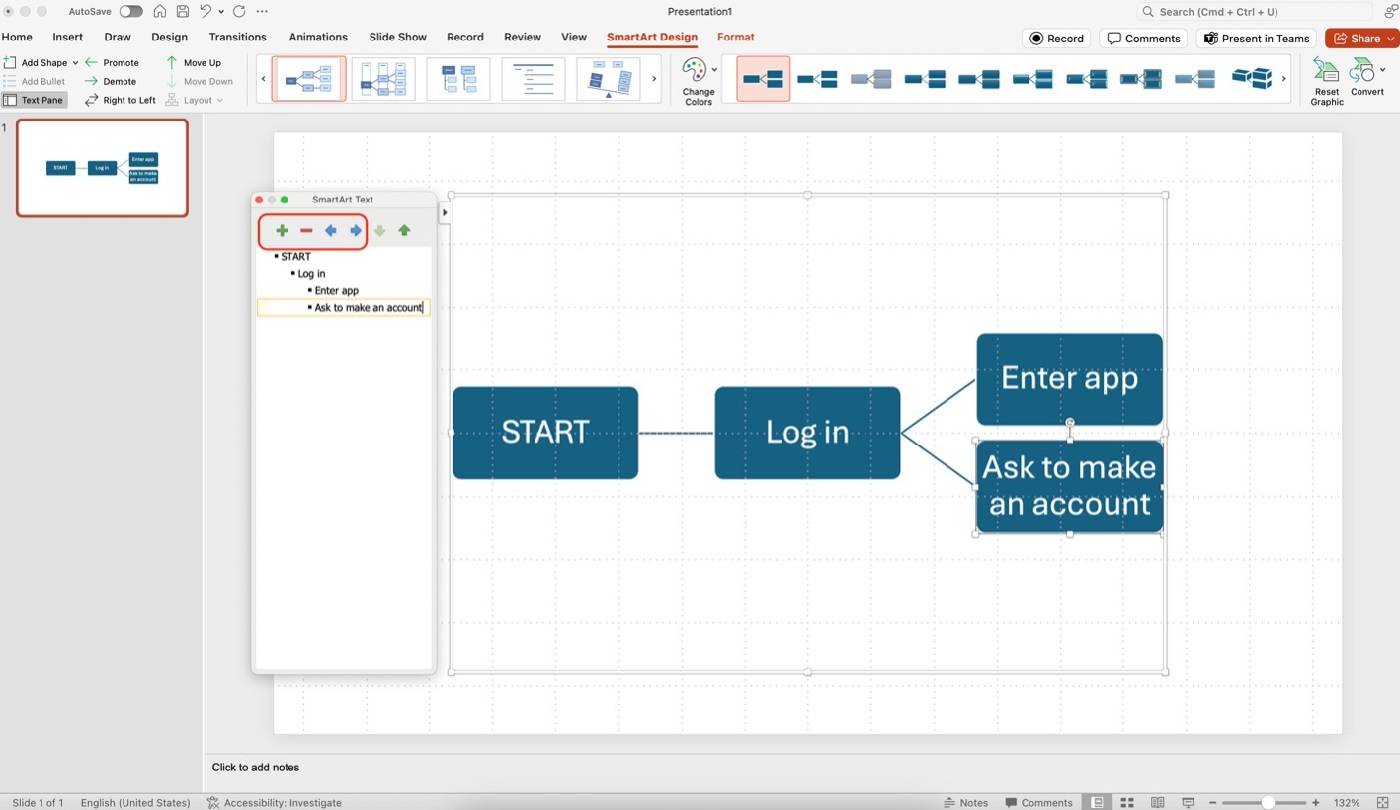
Add new shapes using the + button on the SmartArt Text pane, and remove them using the – button. You can also use the Indent buttons to place a shape next to an existing one.
Step 4
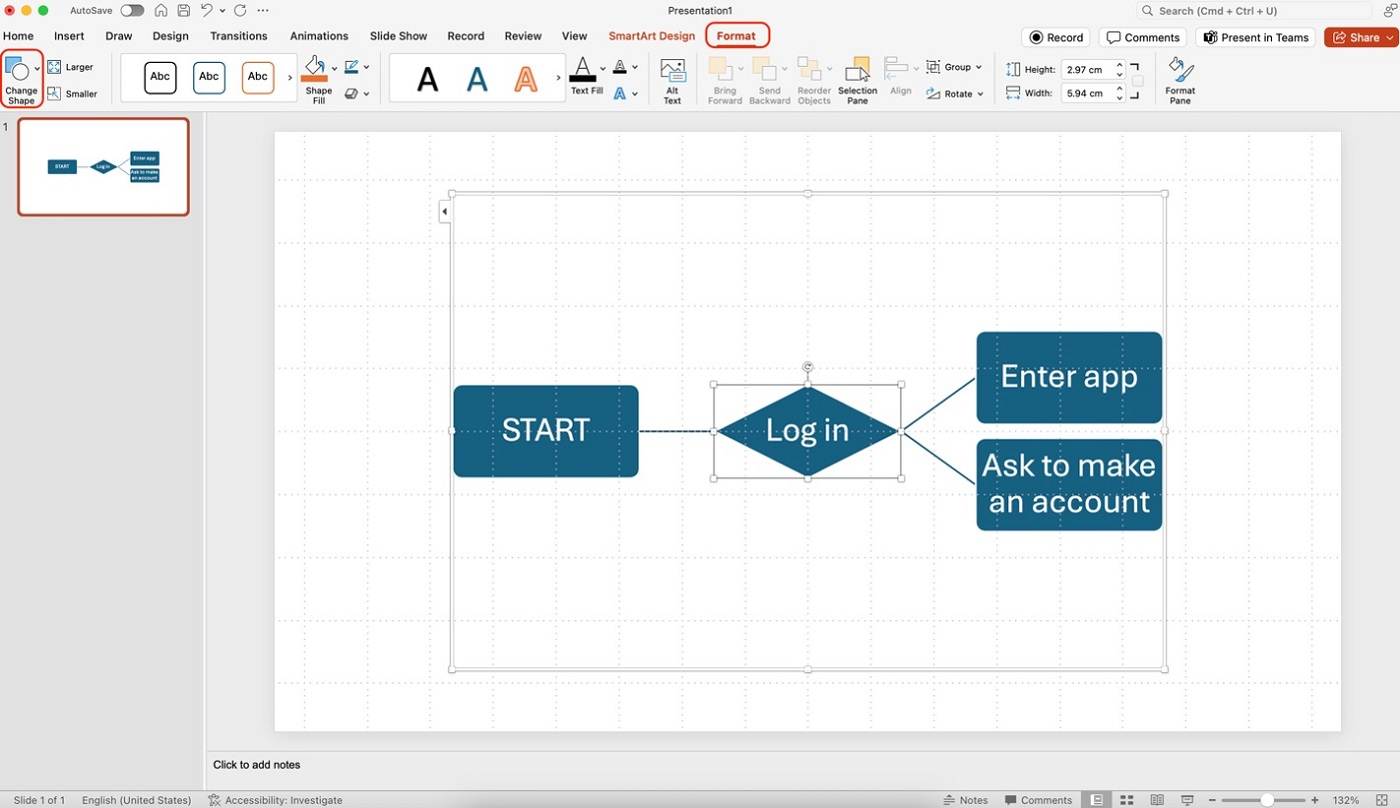
Lastly, go to Format > Change Shape to change the shapes in the flowchart to the standard shapes (refer to Part 1).
Make a Basic If-Else Flowchart on Draw.io (Open-Source)
The last method for making an if-else flowchart is using the open-source diagramming tool Draw.io. It’s a tool primarily for flowcharting, letting you organize ideas for free and without hassle. Not only that, but the tool offers a direct connection to popular cloud drives like Dropbox or Google Drive.
To create your if-else flowcharts in this tool, follow the steps below:
Step 1
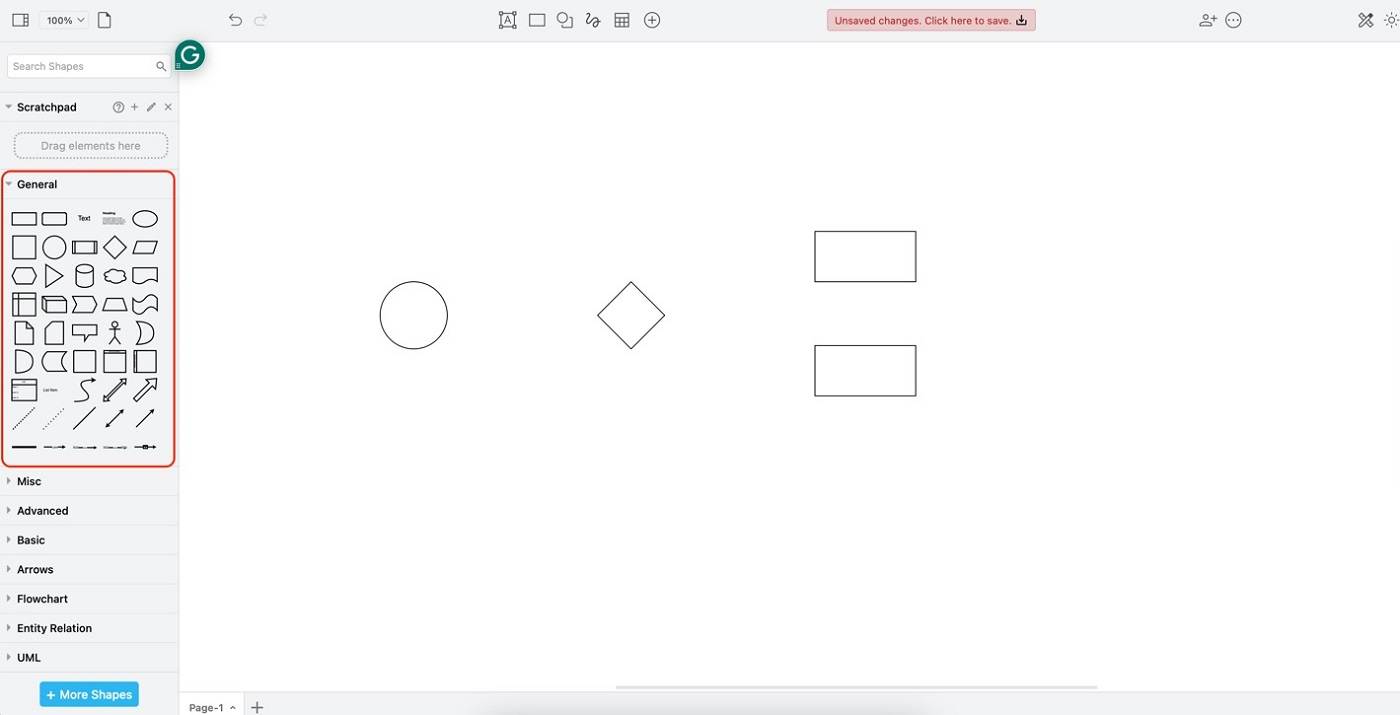
Drag-and-drop shapes under General. Follow the standard shapes provided in Part 1 of this article.
Step 2
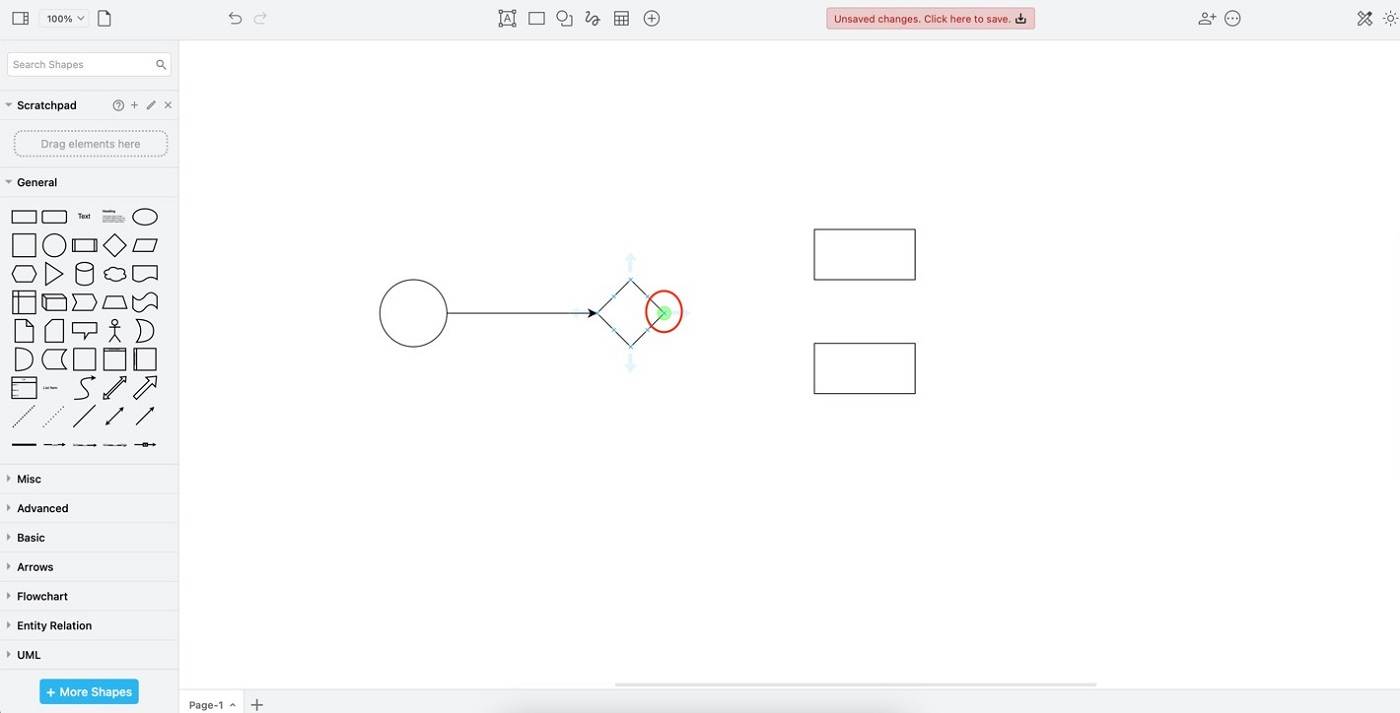
Connect the shapes by clicking and dragging the little yellow circle with an arrow indicator to the shape you want it to be connected to.
Step 3
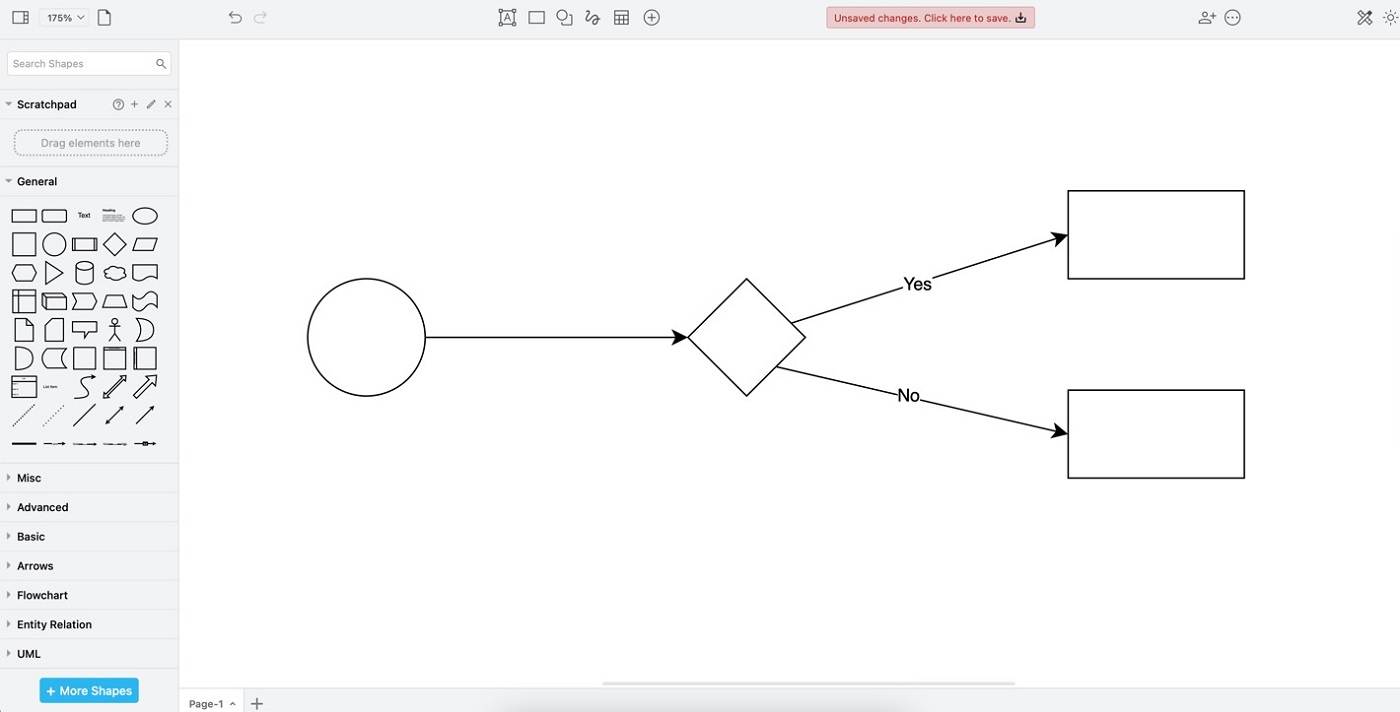
Double-click the connectors to bring up a text box that will serve as your “if-else” labels.
Step 4
Lastly, double-click the shapes to add text.

Ending Notes
Overall, making an if-else flowchart is quite easy as long as you understand its concept. It might seem complicated at first, but practicing it is, of course, a prerequisite to mastering it. As you go through your flowcharting journey, remember to use reliable tools. For example, if you want quick AI-generated flowcharts, then use Edraw.AI. After all, it also offers deep customization features. This way, you can still make the flowchart your own.

Prefer working locally?
Make 210 types of diagrams: flowcharts, blueprints, UML, etc
AI Mind Map, AI PPT, real-time
collaborative brainstorming