If you are a student, a business analyst, or a professional who often needs to handle bulk data, you must have used mind mapping in one form or the other. A mind map is a visual tool that organizes the data creatively. Millions of people use it to highlight complex problems and search for their possible solutions.
Hundreds of mind mapping tools are available on the market. The Notion is one such utility. This tool assists you in structuring the data like never before and creates separate databases for each category. If you wonder how to create a Notion mind map, we have got you covered. In this article, we have presented multiple methods to make a mind map in Notion.
With Notion, you can create a mind map from scratch and by using a present template. You can also integrate Miro with Notion to make mind maps. All three methods are listed and explained below.
In this article
Method 1. How to Create a Notion Mind Map from Scratch
Go to the Notion website, sign in, and follow the steps below.
Step 1 Create a Blank Page
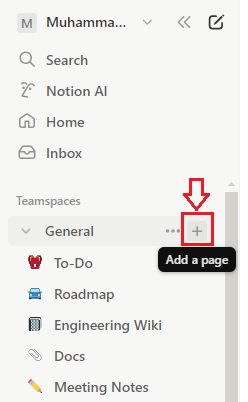
On the main interface, under Teamspaces, click on the + icon. It will create a new blank page for you.
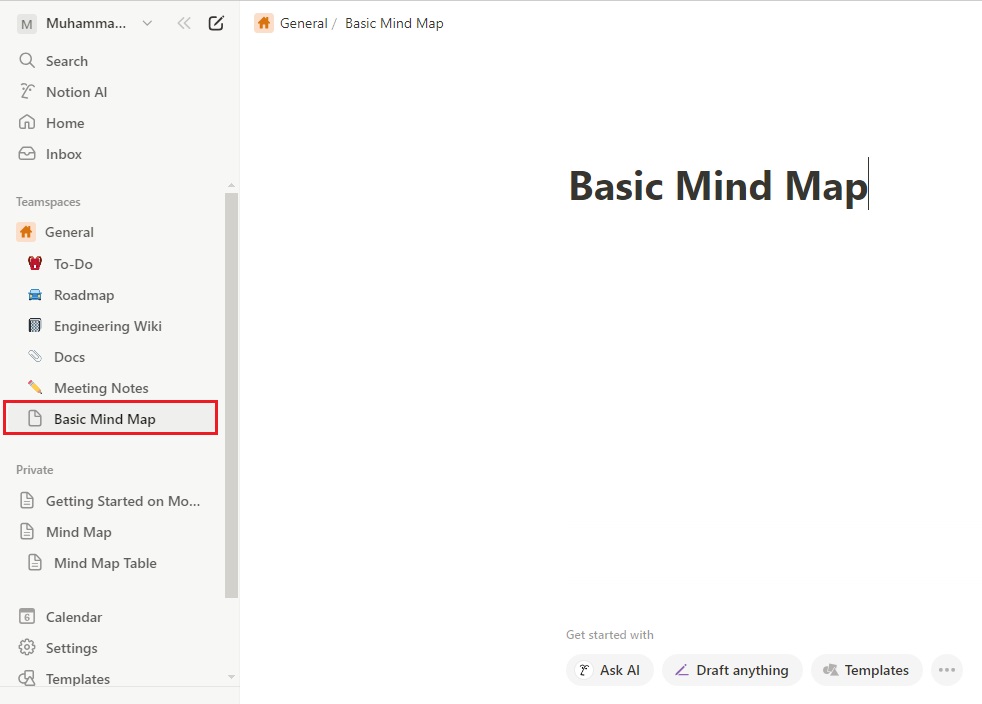
After creating a new page, assign it a new name relevant to your project. Once you name the page, it will appear under Teamspaces, as shown below.
Step 2 Add a Table
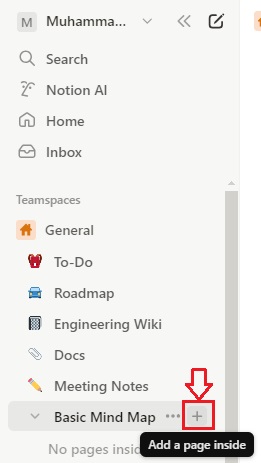
Let’s now add a table to organize the data. To do this, move your cursor onto the newly created page, and tap on the + icon to add a page inside.
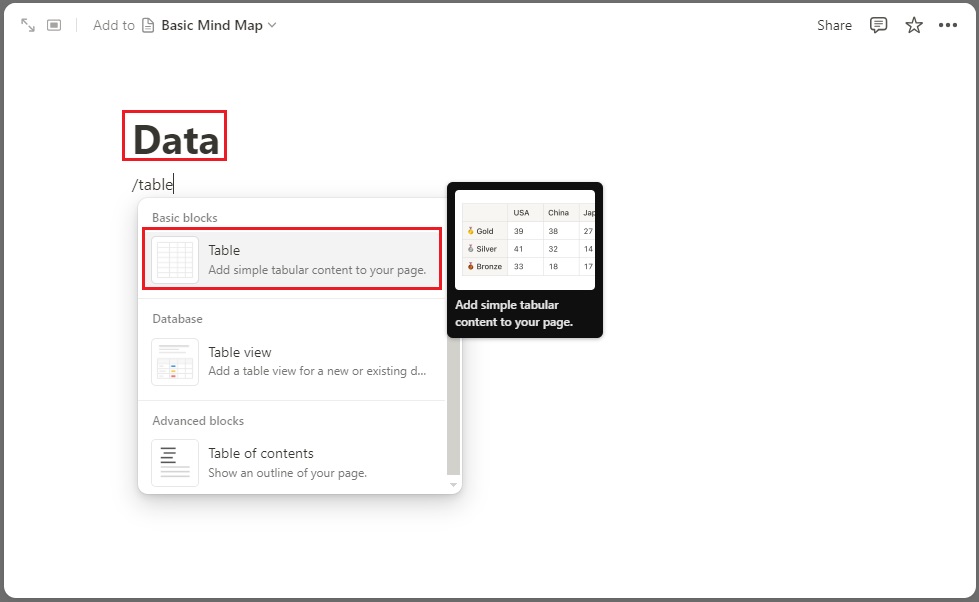
Now, name the inside page, type /table anywhere on the page, and choose the Table, as shown below.
Step 3 Create More Rows/Columns and Add Information
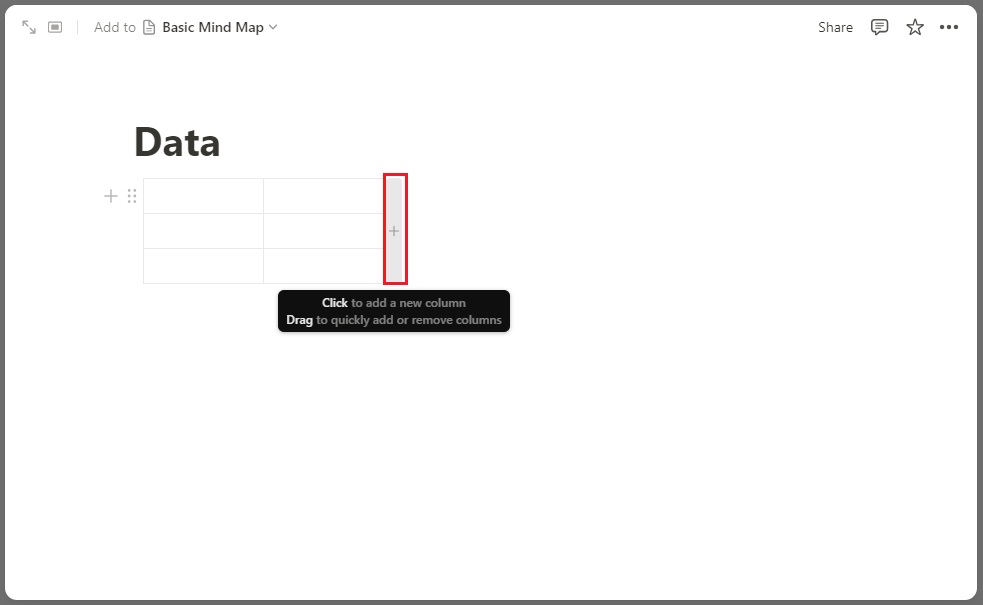
It is time to add more rows and columns to the table according to your data requirements. Move your cursor to the right side of the table and click the + button to add more columns. Similarly, move your cursor to the bottom of the table and add more rows by clicking on the + icon.
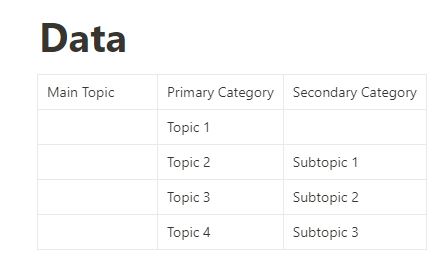
It is time to enter information in the table. Add the main subject, subtopics, and further information if needed. In the example below, we have entered the general data for basic understanding.
Step 4 Customize the Table
Once you create the table and add the complete information, make it more engaging with the customization options. Move your cursor to the top of the column, left-click on the six-dot icon, and use the options available in the list, such as Color, Insert Right, Insert Left, Clear Content, Duplicate, and Delete.
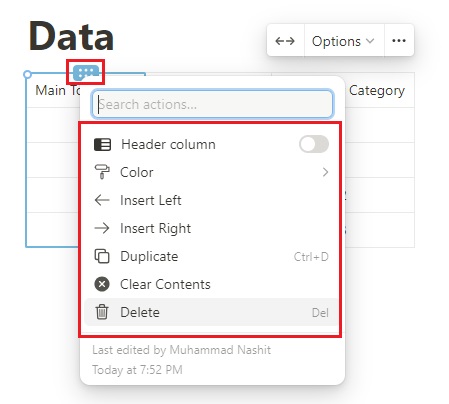
Let’s now change the color of the main topic and both categories to make the table more appealing to viewers. To do this, click on the Color option, and select the suitable background color, as shown below.
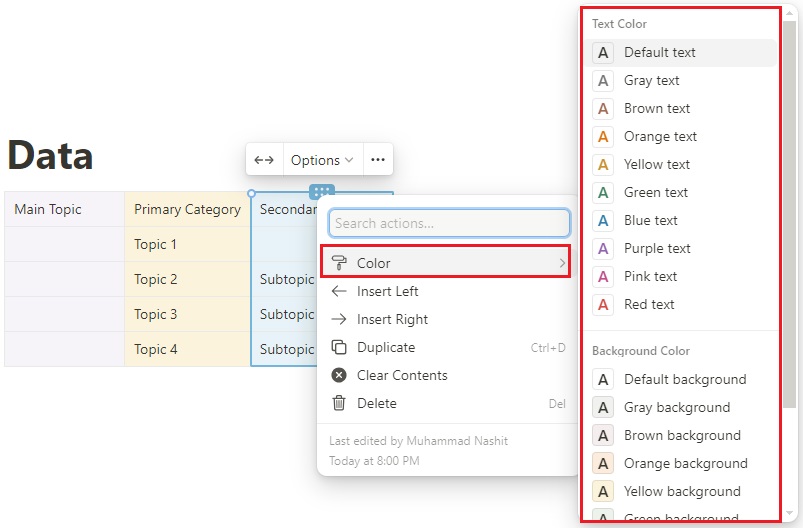
Similarly, you can also change the color of the text written inside the rows or columns of the table.
Step 5 Share the Map
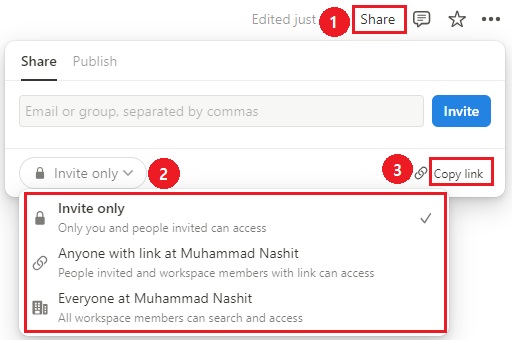
Once the table for a mind map in Notion is ready, you can share it quickly with others. To do this, go to the upper-right corner and click on the Share button. Then, adjust the shareable access and copy the link. Now, you can share this link with anyone you want.
Moreover, you can also enter the email addresses of your colleagues or team members and hit the Invite button to make them collaborate with you while making a mind map.
Method 2. How to Create a Mind Map with Notion Templates
It is the quickest method to make a Notion mind map because you don’t need to create a layout from scratch. All you need to do is make some adjustments, and then you are good to go.
Notion offers more than 20,000 pre-built templates to make mind mapping easier and more fun for you. In the template community, you will find both free and paid templates. Let’s look at how you can find preset templates and edit them.
Step 1
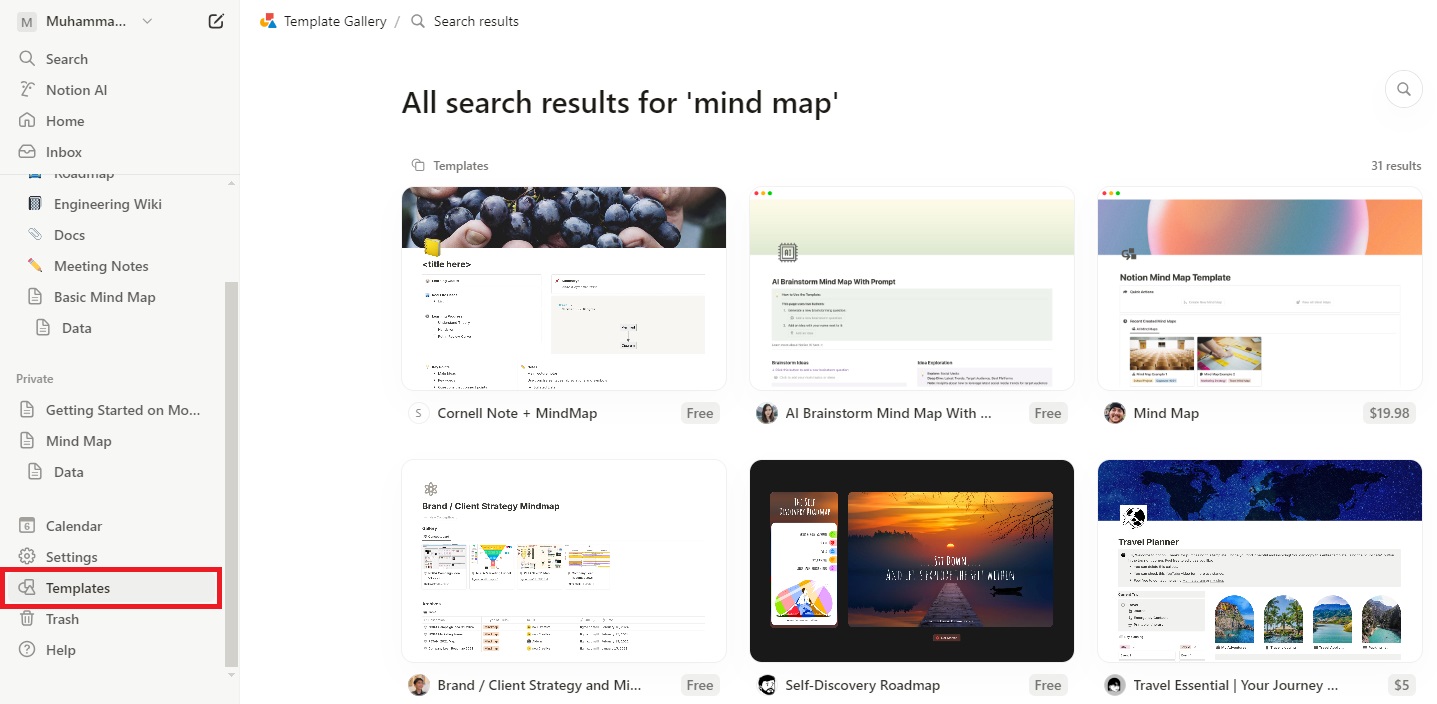
Go to the left bar and click on Templates.
Step 2
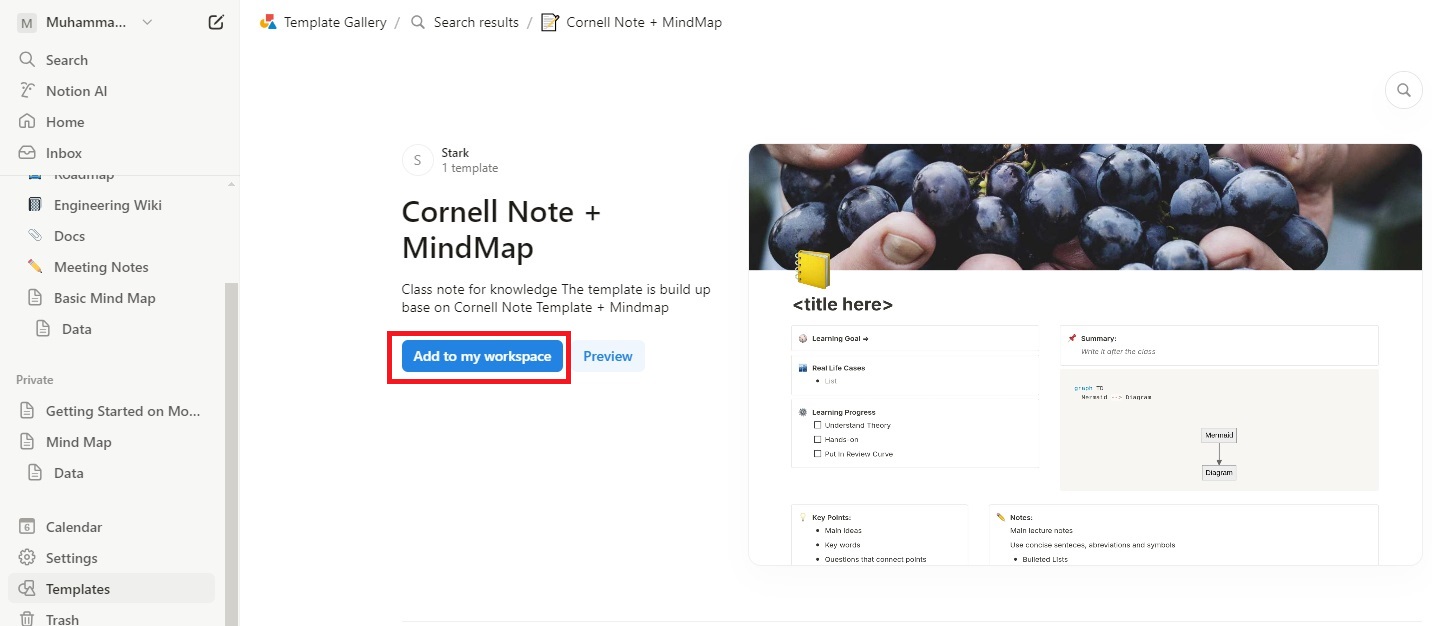
Choose the template you need and tap on Add to my workspace, as shown below.
Step 3
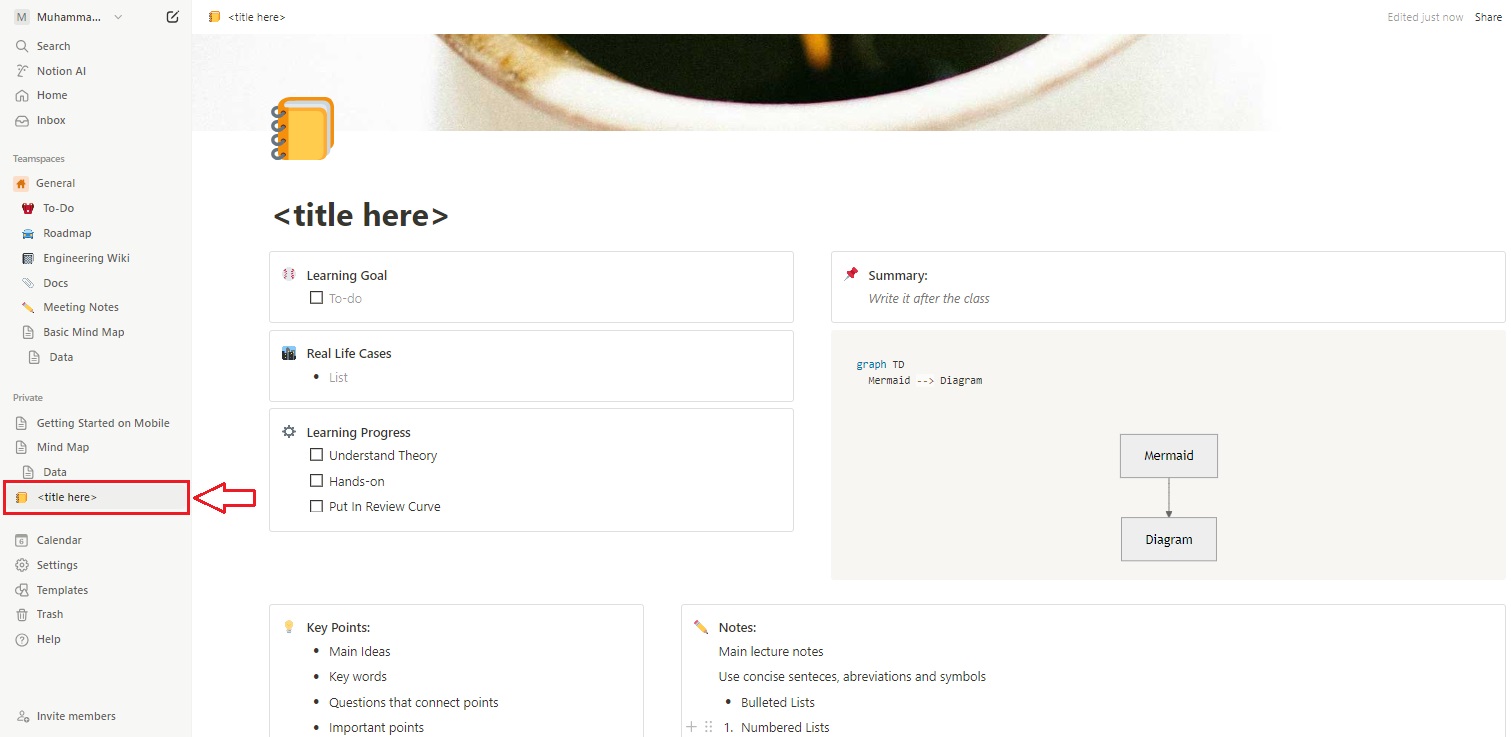
The template added to your workspace will appear on the left bar, as shown below. You can modify it by entering your project’s data so that it can perfectly meet your requirements.
Method 3. Make a Mind Map by Connecting with Miro
Now that you know how to make a Notion mind map from scratch and with a preset template. It is time to learn how you can integrate Miro with Notion to draw the map. Let’s look at the steps included in this method.
Step 1
Plan your map, launch Miro on your computer, and open a blank page to start drawing.
Step 2
Select a specific shape for the parent subject and hit Tab to go to the associated concept or child. Then, press Return to get a shape for associated topics. You can make the whole mind map by using the Tab and Return shortcuts.
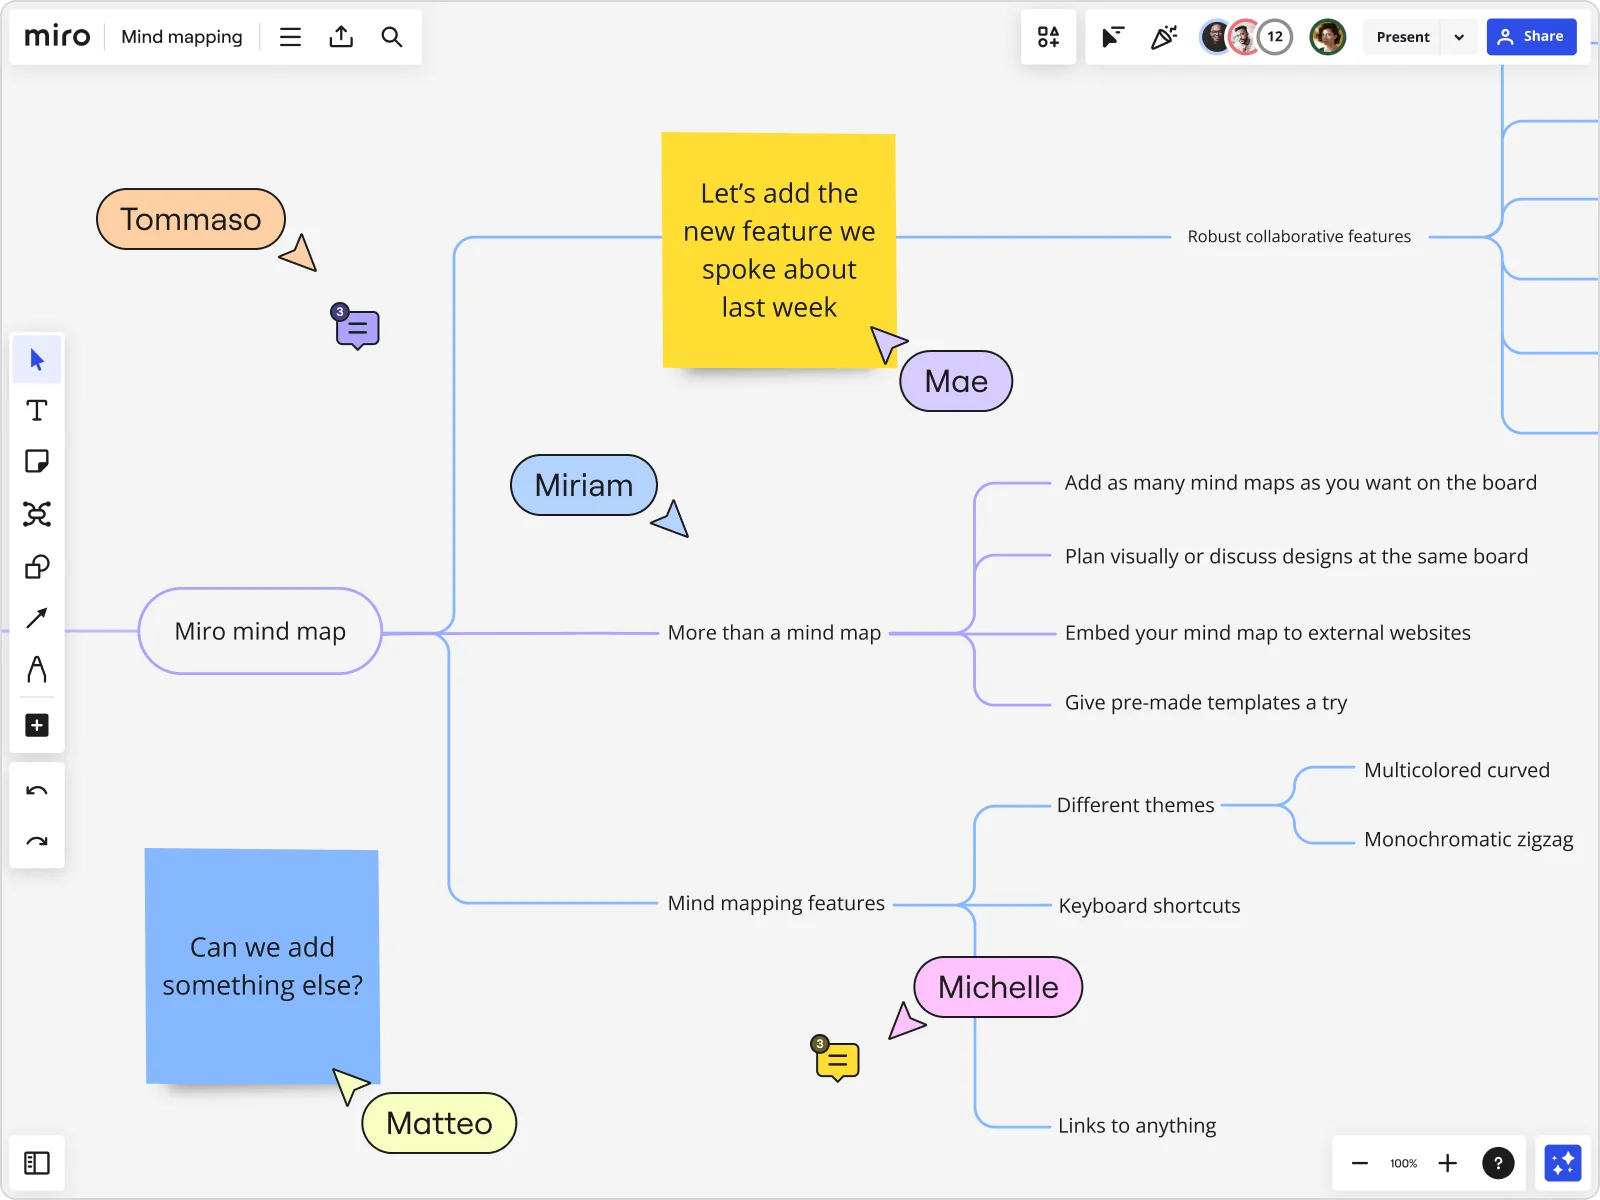
Once the layout is ready, add the text. Now, you can embed the map in Notion.
Step 3
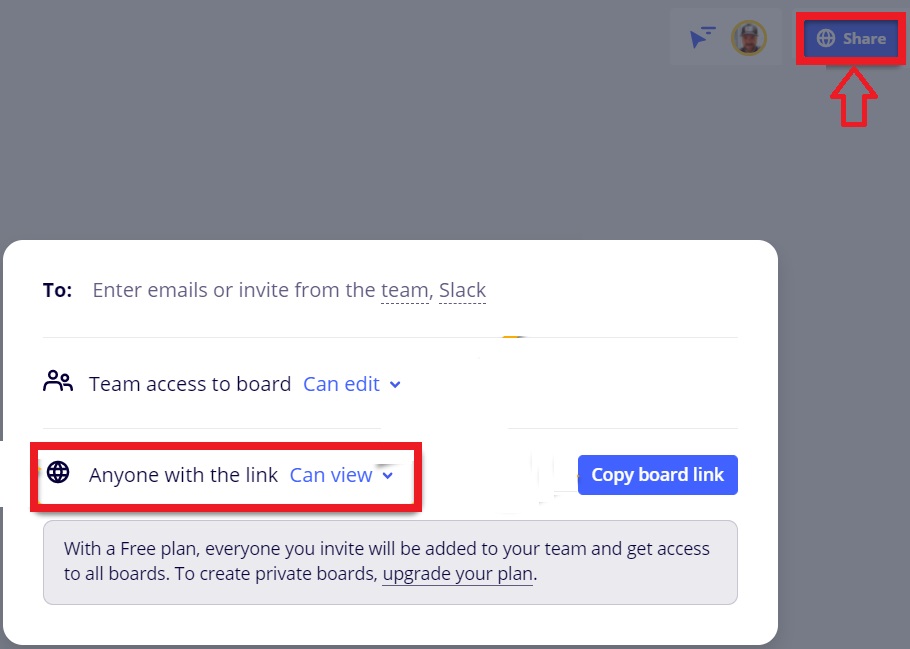
Tap on the Share button to get a shareable link to your mind map. Then, choose Anyone can view. Once done, click on the Copy board link button, as shown below.
Step 4
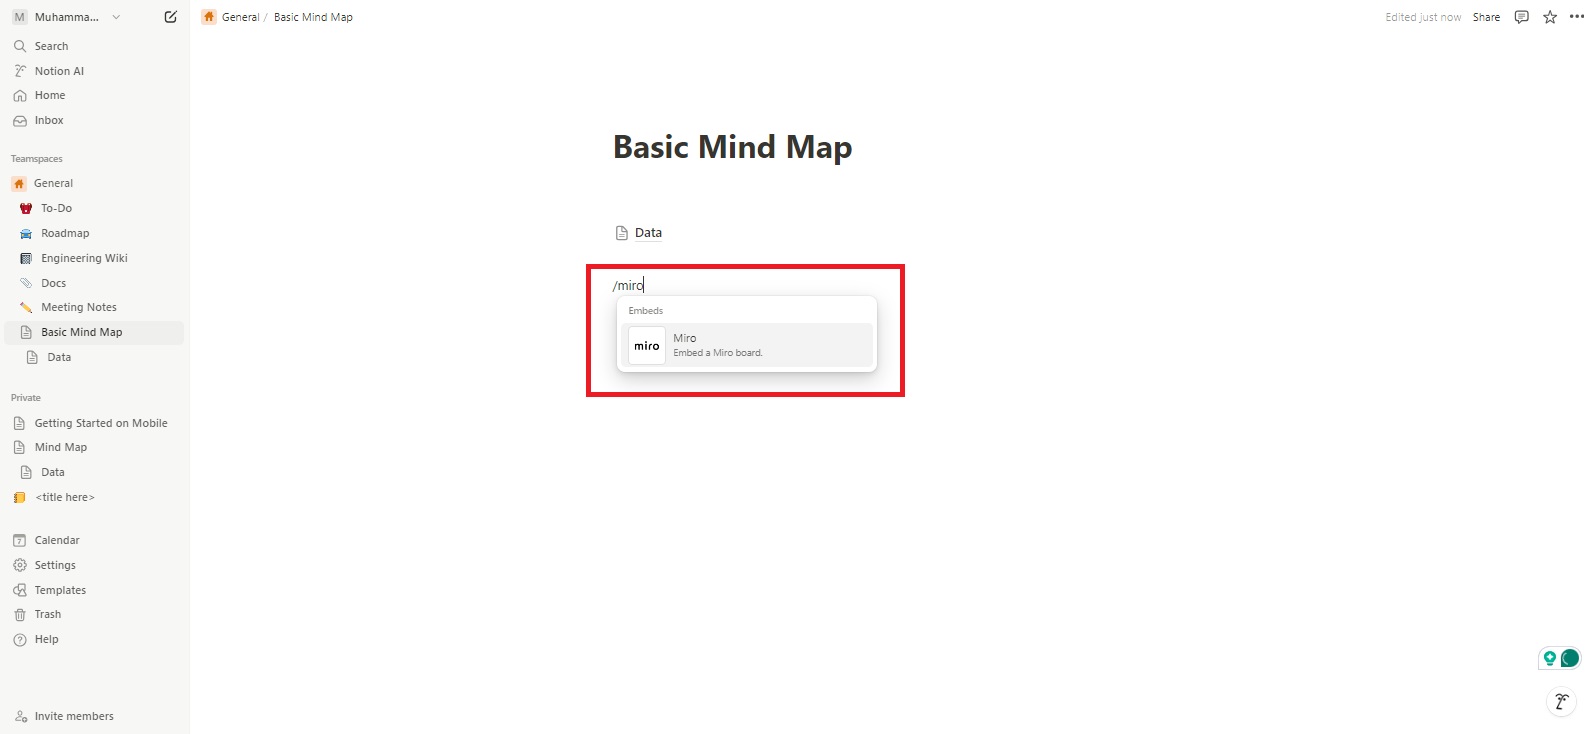
Now, open Notion. Click anywhere on the Notion page and type /miro. Doing this will help you select the tool.
Step 5
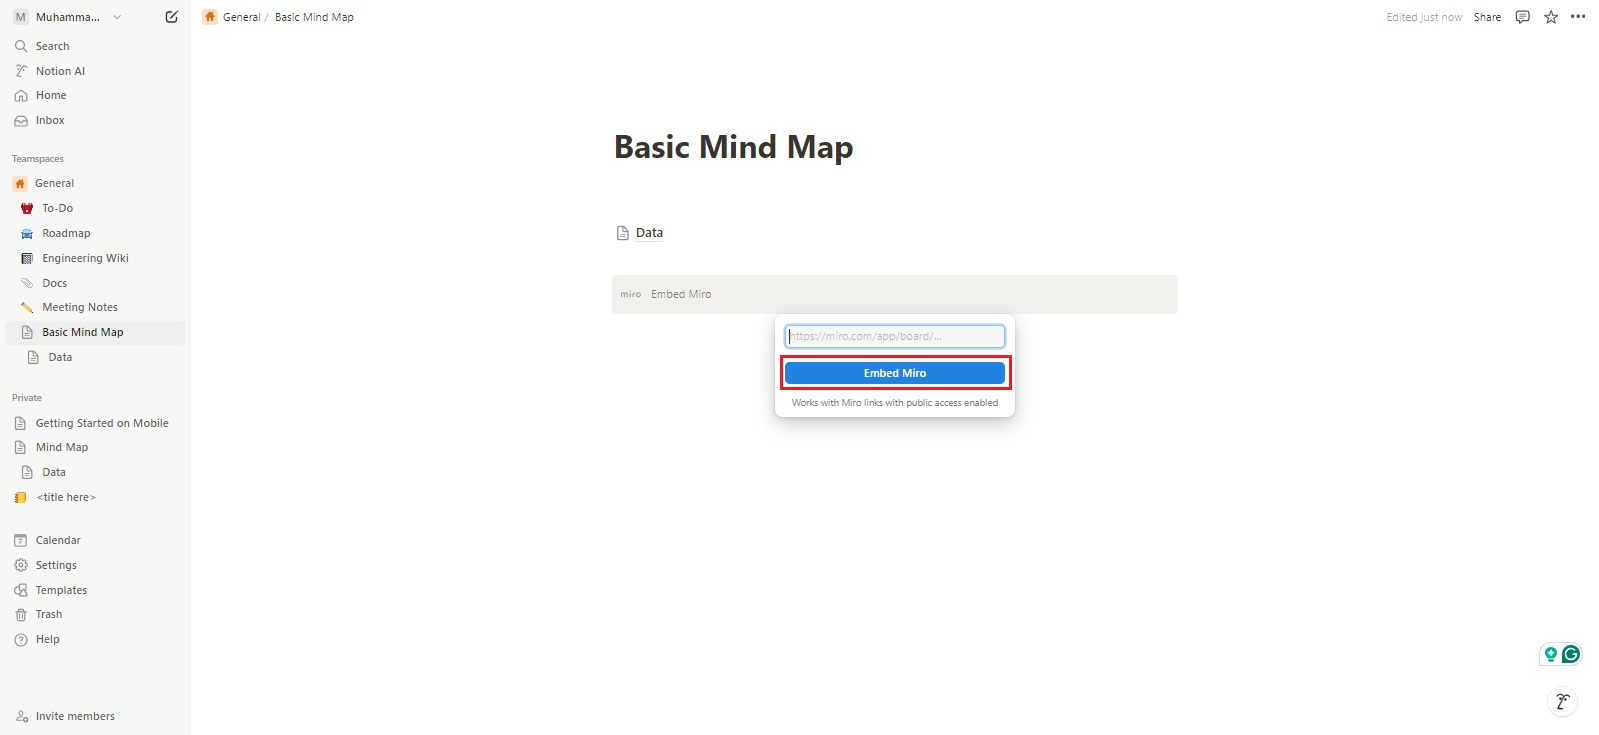
A new dialogue box will appear on the screen. Here, you can paste the link you have copied in Step 3. Now, hit the Embed Miro button. You will now see an image box. Click on the finger sign to make the mind map visible.
Tip: Make a Mind Map on Edraw.AI
Do you want to make a more professional and elegant mind map? Need a reliable tool that uses AI technology to understand your requirements precisely and generate what you want? If so, try Edraw.AI.
Edraw.AI is a wonderful visual collaboration tool that works online to help you make hundreds of diagrams including mind maps. A wide range of AI-powered tools, real-time collaboration, quick process, and 100% safe diagramming make Edraw.AI stand out in the market.
Method 1. Create a Mind Map with the AI Mind Map Tool
Open Edraw.AI on your browser and sign in with your Wondershare ID. Don’t worry if you don’t have this ID. You can simply log in with your social media credentials. Once done, follow the steps given below.
Step 1
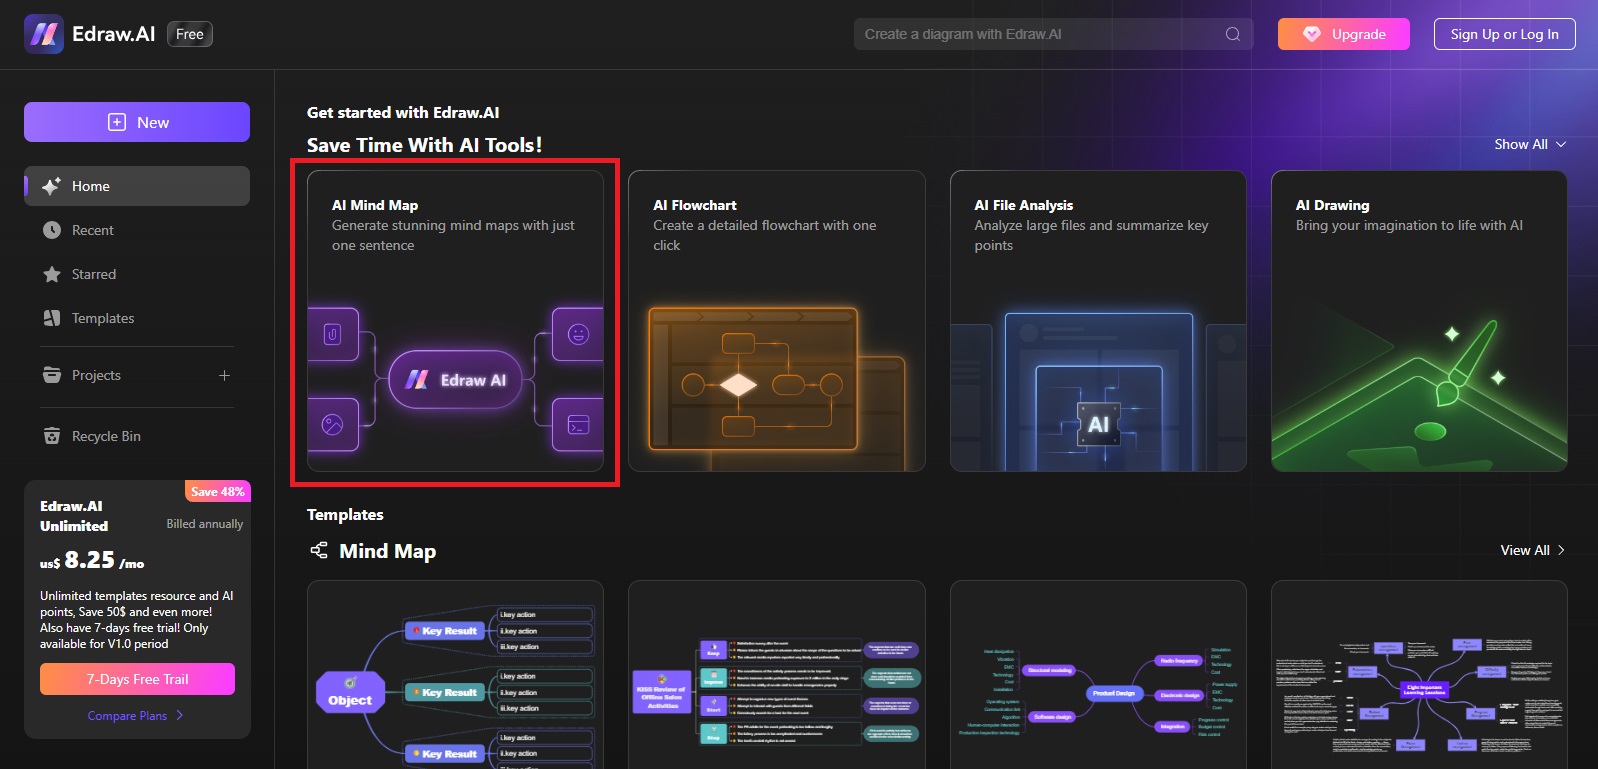
Select AI Mind Map on the user interface.
Step 2
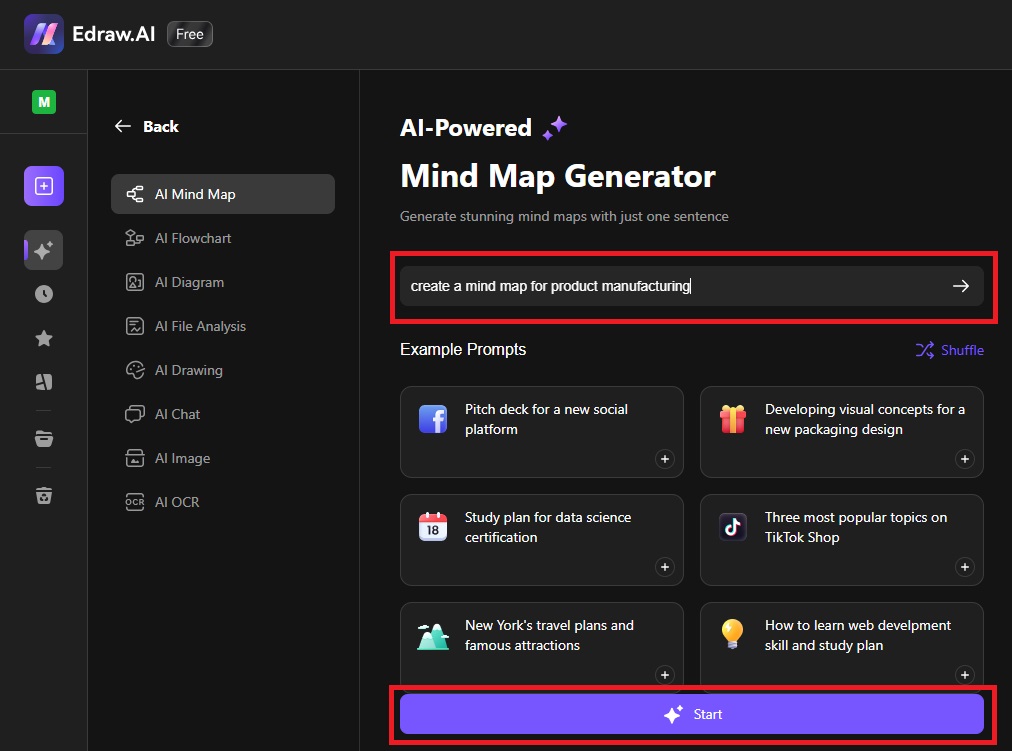
Enter the prompt and hit the Start button to allow the tool to generate a mind map accordingly.
Step 3
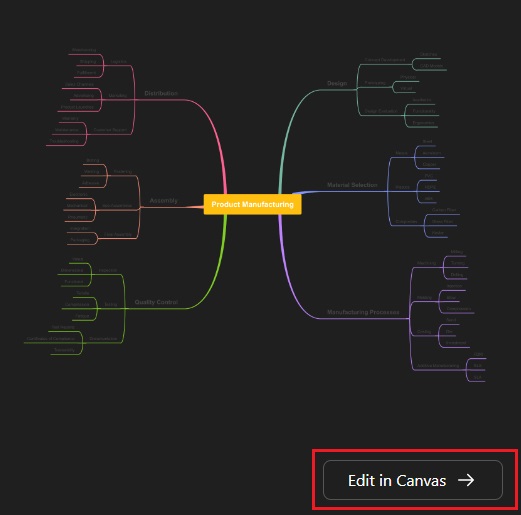
To edit the generated mind map, tap on the Edit in Canvas button, and make the required changes.
Step 4
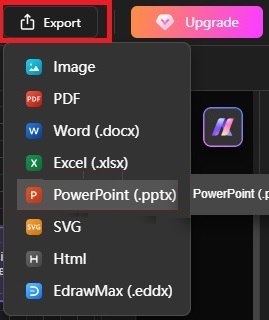
If the map is ready, click on the Export button, and choose the format for the output file.
Method 2. Use a Template on Edraw.AI to Make a Mind Map
Using a pre-built template is the easiest way to make a professional mind map within minutes. The steps below will help you create an engaging mind map using a template in Edraw.AI.
Step 1
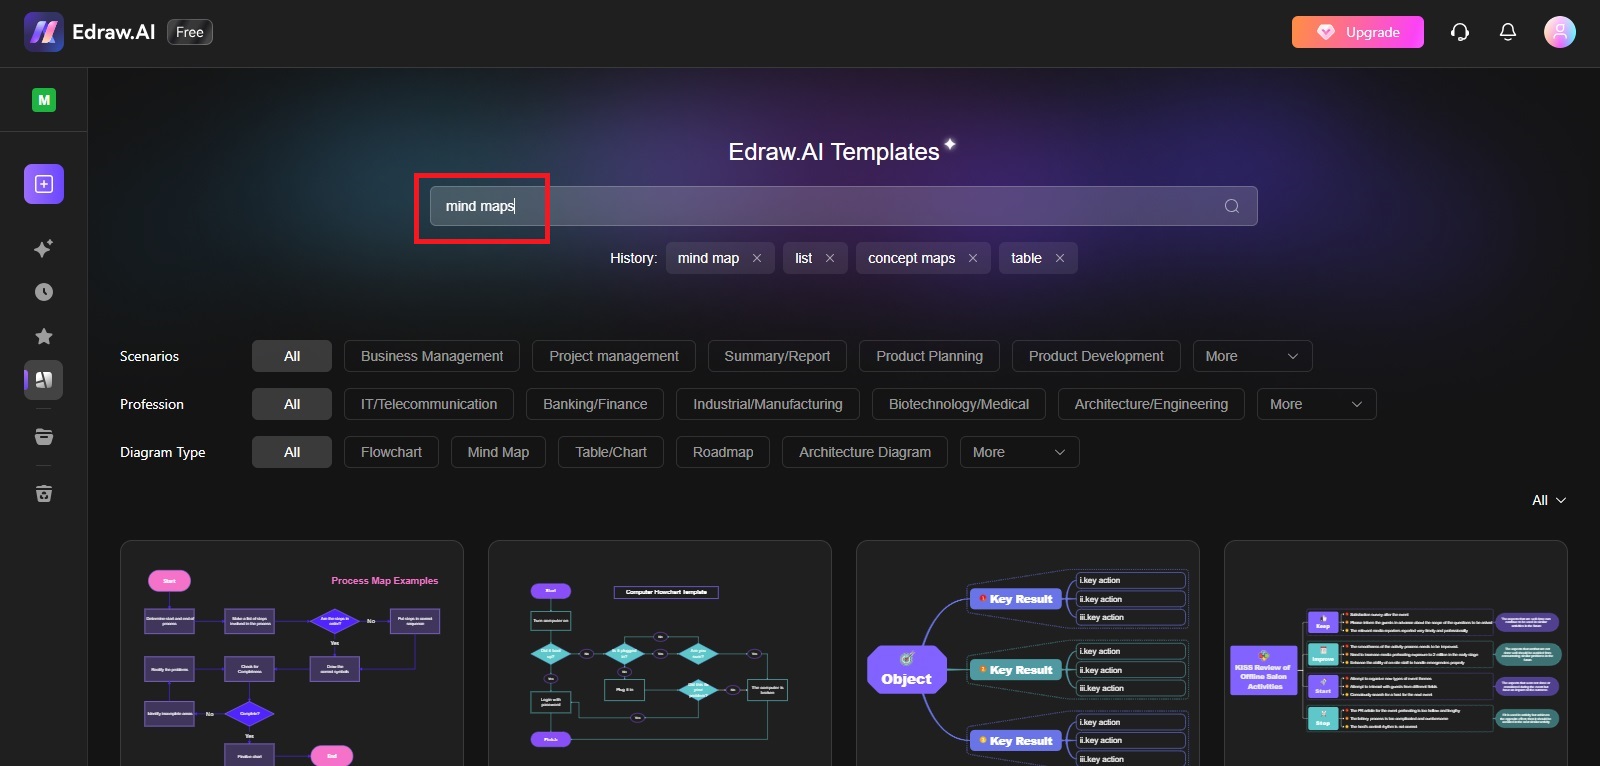
Find the right template in the preset templates collection.
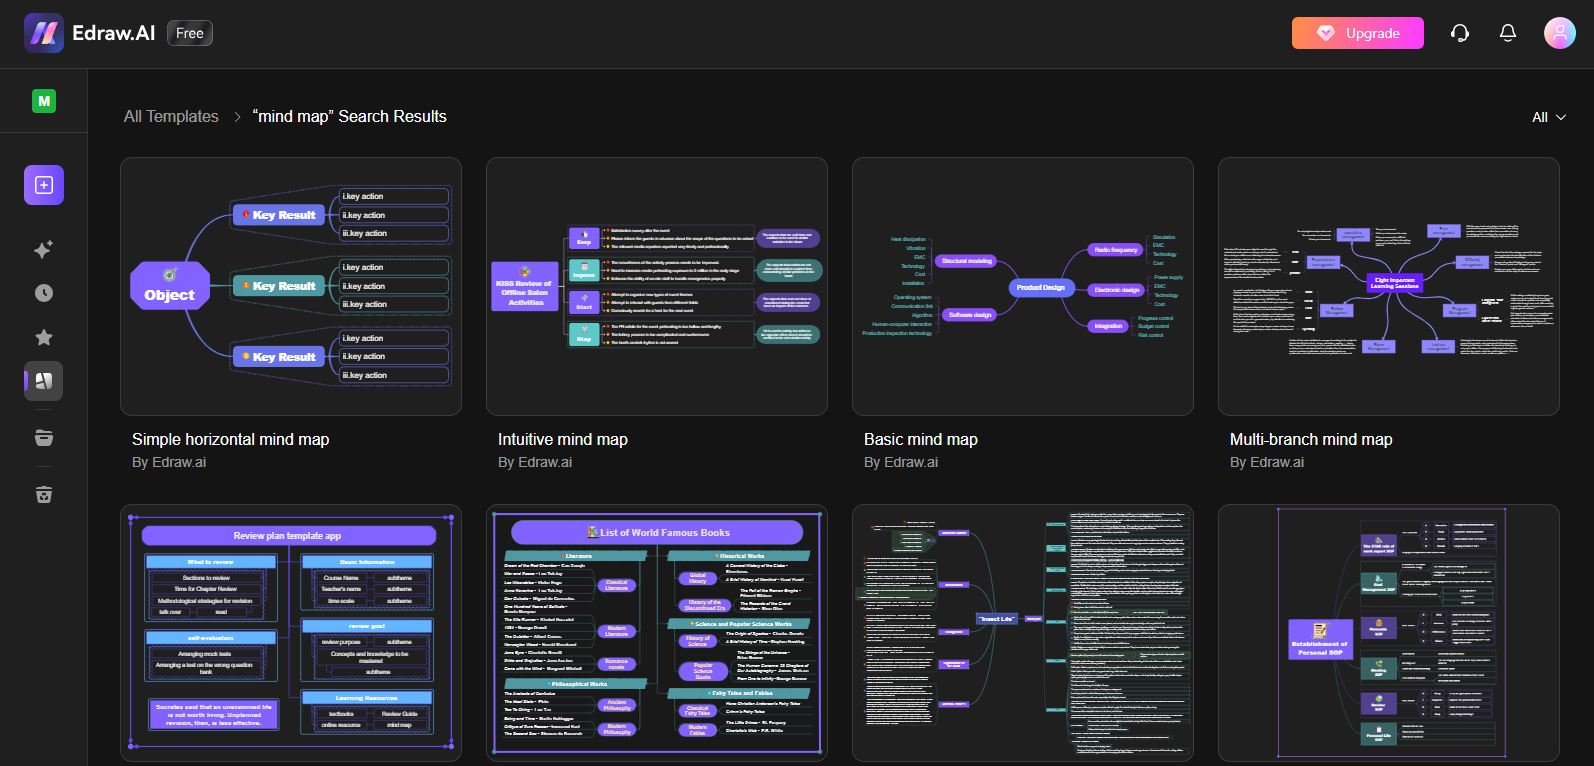
Different templates will appear on your screen, as shown below.
Step 2
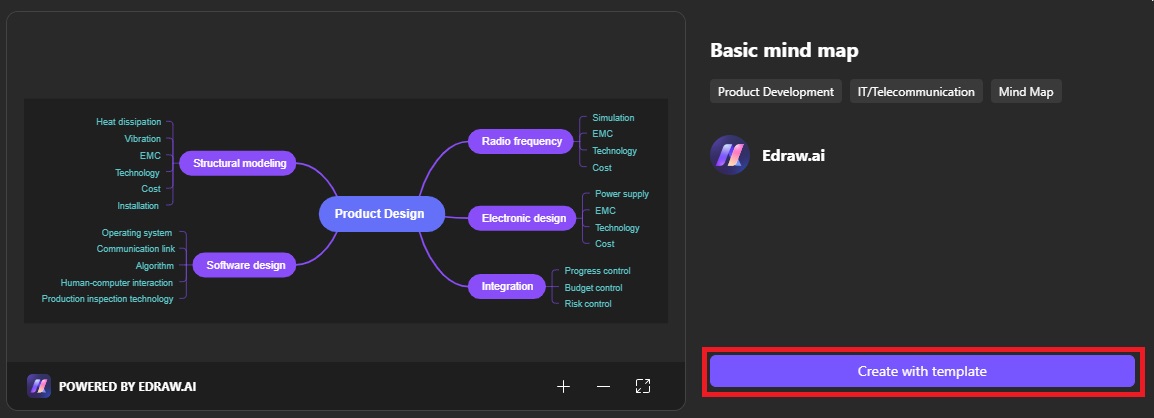
Click on the template you want to choose and hit the Create with template button.
Step 3
As soon as the map is ready, download it on your device in the same way as explained in the previous method.
Conclusion
Though many people use Notion for making mind maps, newbies may find it difficult to organize data in a tabular form in this tool. If you are the one who struggles to use Notion, try Edraw.AI - an unmatched AI mind map maker.
Edraw.AI is an efficient, reliable, easy-to-use tool that offers a variety of AI features. Apart from generating AI mind maps, this online tool carries hundreds of basic and advanced templates. These templates make it even easier for you to create mind maps of your choice and ask your team members, colleagues, or friends to collaborate in real time. Give it a try.

