
Whether you're a student or a corporate user, making flowcharts is an essential skill for visualizing processes and identifying bottlenecks in a project. Creating these diagrams online is a challenge if you are not using the right software. One of the software for making flowcharts is Lucidchart, known for its collaborative workspace and easy-to-use interface.
If you are switching to the platform and don’t know where to start, here is a detailed guide on how to create a flowchart in Lucidchart using three different ways. Though it a good starting point, its outdated symbols and limited template use cases may not satisfy the requirements of an advanced flowchart-maker.
But! no worries. By the end, I have added a faster and more efficient diagramming alternative to plot flowcharts. So, keep reading to learn more about it.
In this article
How to Make a Flowchart in Lucidchart
Lucidchart offers three methods to create a flowchart. Here is a breakdown of each:
Make a Flowchart from Scratch in Lucidchart
If this is your first time using Lucidchart, start with the free version and register with the software. Done? Follow these simple steps to create a flowchart from scratch.
Step 1:
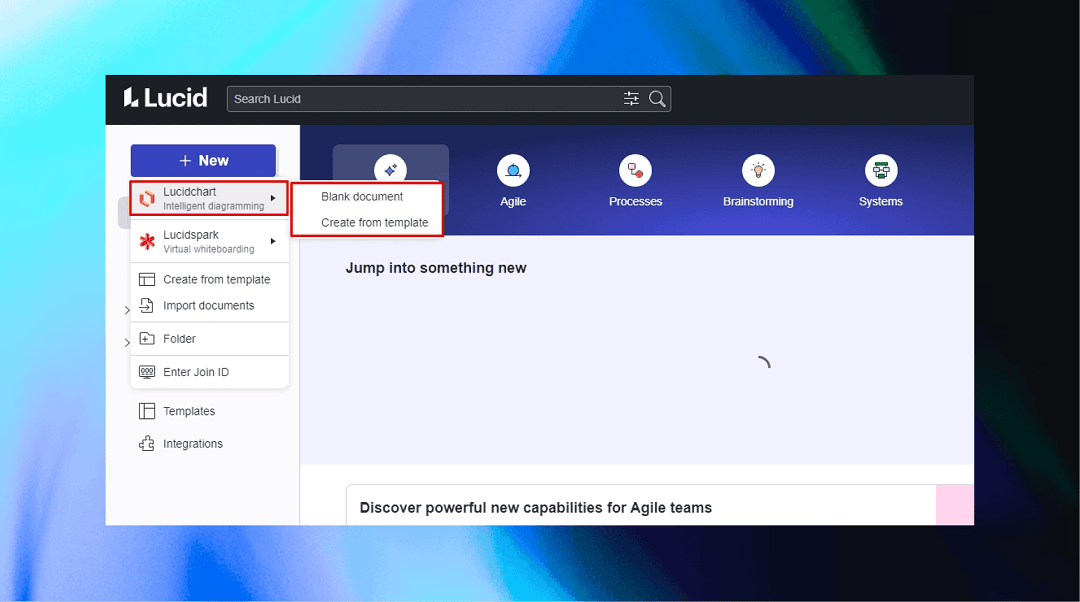
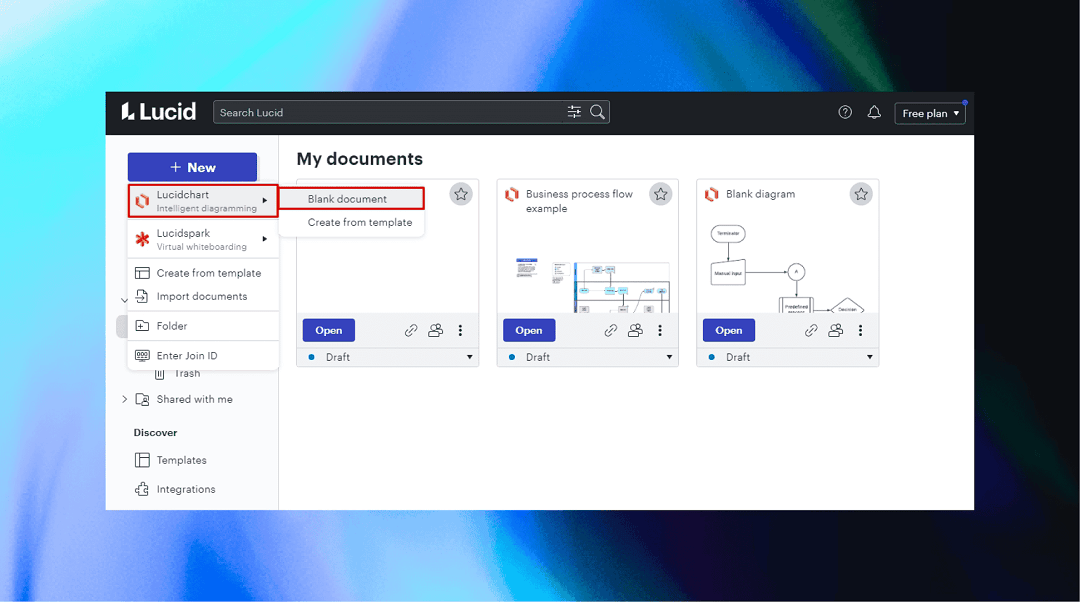
Click New > Lucidchart > Blank Document from the dashboard. It will take you to the editing panel.
Step 2:
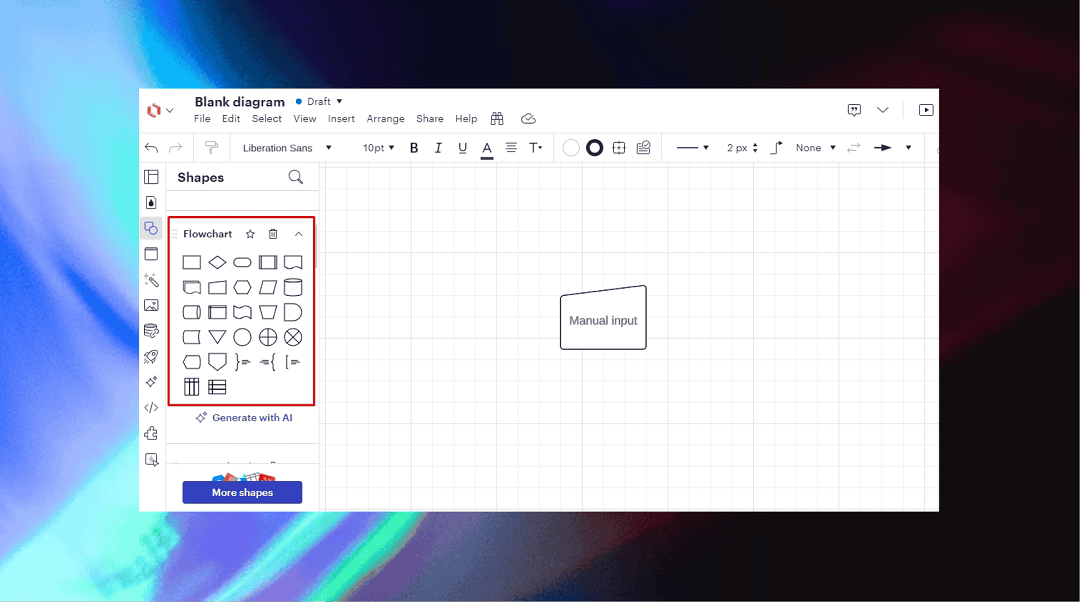
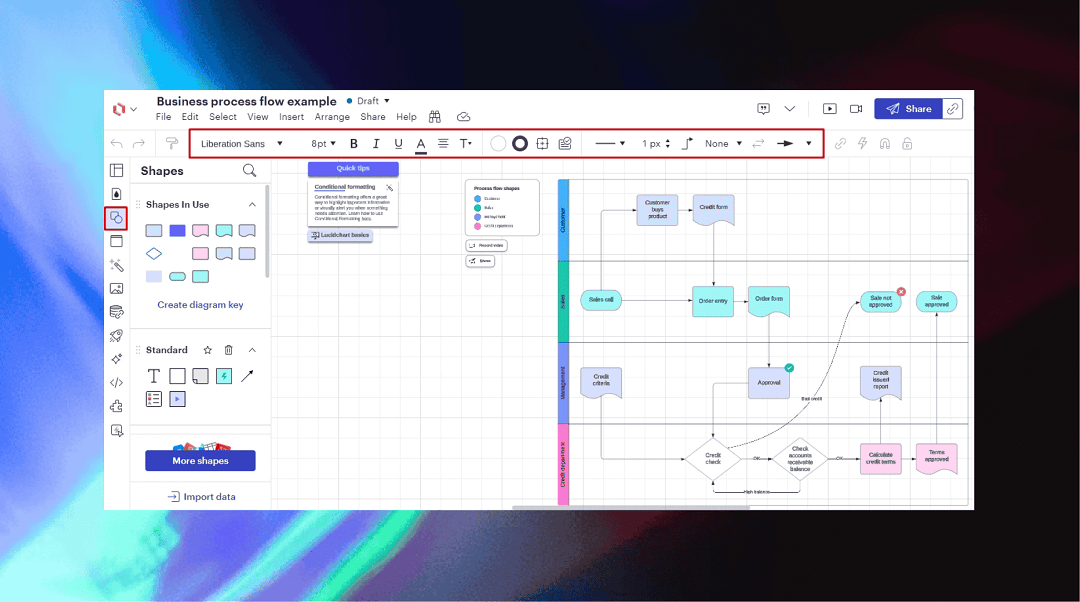
Once on the editing panel, access the symbol library from the left side. Add desired shapes to the canvas and plot a flowchart structure.
Step 3:
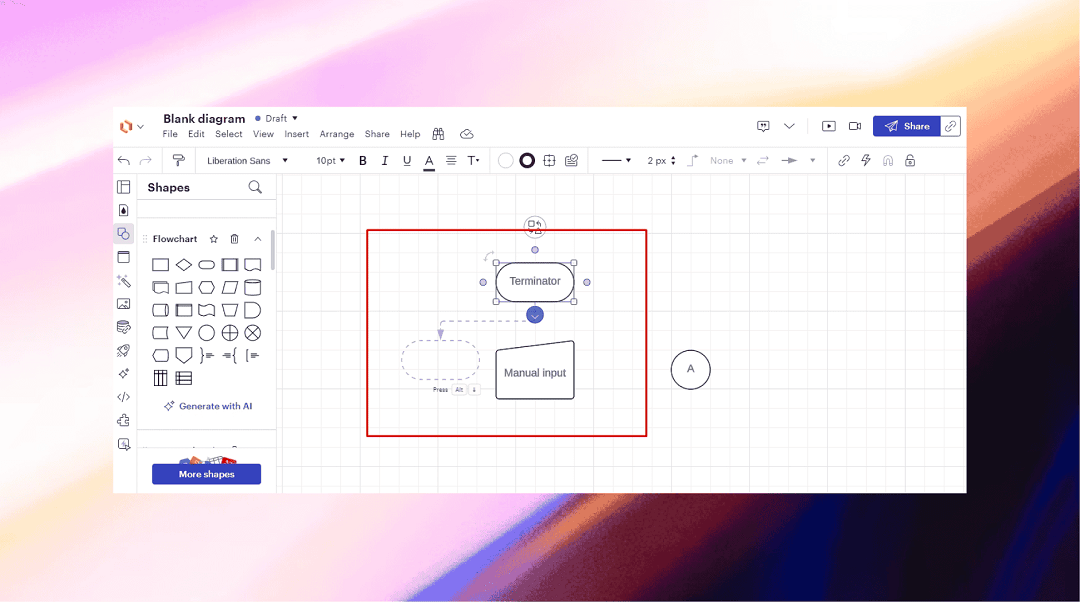
Next, select the shape and use its connections to build links. You can also use the connectors from the toolbar. Your flowchart is complete.
How to Use a Flowchart Template in Lucidchart
Here is how you can make a flowchart using Lucidchart’s templates.
Step 1:
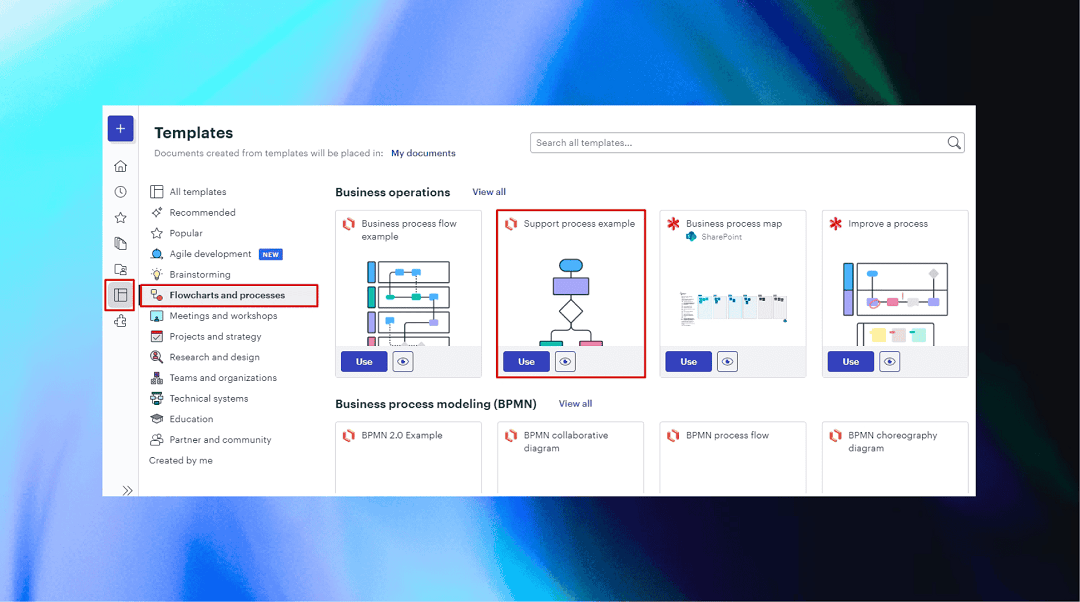
Go to the Templates section from the main menu and select Flowchart and Processes. It will display a range of examples. Find one that fits your task and click Use.
Step 2:
Once on the editing panel, you can replace the symbols from the left-side library and build connections.
Step 3:
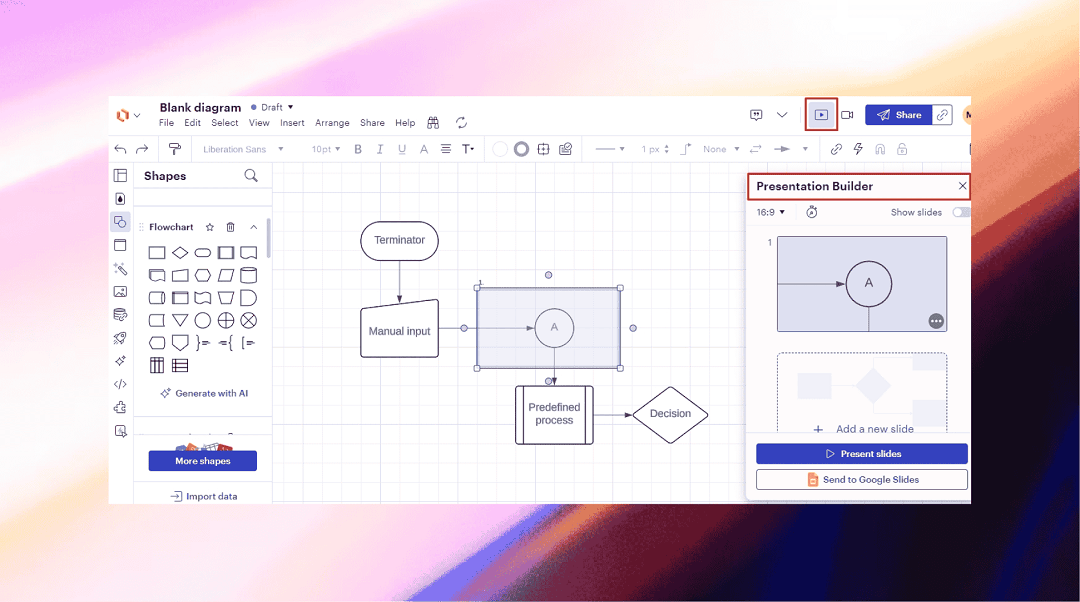
Want a quick presentation of your flowchart? Visit the Play icon on the top-right corner and select square areas to generate slides. You can now directly present these slides from the canvas.
How to Make a Flowchart with Lucidchart AI Diagram Generator
Step 1:
Click New > Lucidchart > Blank Document, and it will take you to the editing panel.
Step 2:
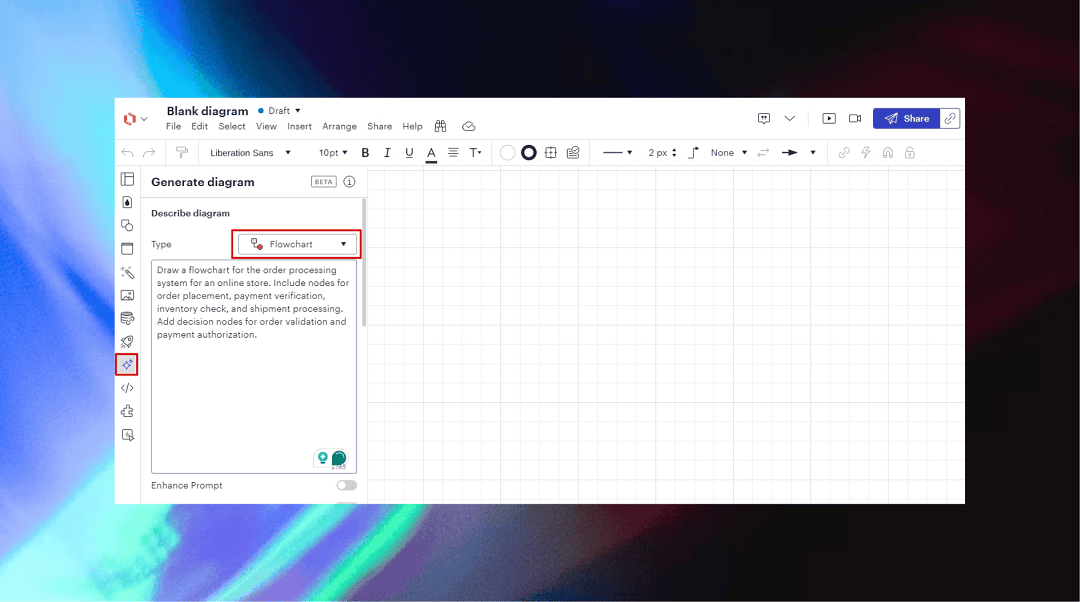
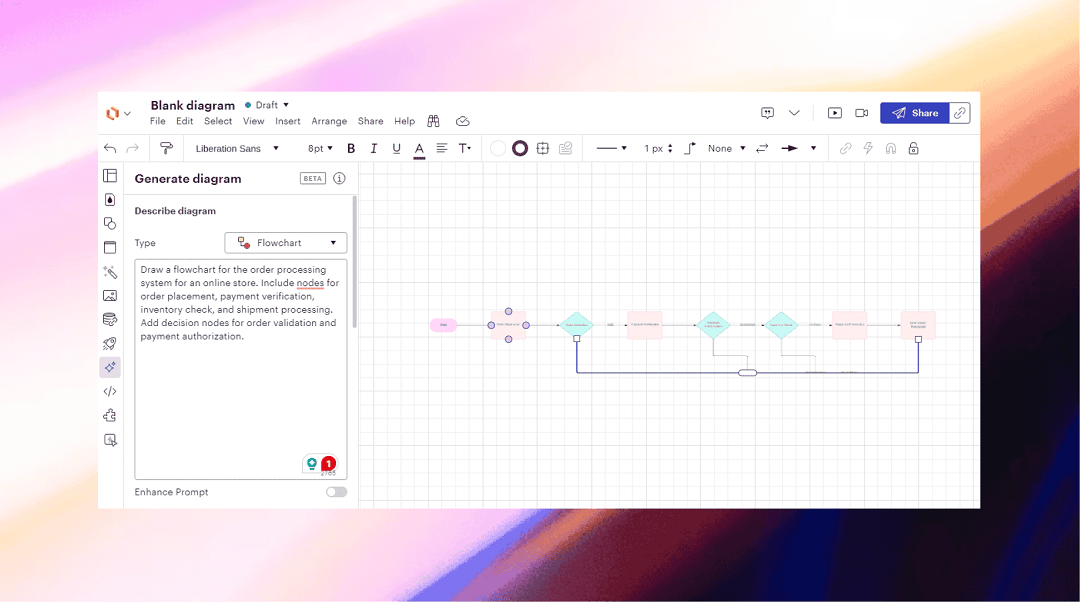
Now, from the left side of the canvas, go to Diagram Generator. Select Flowchart, enter a prompt, and click Generate.
Step 3:
It will create a flowchart for you. Now, press Finish Editing and do a few finishes, like font details and shapes from the main toolbar.
Download, share, or export the Lucidchart Flowchart
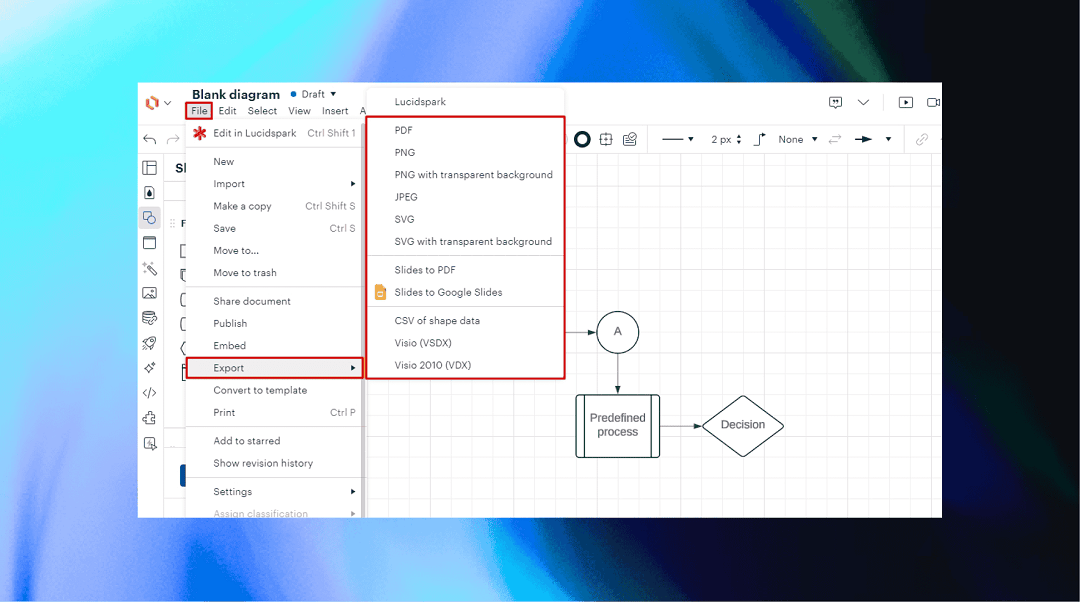
Finally, whatever method you use, here is how you can export the flowchart.
Go to the File menu from the top-left corner, click Export, and select a desired format.
Part 2: How to Make a Flowchart on Edraw.AI
Have a tight deadline and want to create a professional-graded flowchart with your team in seconds? Try using Edraw.AI.
This Lucidchart alternative offers extensive templates, AI support, and advanced editing tools in the free version. Here is how you can make flowcharts with Edraw.ai in no time.
Before you begin, open Edraw.AI in your browser and log into your Wondershare ID. You can also access the software using your Google ID.
How to Use AI Flowchart Generator to Create a Flowchart
Step 1:
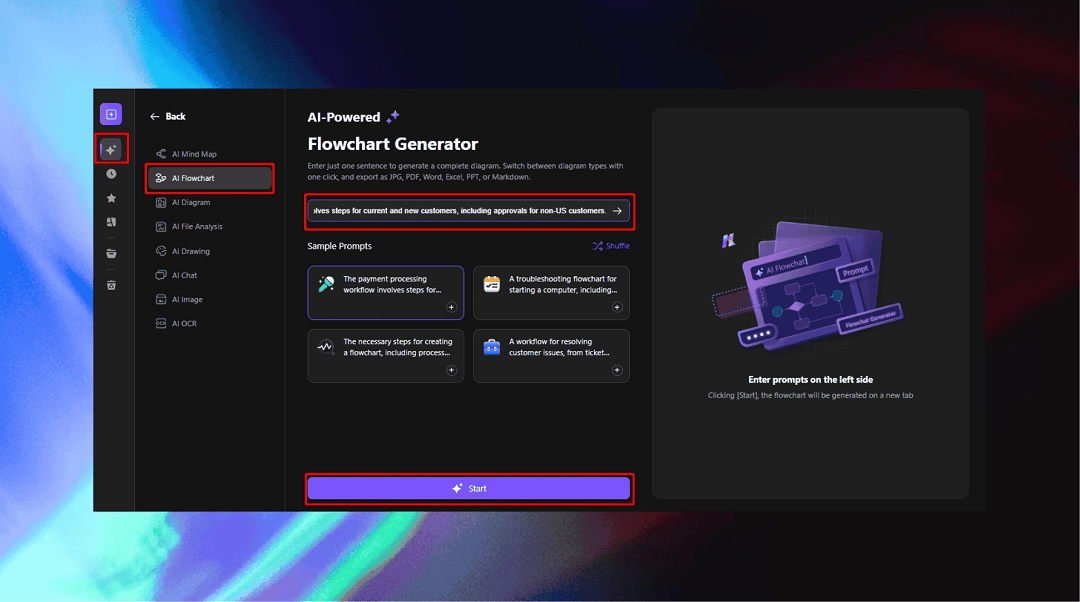
Navigate to AI Tools from the dashboard and click AI Flowchart.
Enter your text commands or use existing prompts and select Start.
Step 2:
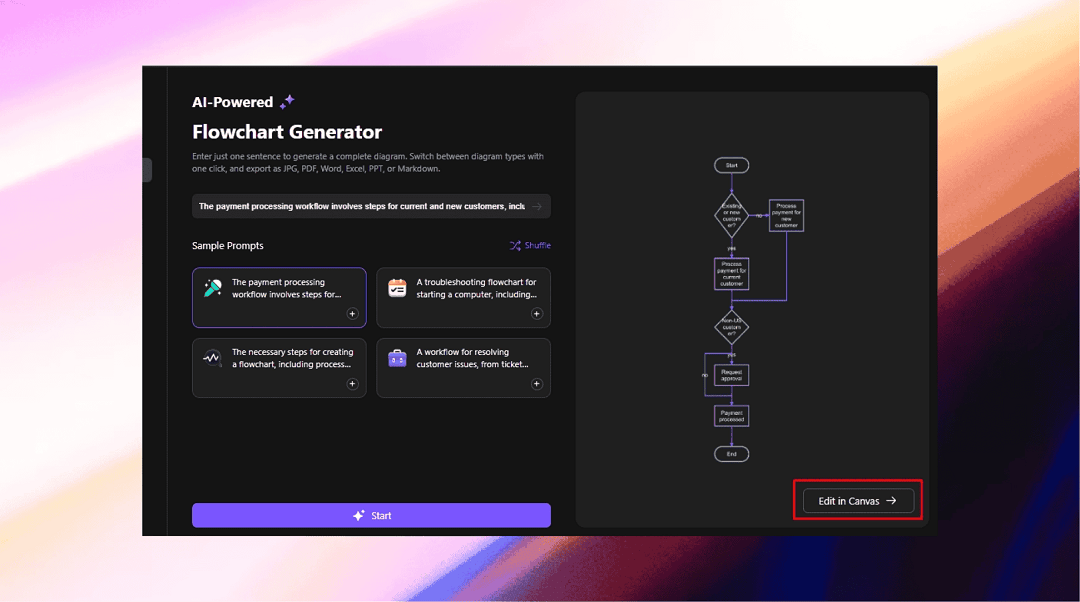
Once generated, press Edit in Canvas. It will take you to the editing panel.
Step 3:
Now, replace symbols from the left-side library or customize the connectors from the on-screen prompt. Also, you can customize the diagram theme from the right-side panel.
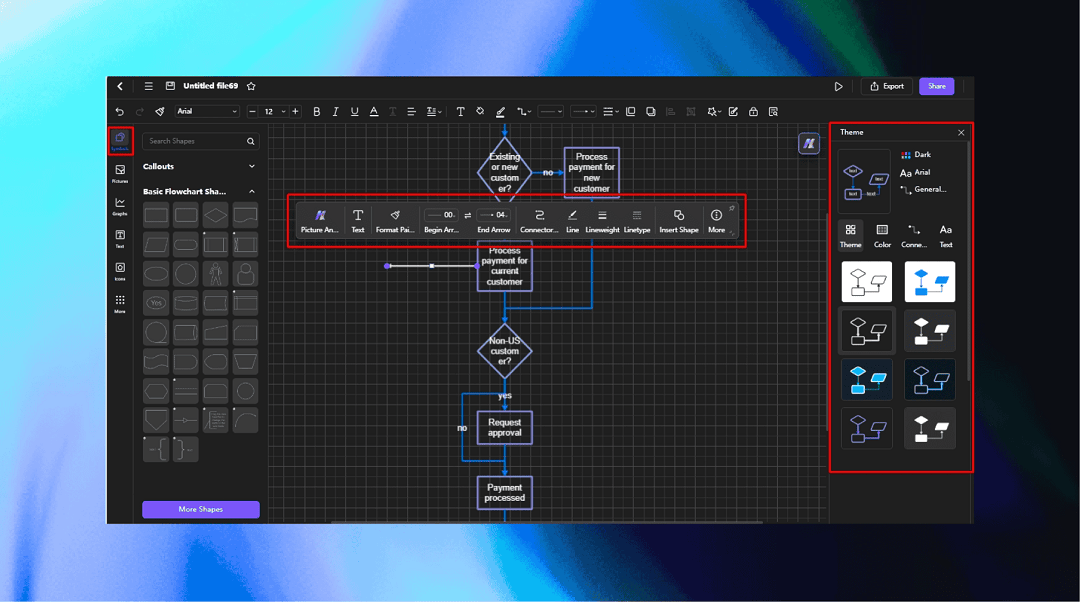
Step 4:
Edraw.AI gives you the option to analyze and optimize your flowcharts. For this, select any element from the flowchart, click AI Assist from the on-screen prompt, and analyze. It will open an AI chat for suggestions.
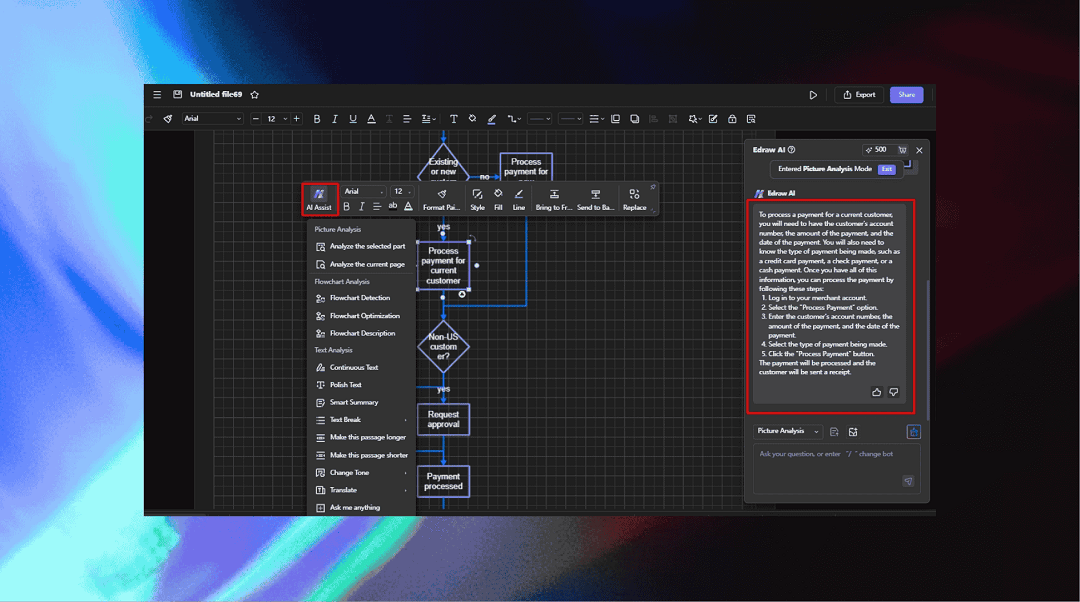
Step 5:
Finally, your flowchart is complete. Invite other team members to co-edit and give feedback. Click Share from the top-right corner and edit permissions, accordingly.
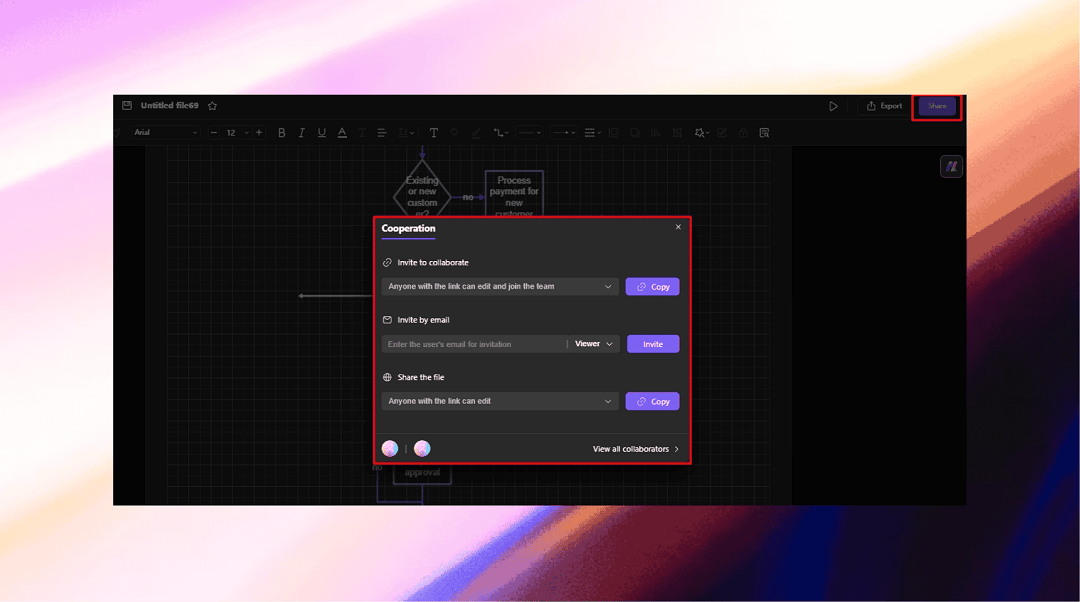
How to Use an Edraw Flowchart Template to Create Flowcharts
Like Lucidchart, you can also create a flowchart using templates on Edraw.AI. Here is how it goes.
Step 1:
Navigate to the Templates section from the dashboard and select Flowchart from the Diagram Type. It will display several options for different use cases.
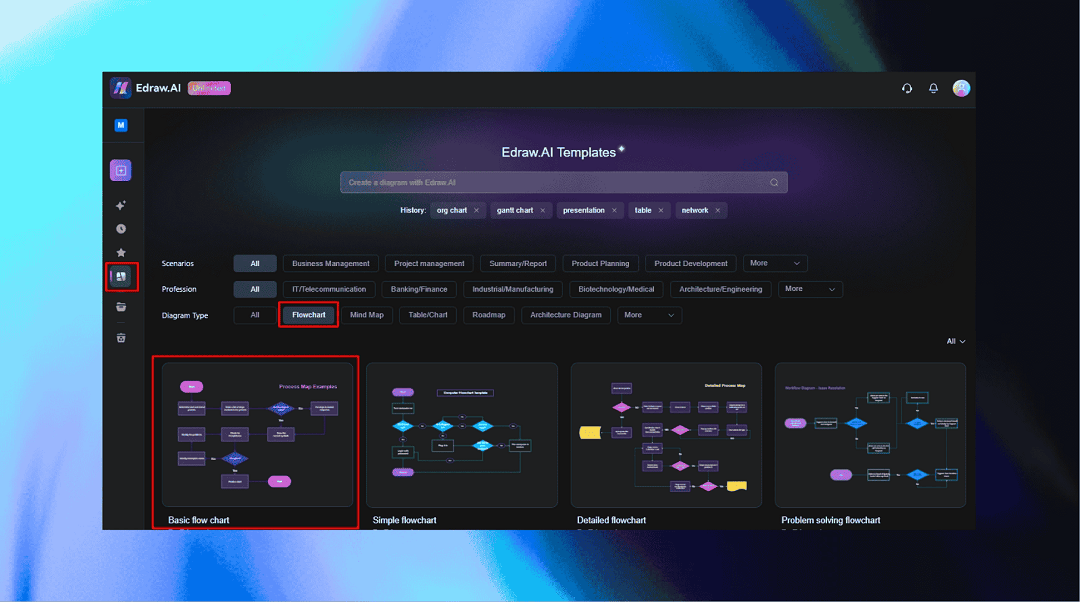
Step 2:
Select one that matches your task description and click Create with Template.
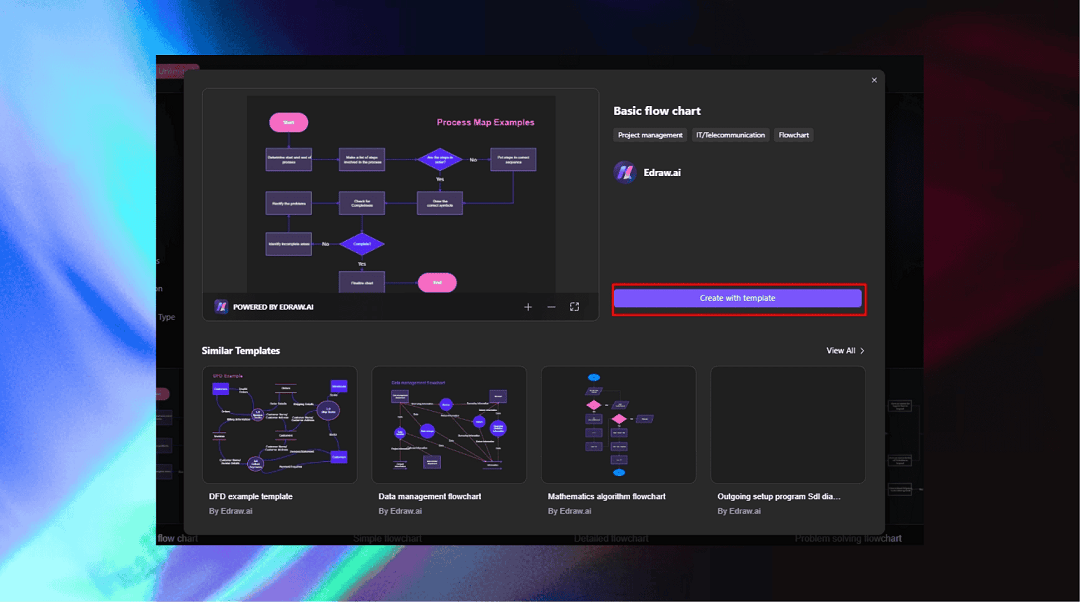
Step 3:
Once on the editing panel, access the symbol library on the left side. Drag your desired shapes to the canvas and enhance the process.
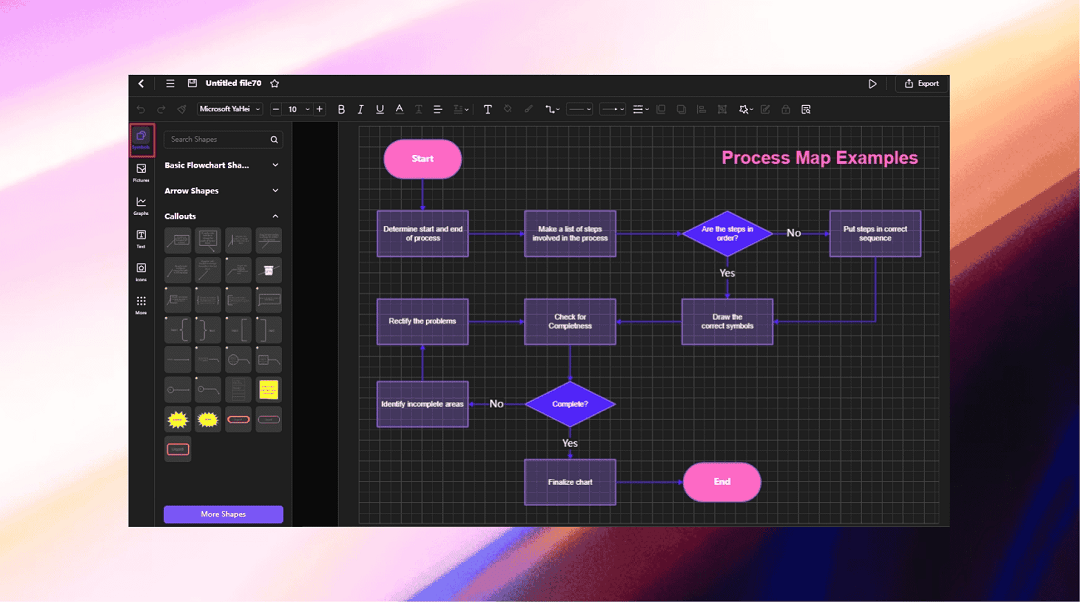
Step 4:
Drag connections of shapes on the canvas to link steps. You can also customize the connectors from the on-screen prompt.
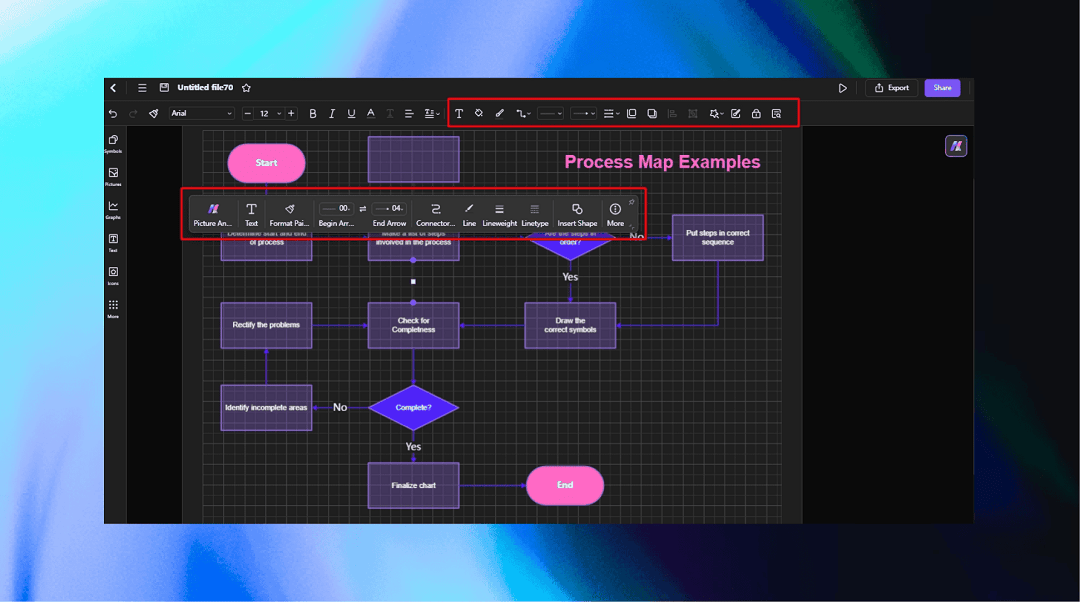
Step 5:
Your flowchart is complete. But make it more engaging using themes and colors. Go to the right-side panel and adjust the flowchart’s formatting.
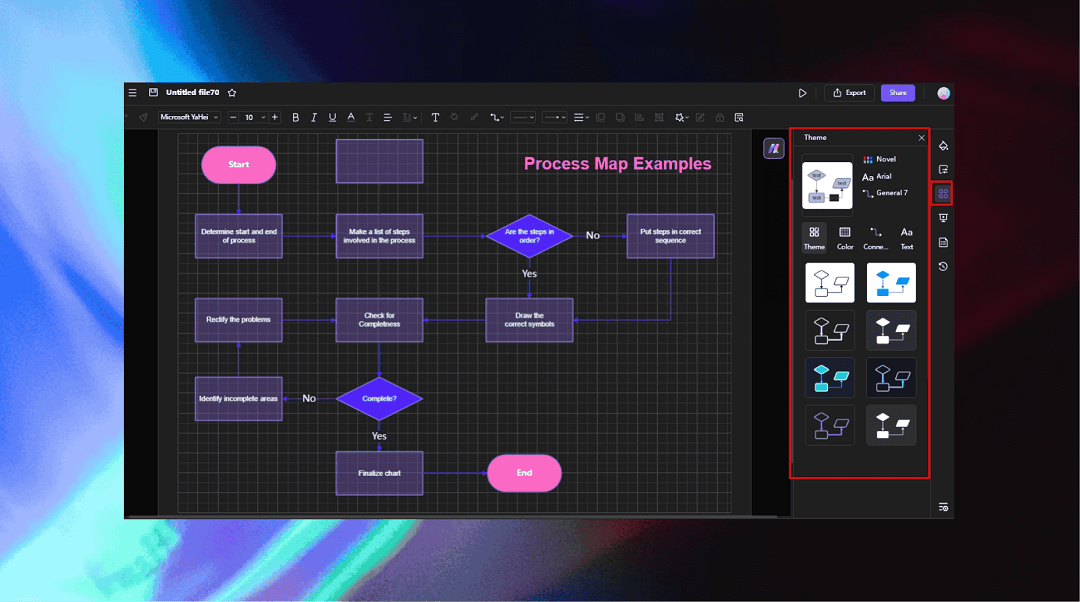
Step 6:
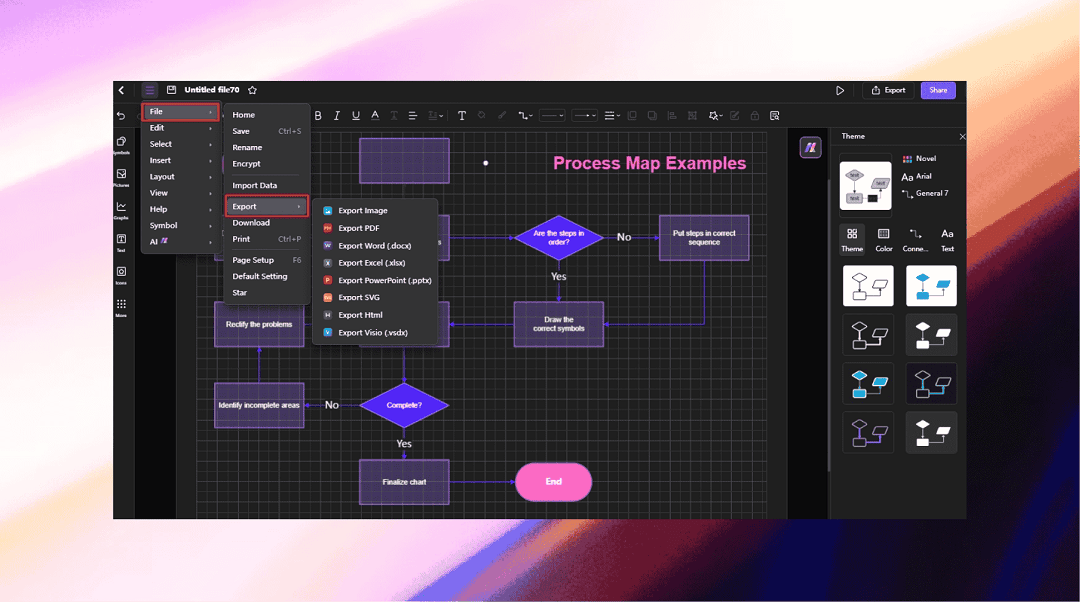
Finally, visit the File menu from the top-left corner and select Export > Desired format to download your flowchart. Like the previous method, you can invite other members for co-editing by clicking the Share button from the quick-access toolbar.
Conclusion
Lucidchart is a good starting point, its real-time collaborative space and simplistic interface are ideal for those stepping into digital diagramming. Most prefer it for convenience and communication. However, it is not the ultimate solution for flowcharts, because of its lack of advanced customization tools and insufficient templates for diverse niches.
You can still try its free version for making up to three diagrams. Or, you can consider Edraw.AI for more advanced features. Its diverse flowchart symbols, an intuitive interface, and a collaborative workspace create an inclusive and productive environment.
What’s even better is the extensive template collection for diverse use cases and AI tools for research, diagram creation, analysis, and optimization. So, give it a shot and see whether it works for you.

Try Our Products
Now for Free

